
Webapps
Creating custom apps with TelemetryTV's SDK
TelemetryTV's Software Development Kit (SDK) empowers you to create custom Webapps with your own HTML, JavaScript, and CSS code. This feature provides the flexibility to deploy a wide range of content on your digital signage displays.
Once created, your Webapp can be saved in your TelemetryTV account for future use, with the ability to update custom fields quickly.
If you're a developer, you can refer to our technical documentation on using our SDK here.
The Webapp feature allows you to input custom code to generate personalized content. Similar to other apps in our app library, a Webapp can be deployed as a standalone playlist page or as an app within a playlist zone.
Here's how you can create a custom Webapp:
- Log in to your TelemetryTV account.
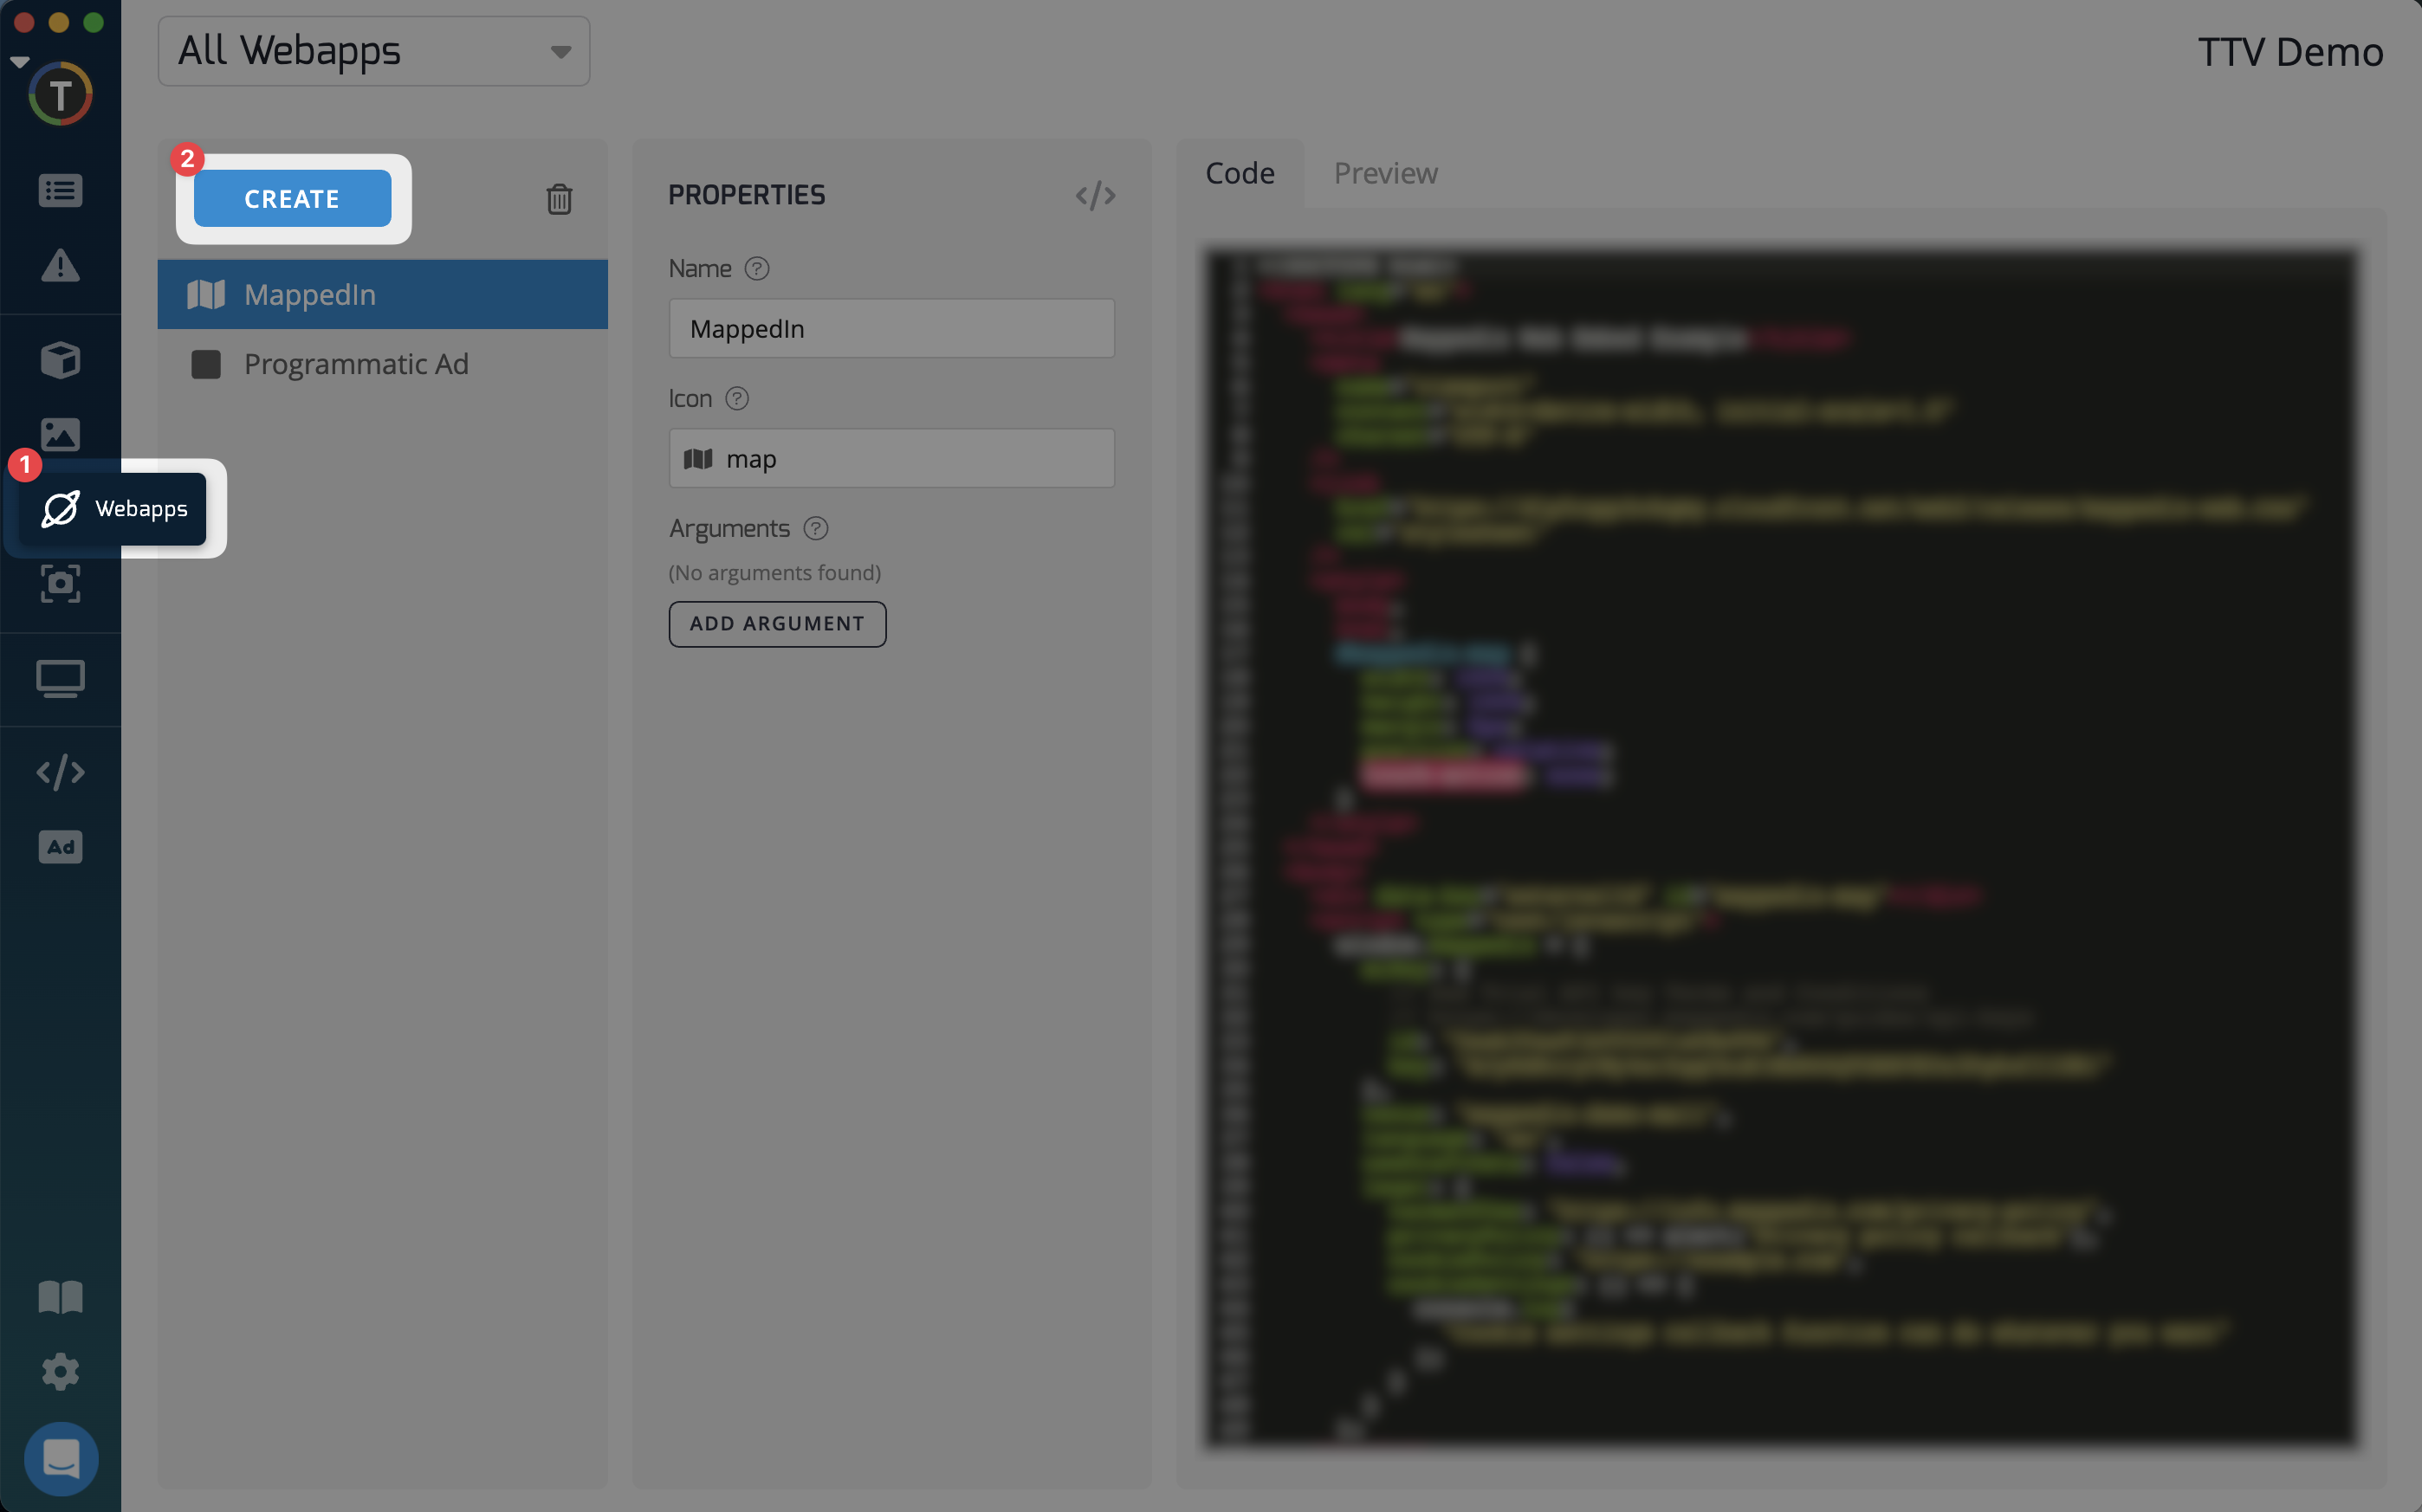
- From the left-hand toolbar, select "Webapps" and click on "Create".
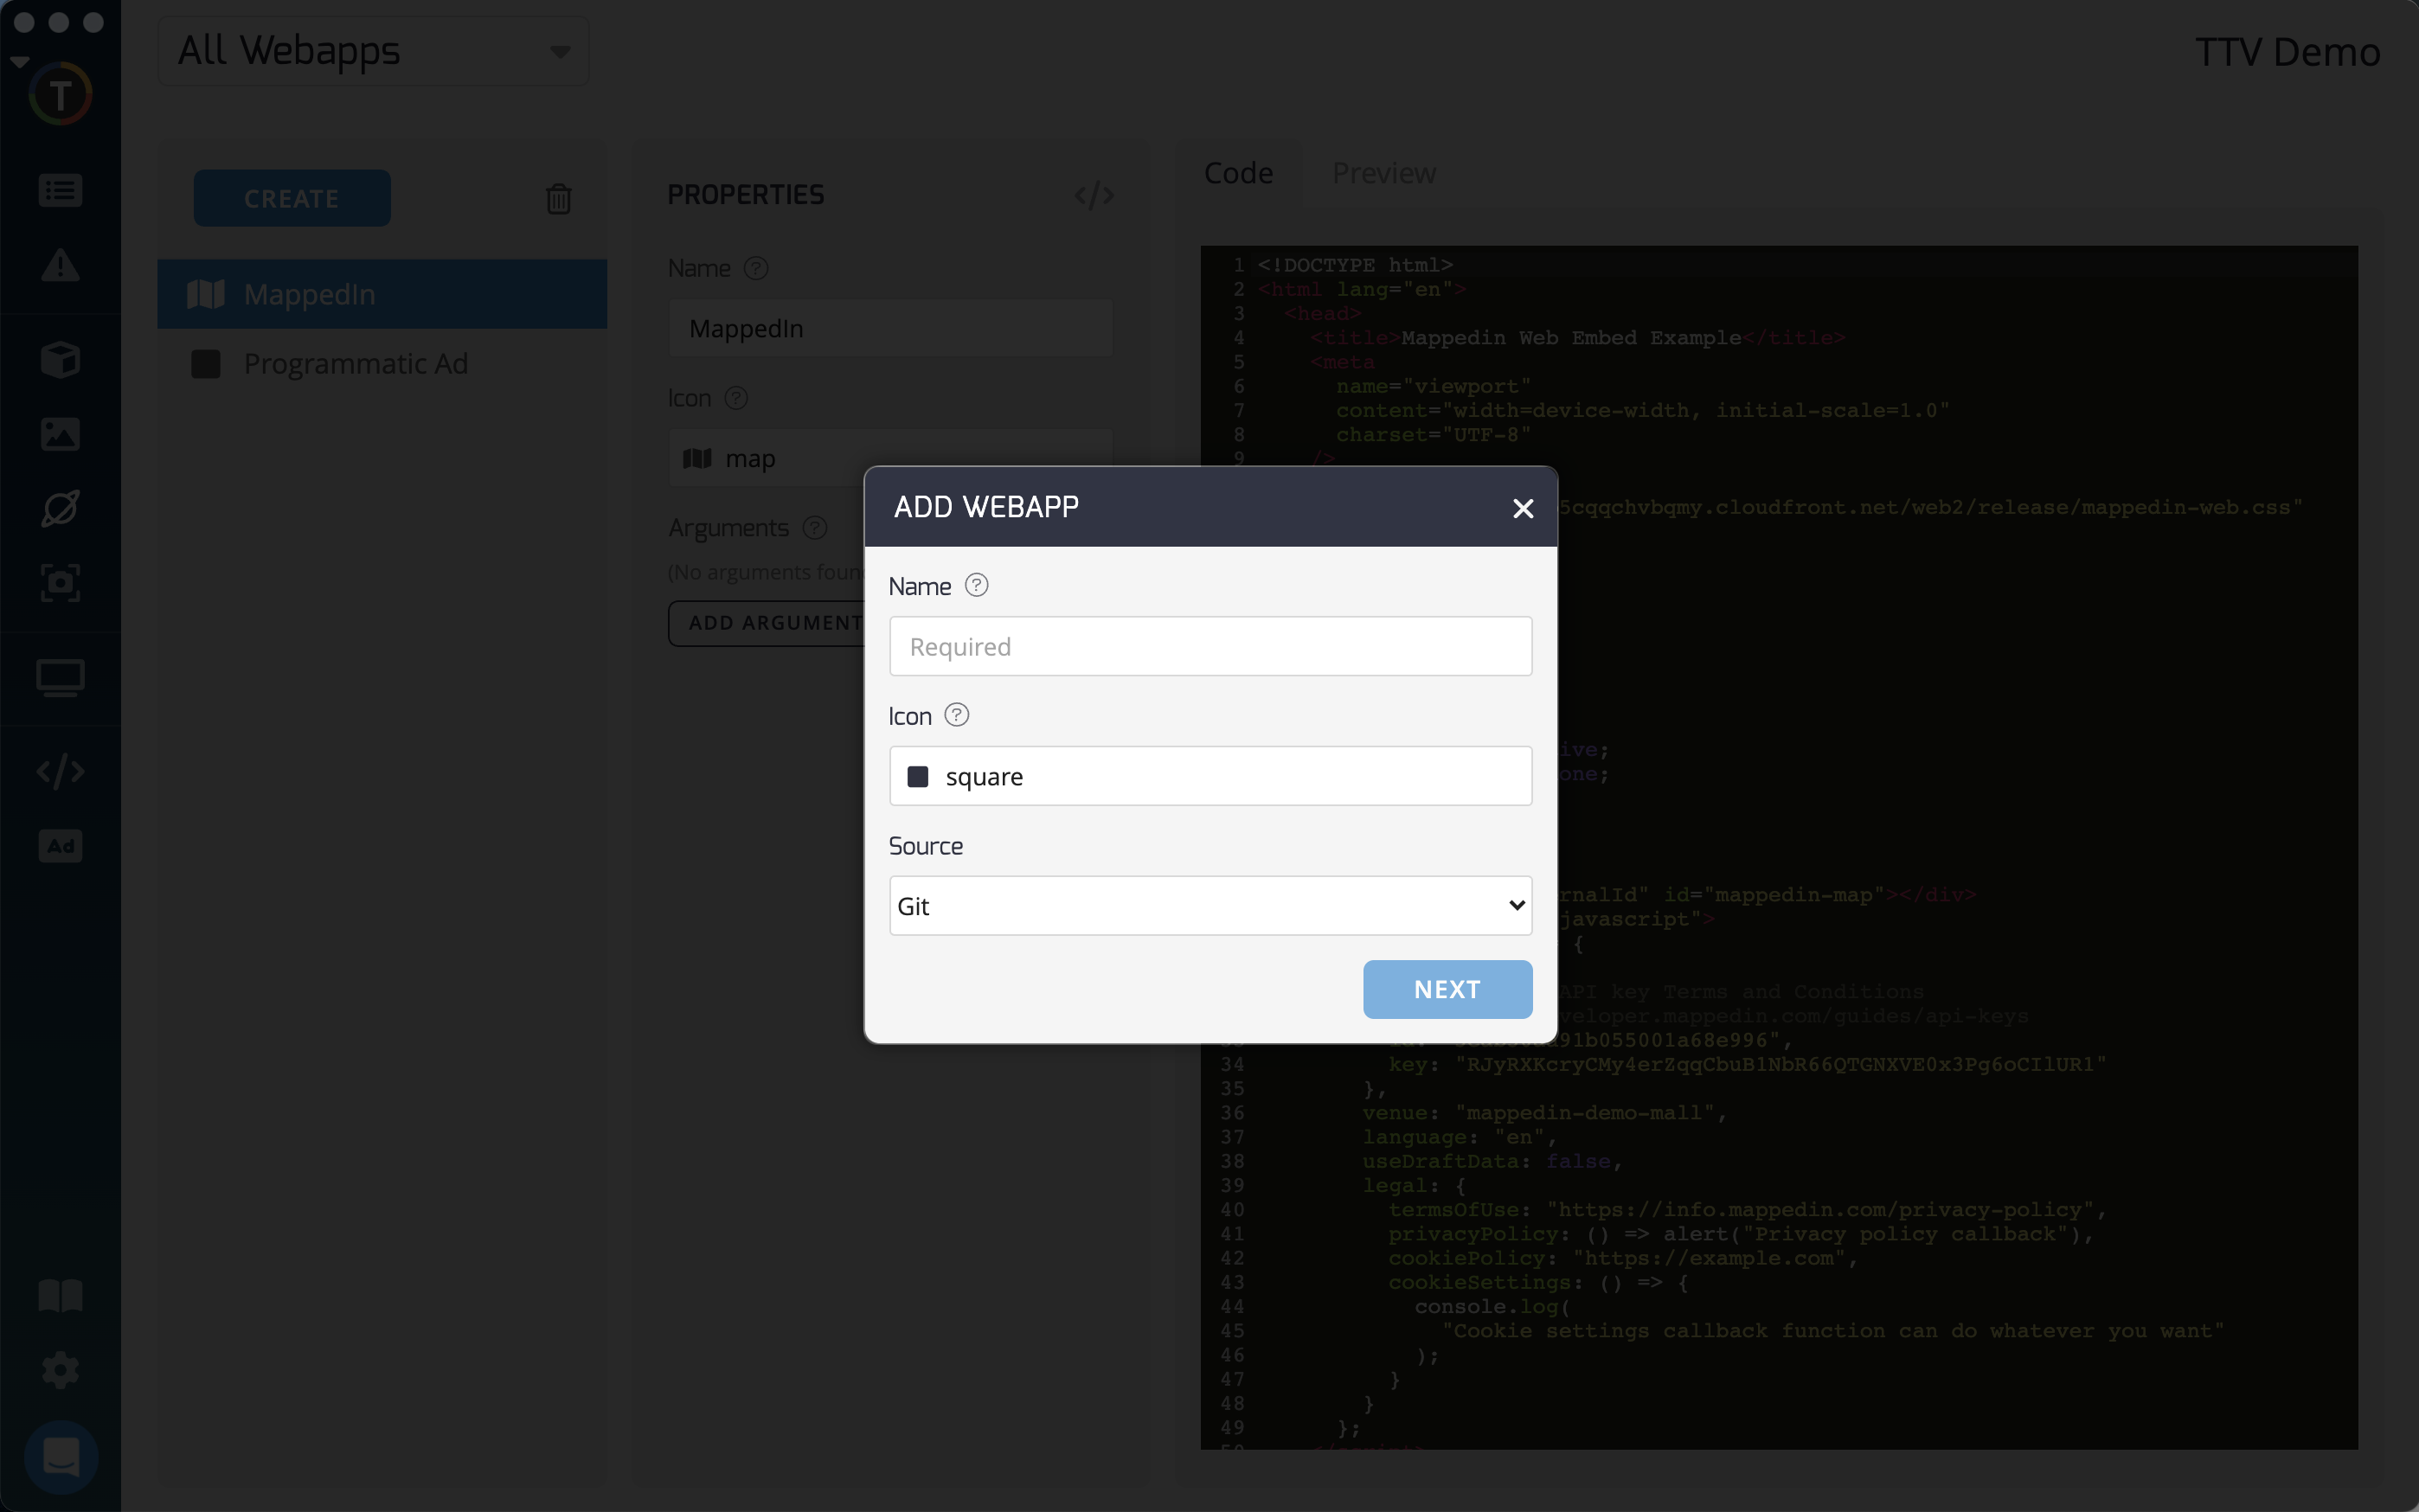
- Enter the app name and choose an icon that best represents your app's features. Click "Next".
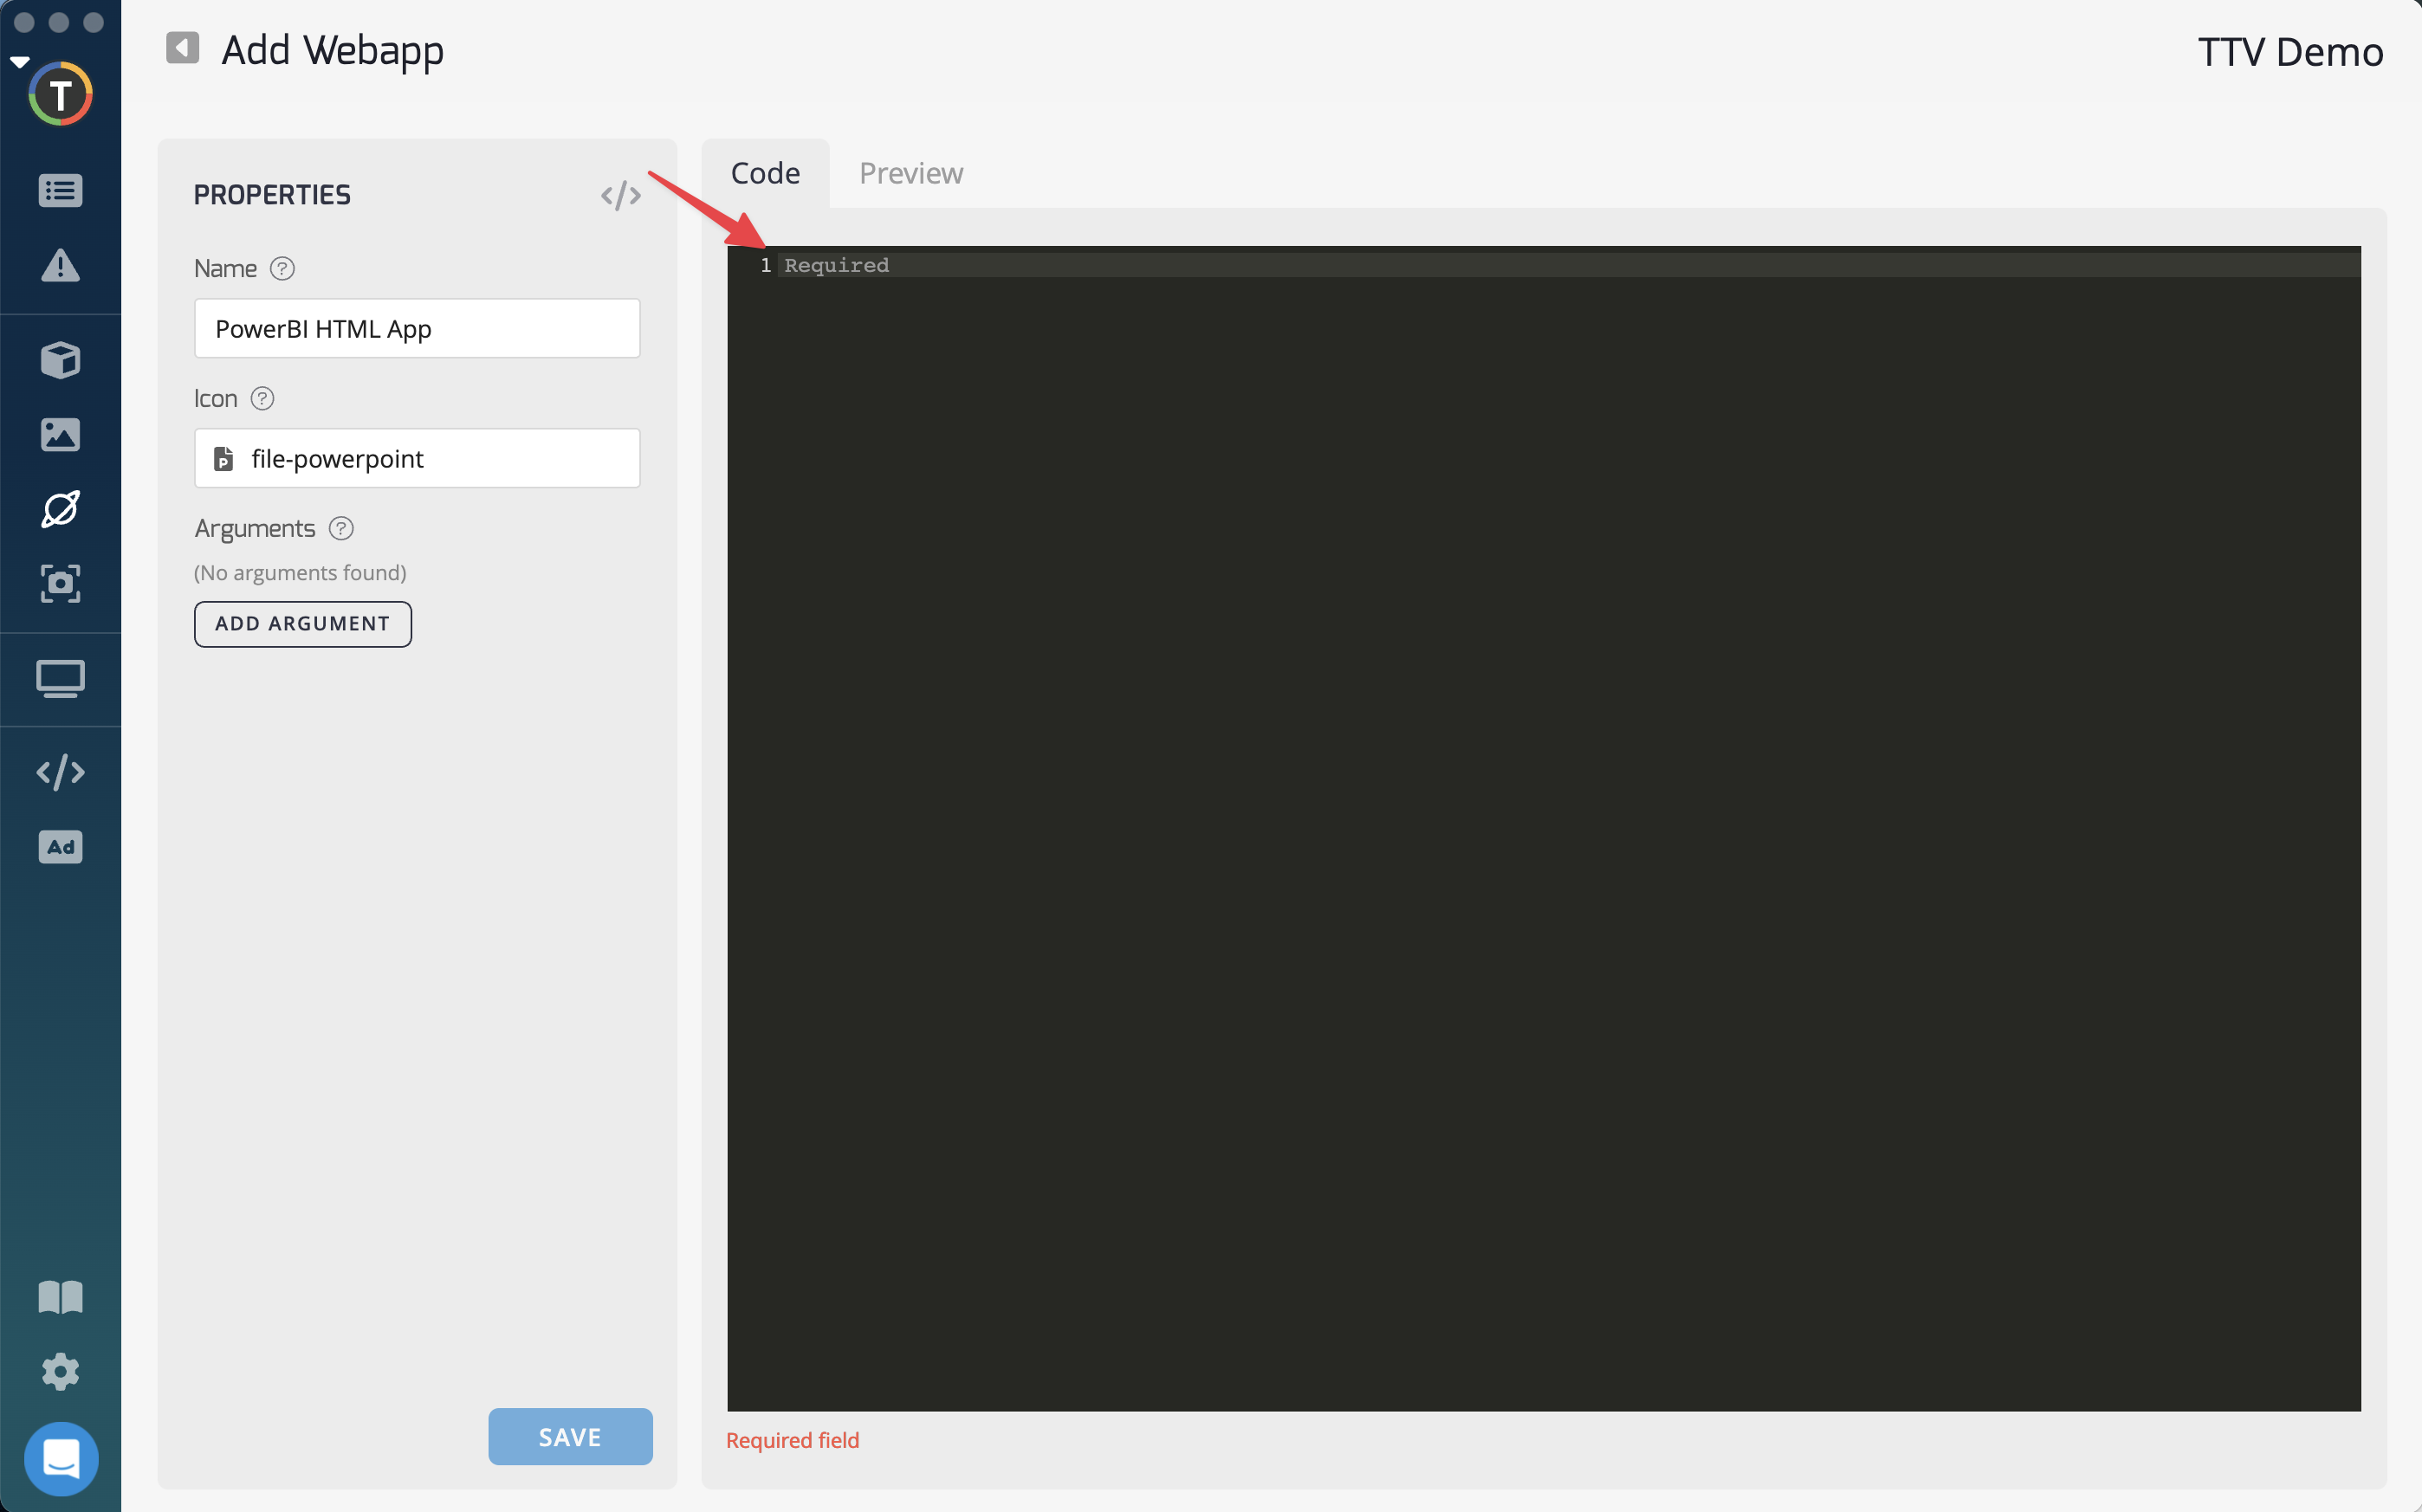
- Add your custom code written in HTML, JavaScript, and CSS to the middle of the screen. Use the "preview" tab to review your Webapp.

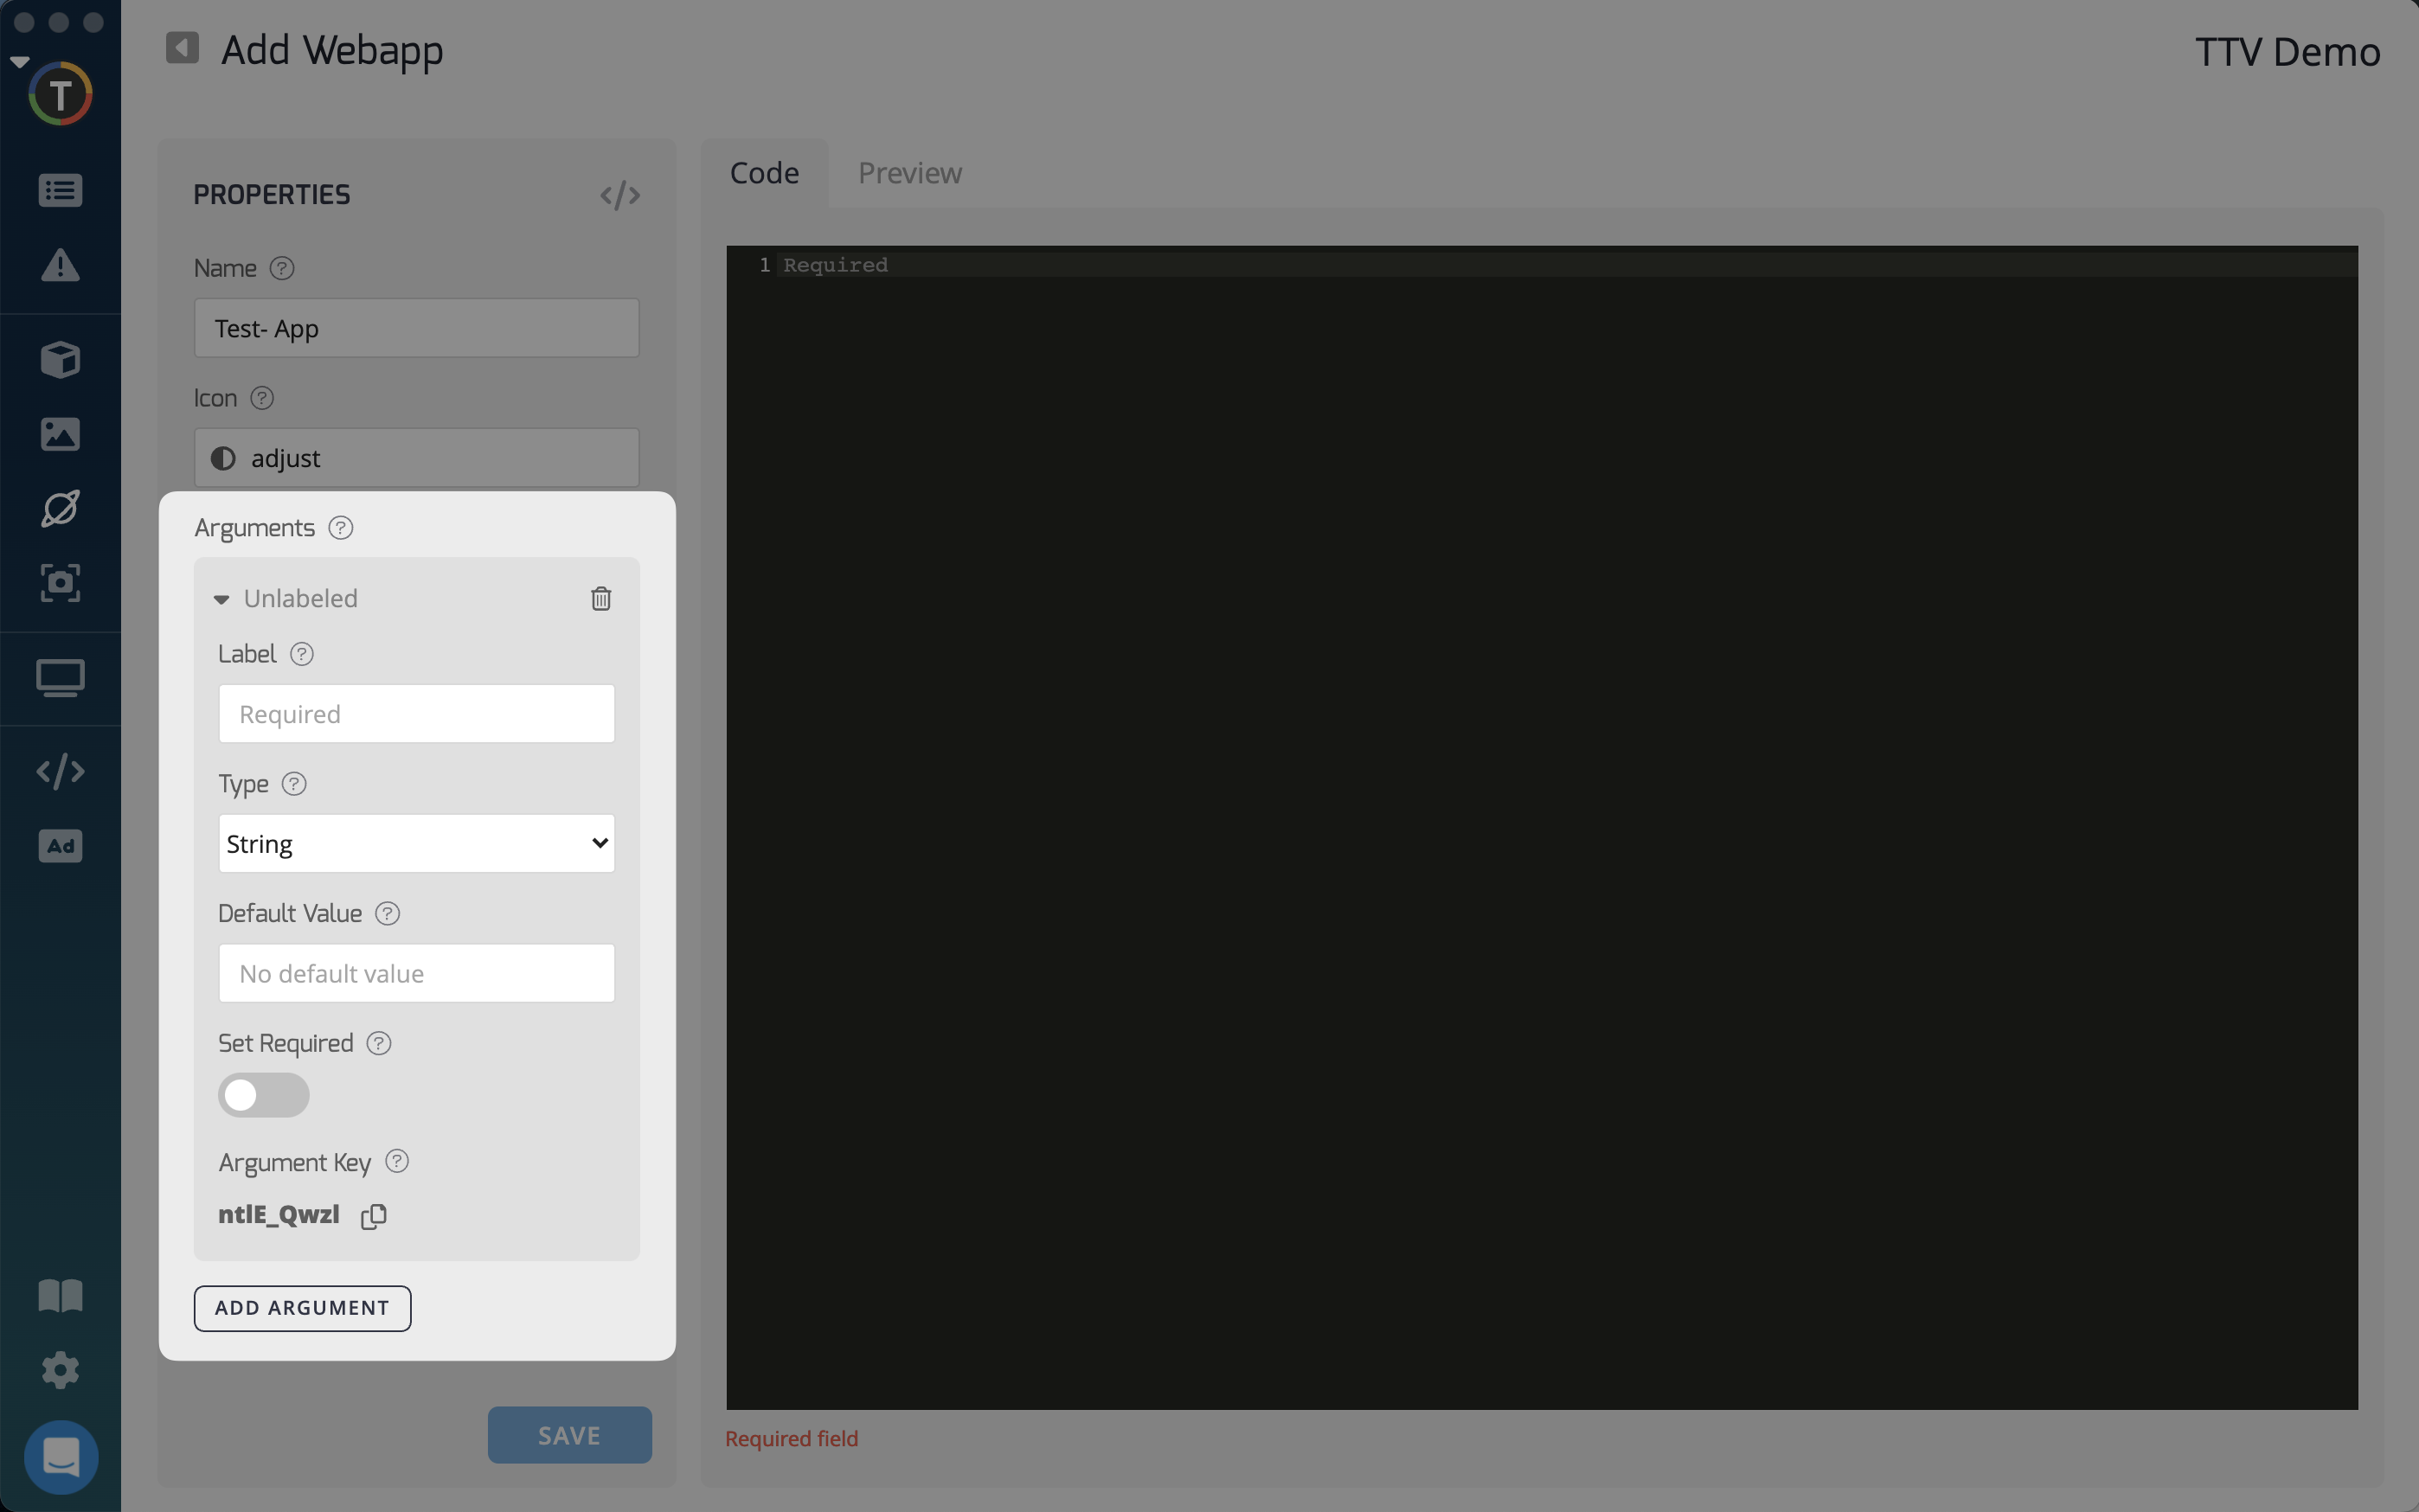
- Utilize argument values as needed.
- Once you're finished, click "Save" to publish your new Webapp.
Sharing Apps with Affiliates
For Reseller accounts, the "Share with Affiliates" option can be toggled on if you want to share the app with your affiliate accounts.
Embedding Microsoft PowerBI HTML Links into TelemetryTV's Webapp Feature:
To display Microsoft PowerBI HTML links on your TelemetryTV digital signage displays, you can use our Webapp feature and SDK. By following these steps, you can easily save your PowerBI - Webapp to your account and update it as needed:
- Obtain the HTML code from Microsoft PowerBI. Refer to this link for more information.
- Add your PowerBI HTML code to the Webapp window.
- Optionally, toggle on "Share with Affiliates" to share the app with your affiliate accounts.
- Save your Webapp to publish it. You can deploy the PowerBI file as a standalone playlist page or as an app within a playlist zone.
If you encounter any questions or issues, please contact our support team for assistance.
Using an iFrame with the TelemetryTV Webapp to Embed a OneDrive Document:
You can leverage iFrames to embed content within a slide of your TelemetryTV playlist using the HTML app or the HTML overlay SDK. Here's how you can embed a OneDrive document using HTML code:
- Go to https://onedrive.live.com/ and open the desired document.
- Click on the menu and select "Embed".
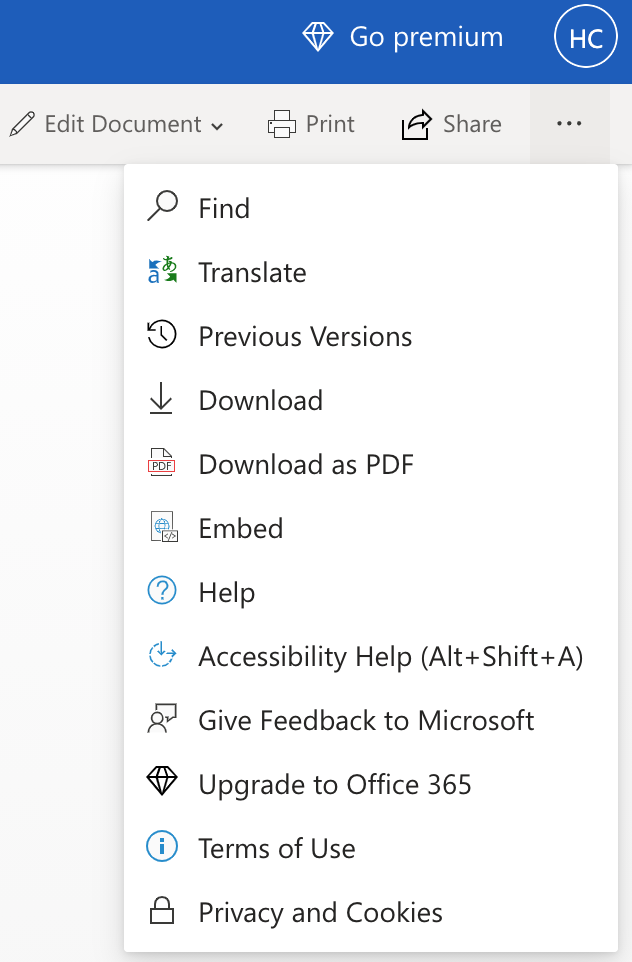
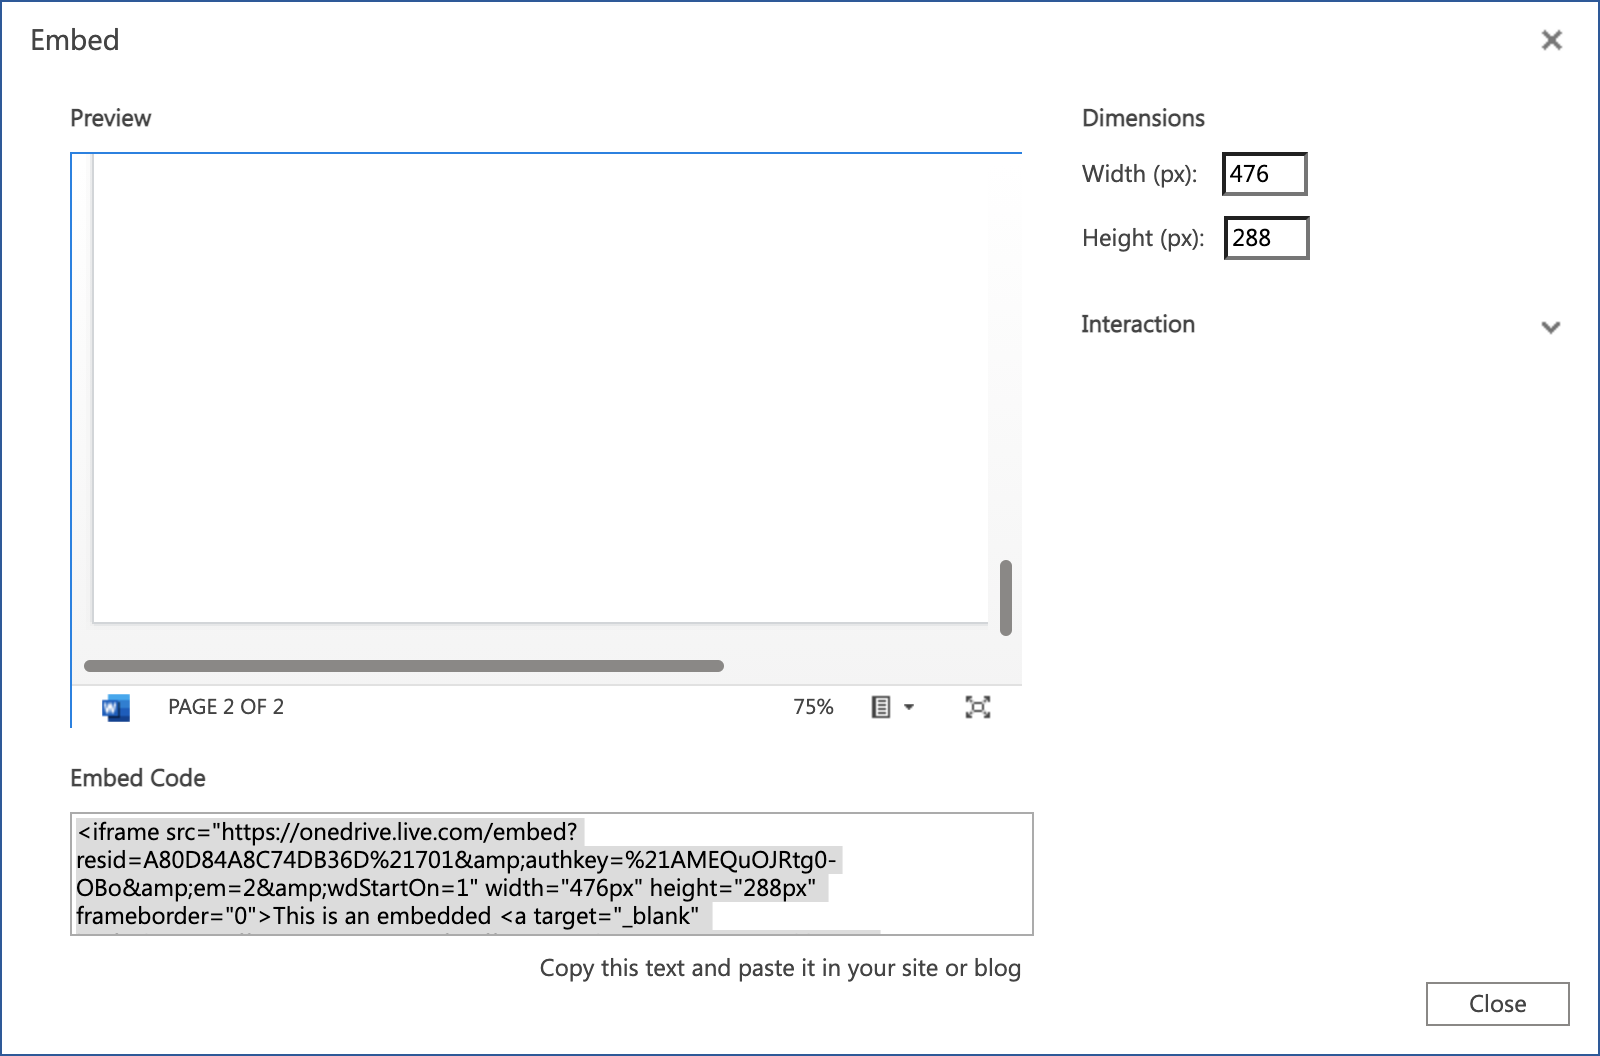
- Copy the HTML embed code provided.
- Go to the TelemetryTV Desktop App, navigate to Webapps, and click "Create Webapp".
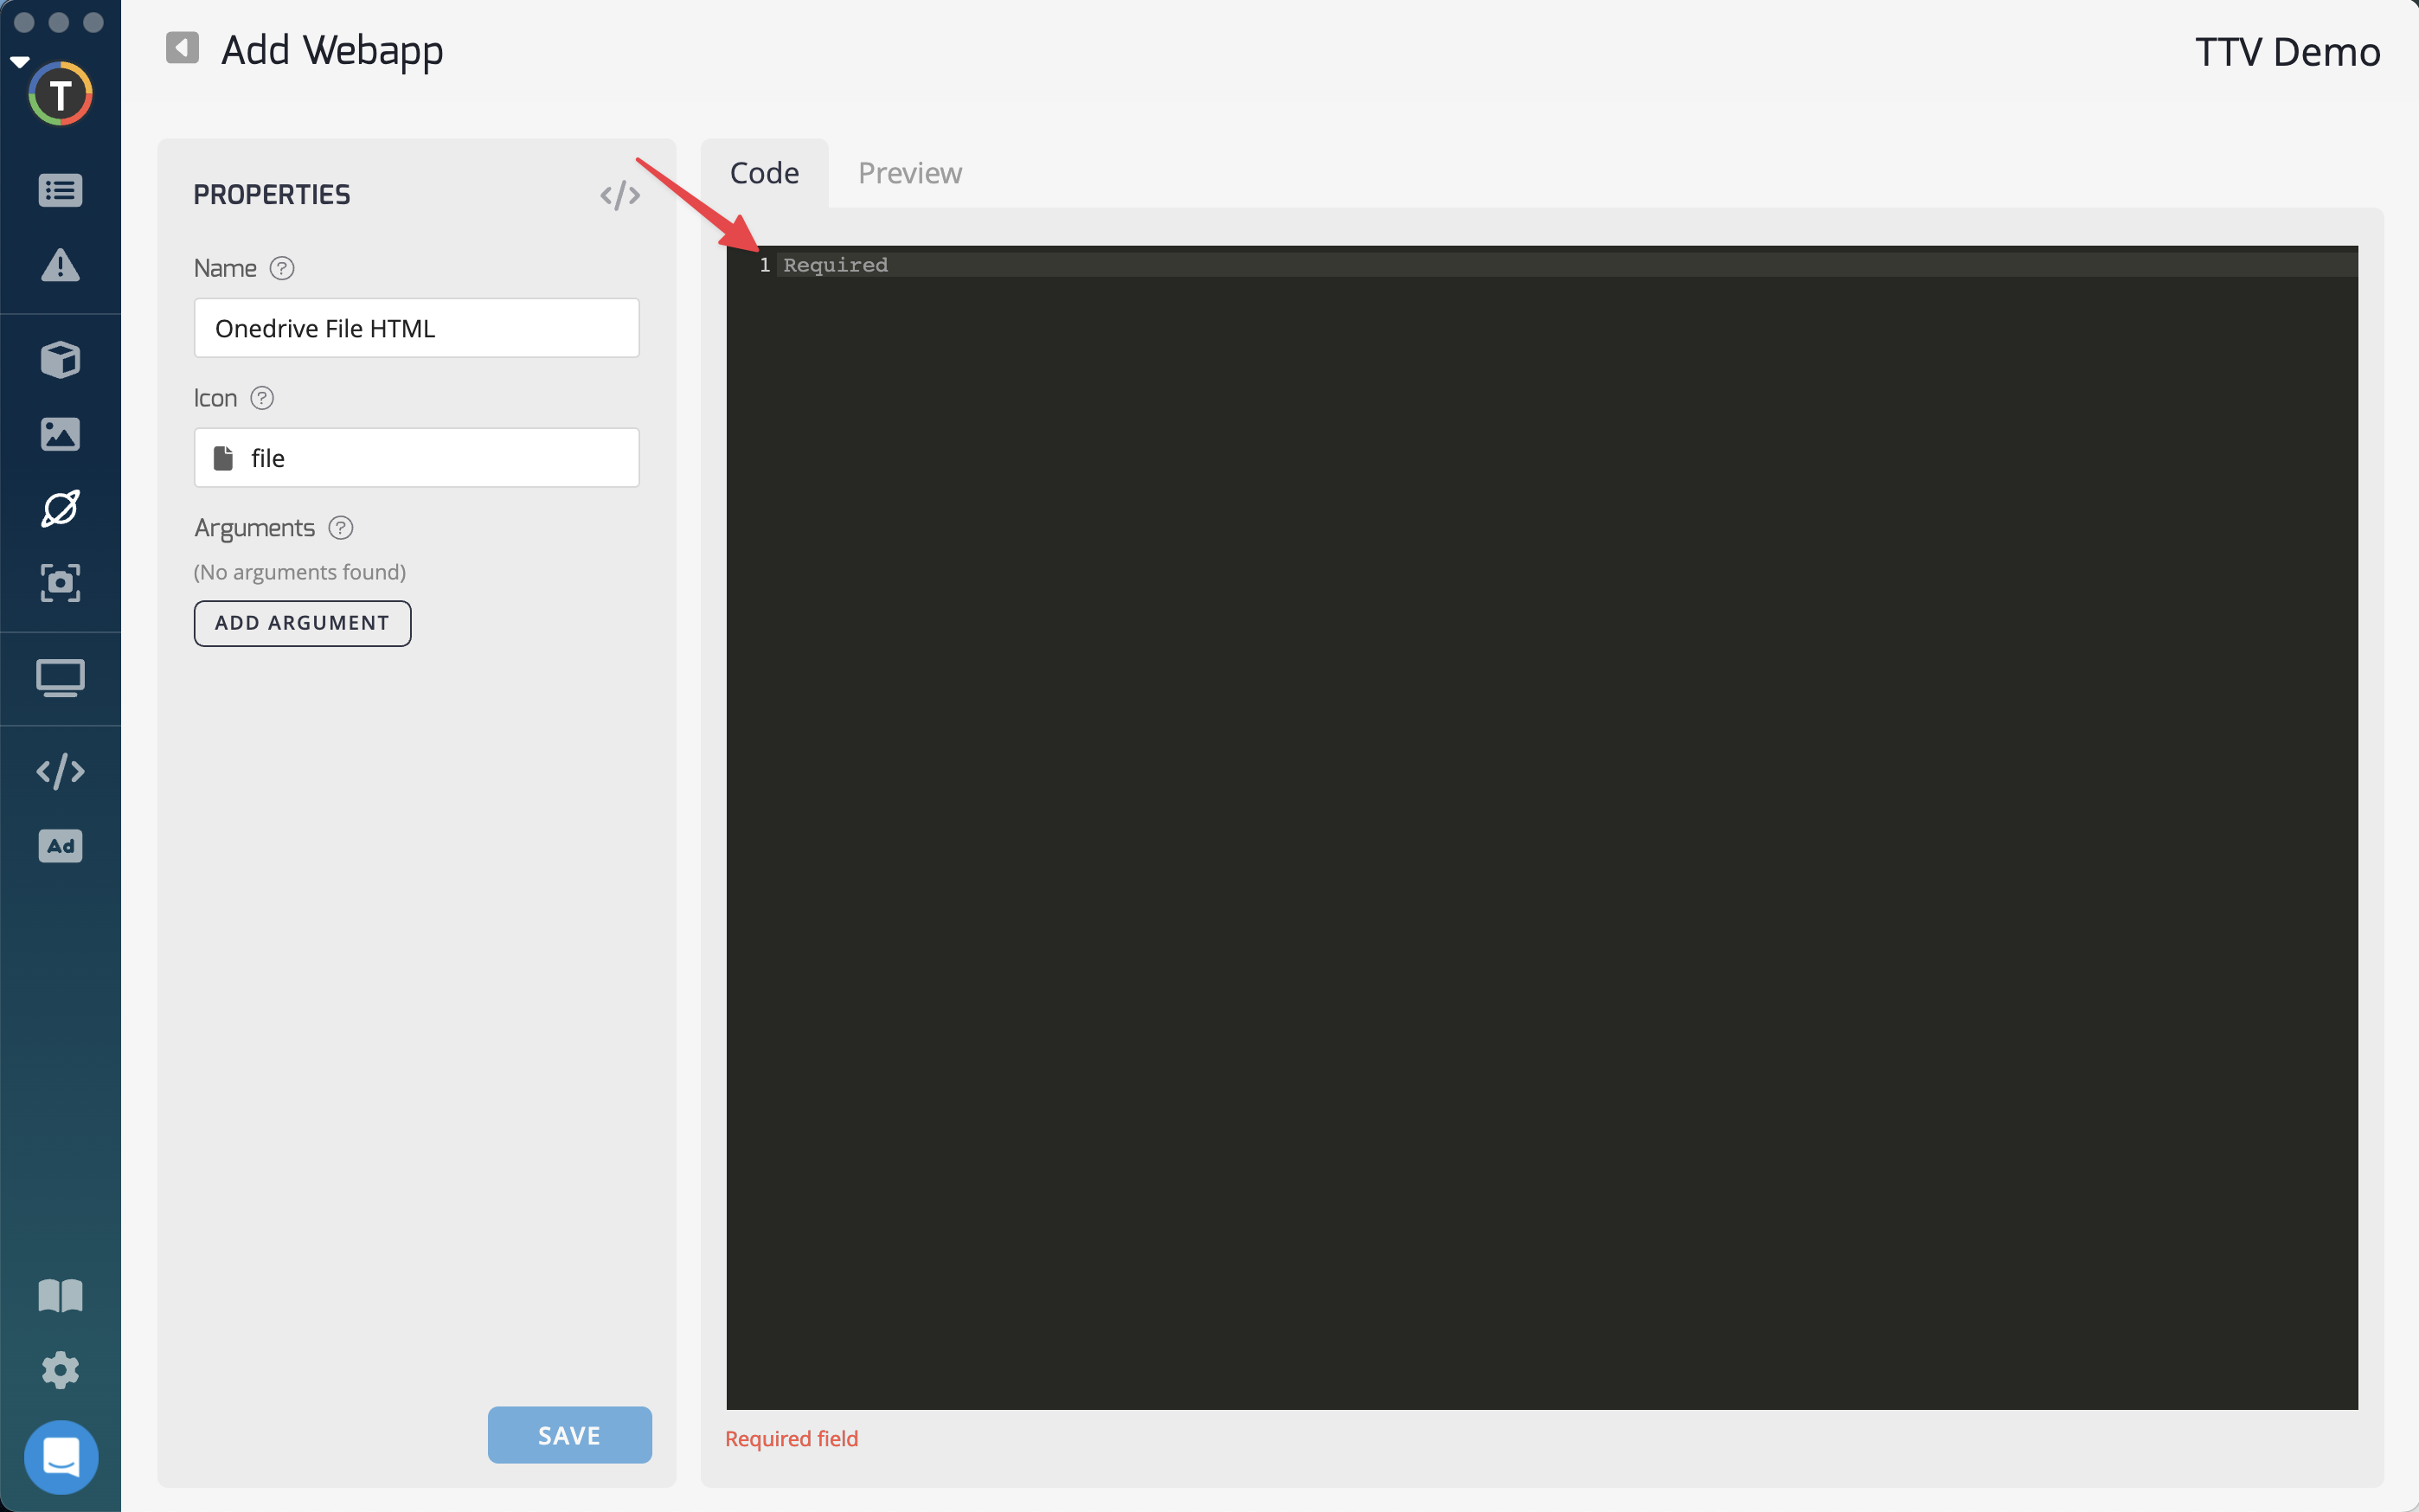
- Name the Webapp and click "Create".
- Paste the OneDrive HTML code into the "code" field.
Example:
<style>
body, html {
width: 100%;
height: 100%;
margin: 0;
padding: 0
}
</style>
<iframe src="https://onedrive.live.com/embed?cid=123123123123&resid=12123123123%123123123123&authkey=abc123abc123-OBo&em=2&wdStartOn=1" height="100%" width="100%" margin="0" allowfullscreen frameborder="0" position="relative"></iframe>
Using Style Code
This
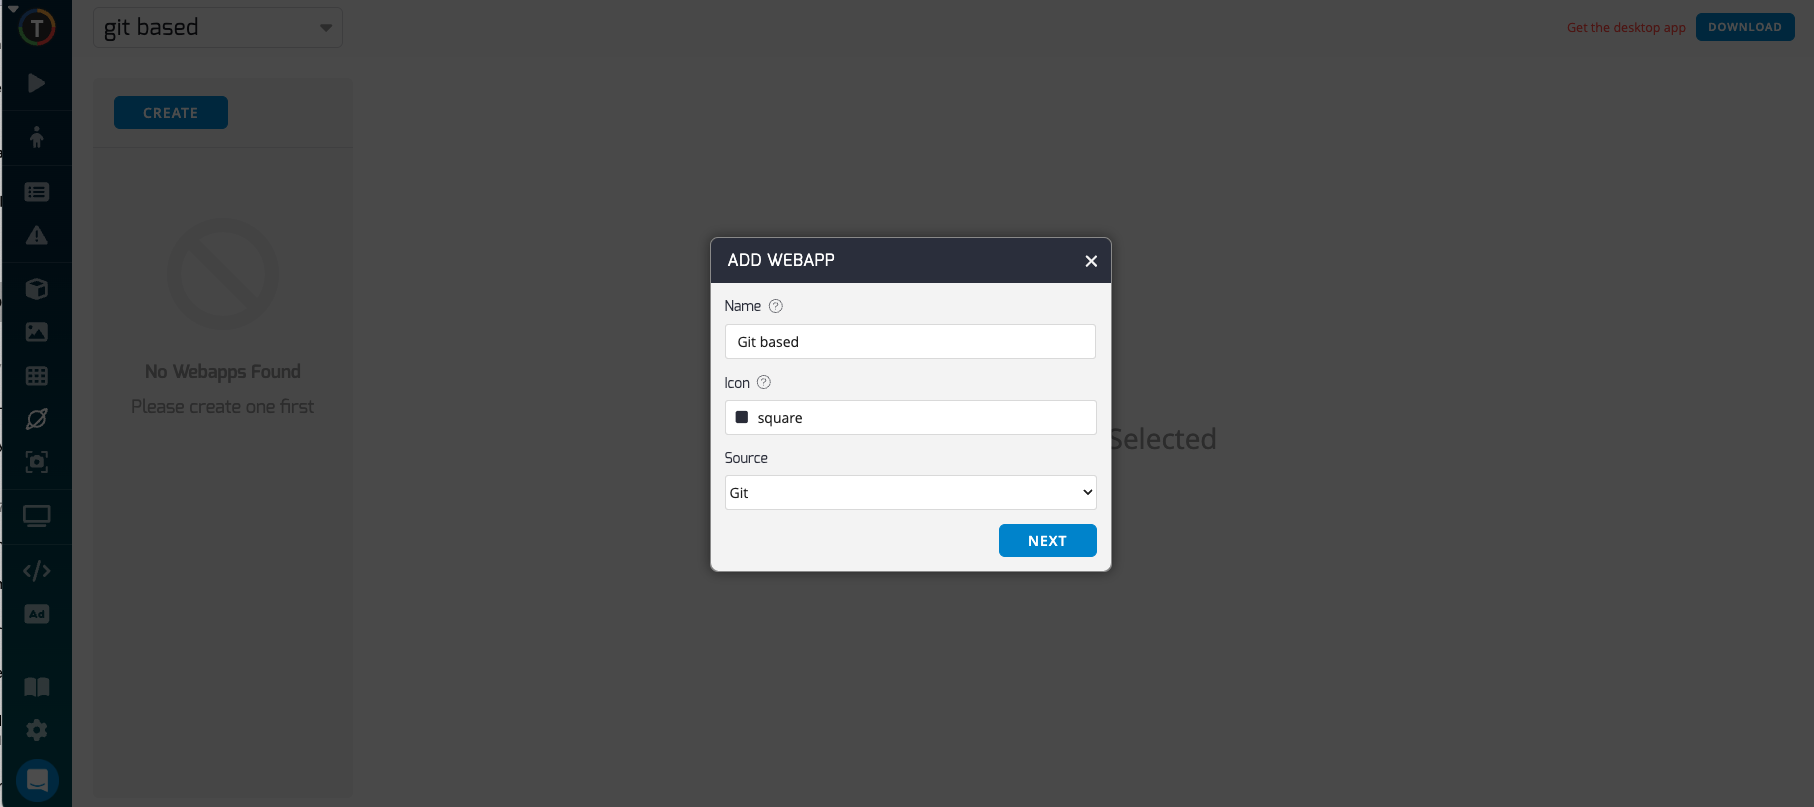
Creating git based WebappIN telemetrytv interface select Git source.
Steps to Deploy Your Application
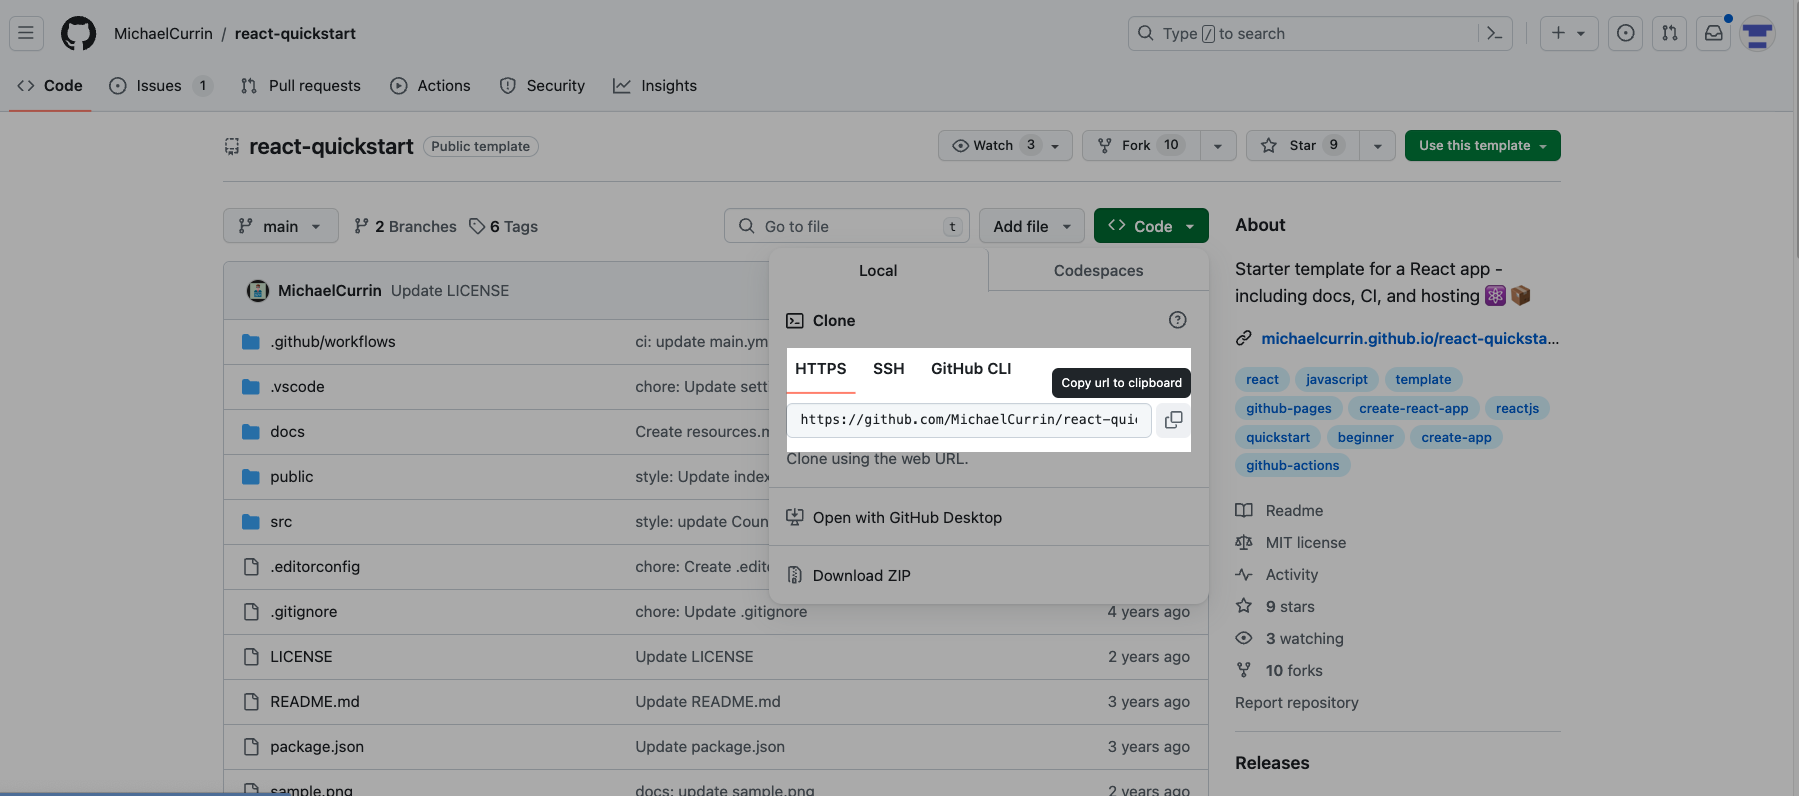
- Locate Your Repository: Identify the GitHub repository where your web application code is stored. Ensure the repository is public, as TelemetryTV does not support private repository authentication for the time being.
- Copy Repository URL: From your GitHub repository page, copy the HTTPS URL provided by GitHub.You may use ssh as well but it will requrie your private key.
- Specify the Branch: Determine which branch of your repository you want to build. Usually, this is the main branch, but it could be any branch that contains the production-ready code.
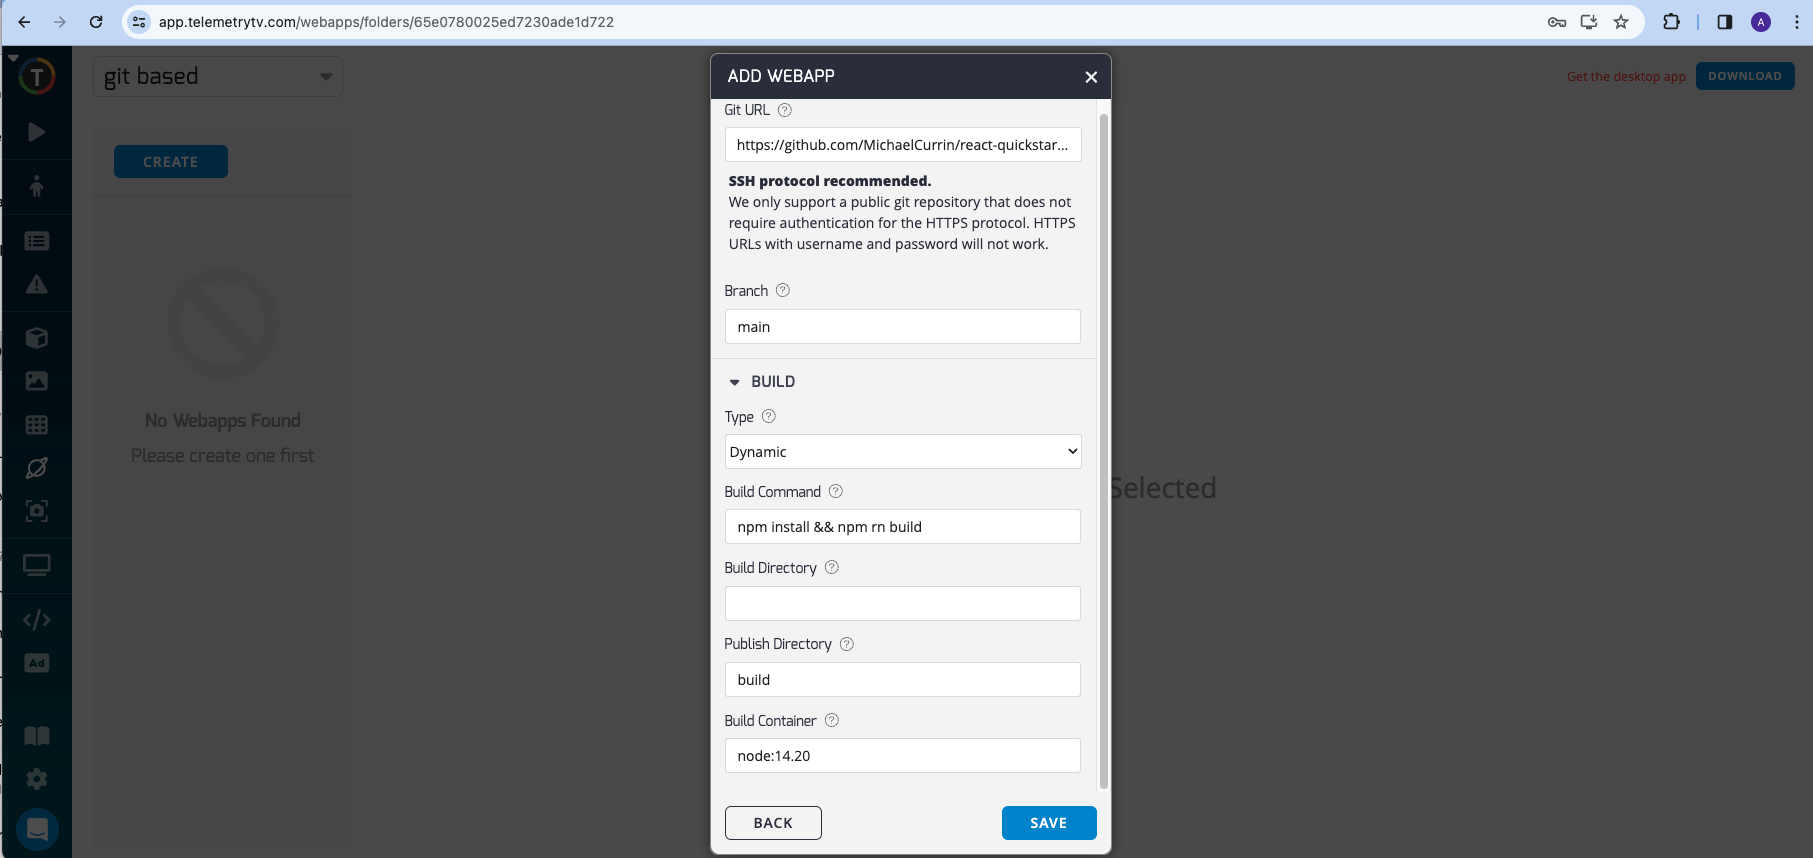
- Define Build Commands:
- For Node.js applications, standard build commands like npm install && npm run build are commonly used.
- For applications requiring Deno runtime, specify the necessary Deno commands to run and build your application.
- Configure Build and Publish Directories:
- Build Directory: The optional directory where to run build commands from .
- Publish Directory: Define the directory from which TelemetryTV should serve your application. This is typically a directory named build or dist.
- Choose a Build Container: Select the appropriate container for your runtime environment. For instance, you may choose node:14.20 for applications that are compatible with Node.js version 14.20.
Notes and Best PracticesEnsure that your web application has a package.json file with a build script defined for Node.js applications.
For Deno projects, make sure to include a deps.ts file for dependency management and a main.ts as an entry point.
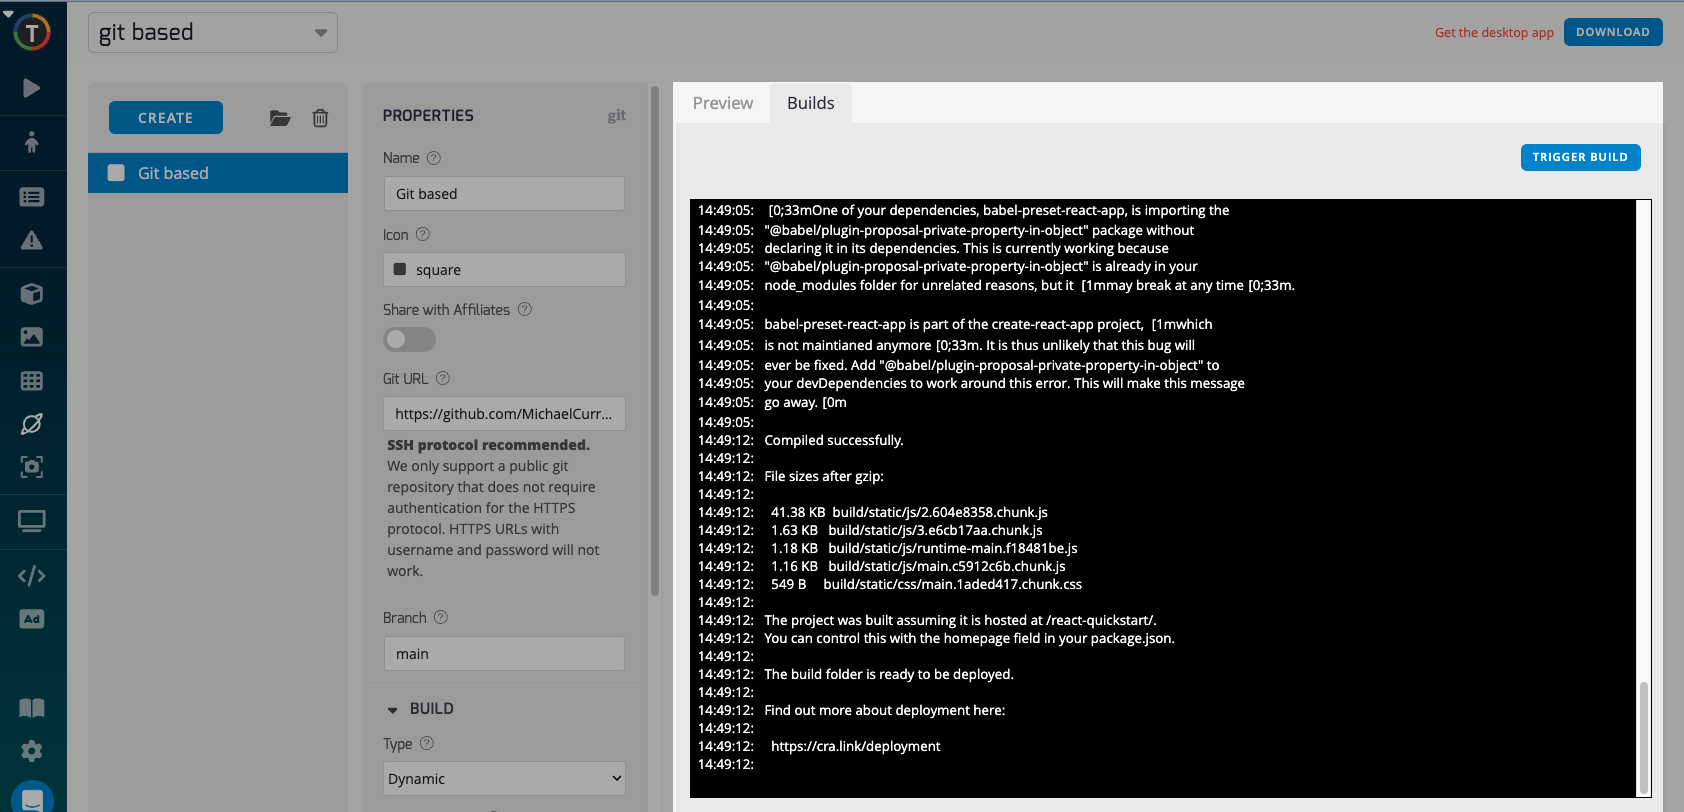
It is recommended to test your build commands locally before configuring them on TelemetryTV to ensure they work as expected.App will be build in docker container and served automatically. Errors will appear in logs if any.
Updated about 2 months ago