
PowerBI Dashboards
Displaying PowerBI Dashboards using the Media Repository, Website App and Webshots
Upload Microsoft PowerBi Media Files to the TelemetryTV interface
In TelemetryTV, you can upload PowerBI files and display them as slides in your playlists. This feature allows you to share your PowerBI visualizations and reports on your digital signage screens. To add PowerBI files using the Media Uploader, please follow the instructions below.
Required File Types
Before proceeding, make sure to export your Power BI files from the Microsoft Power BI application as either PPT or PDF files.
- Export Power BI Files: To export a Power BI file for uploading to TelemetryTV, open the Microsoft Power BI application and load the desired file. From the application's menu or toolbar, navigate to the Export or Save As option. Select either PPT or PDF as the export format, and save the exported file to a location on your local device.
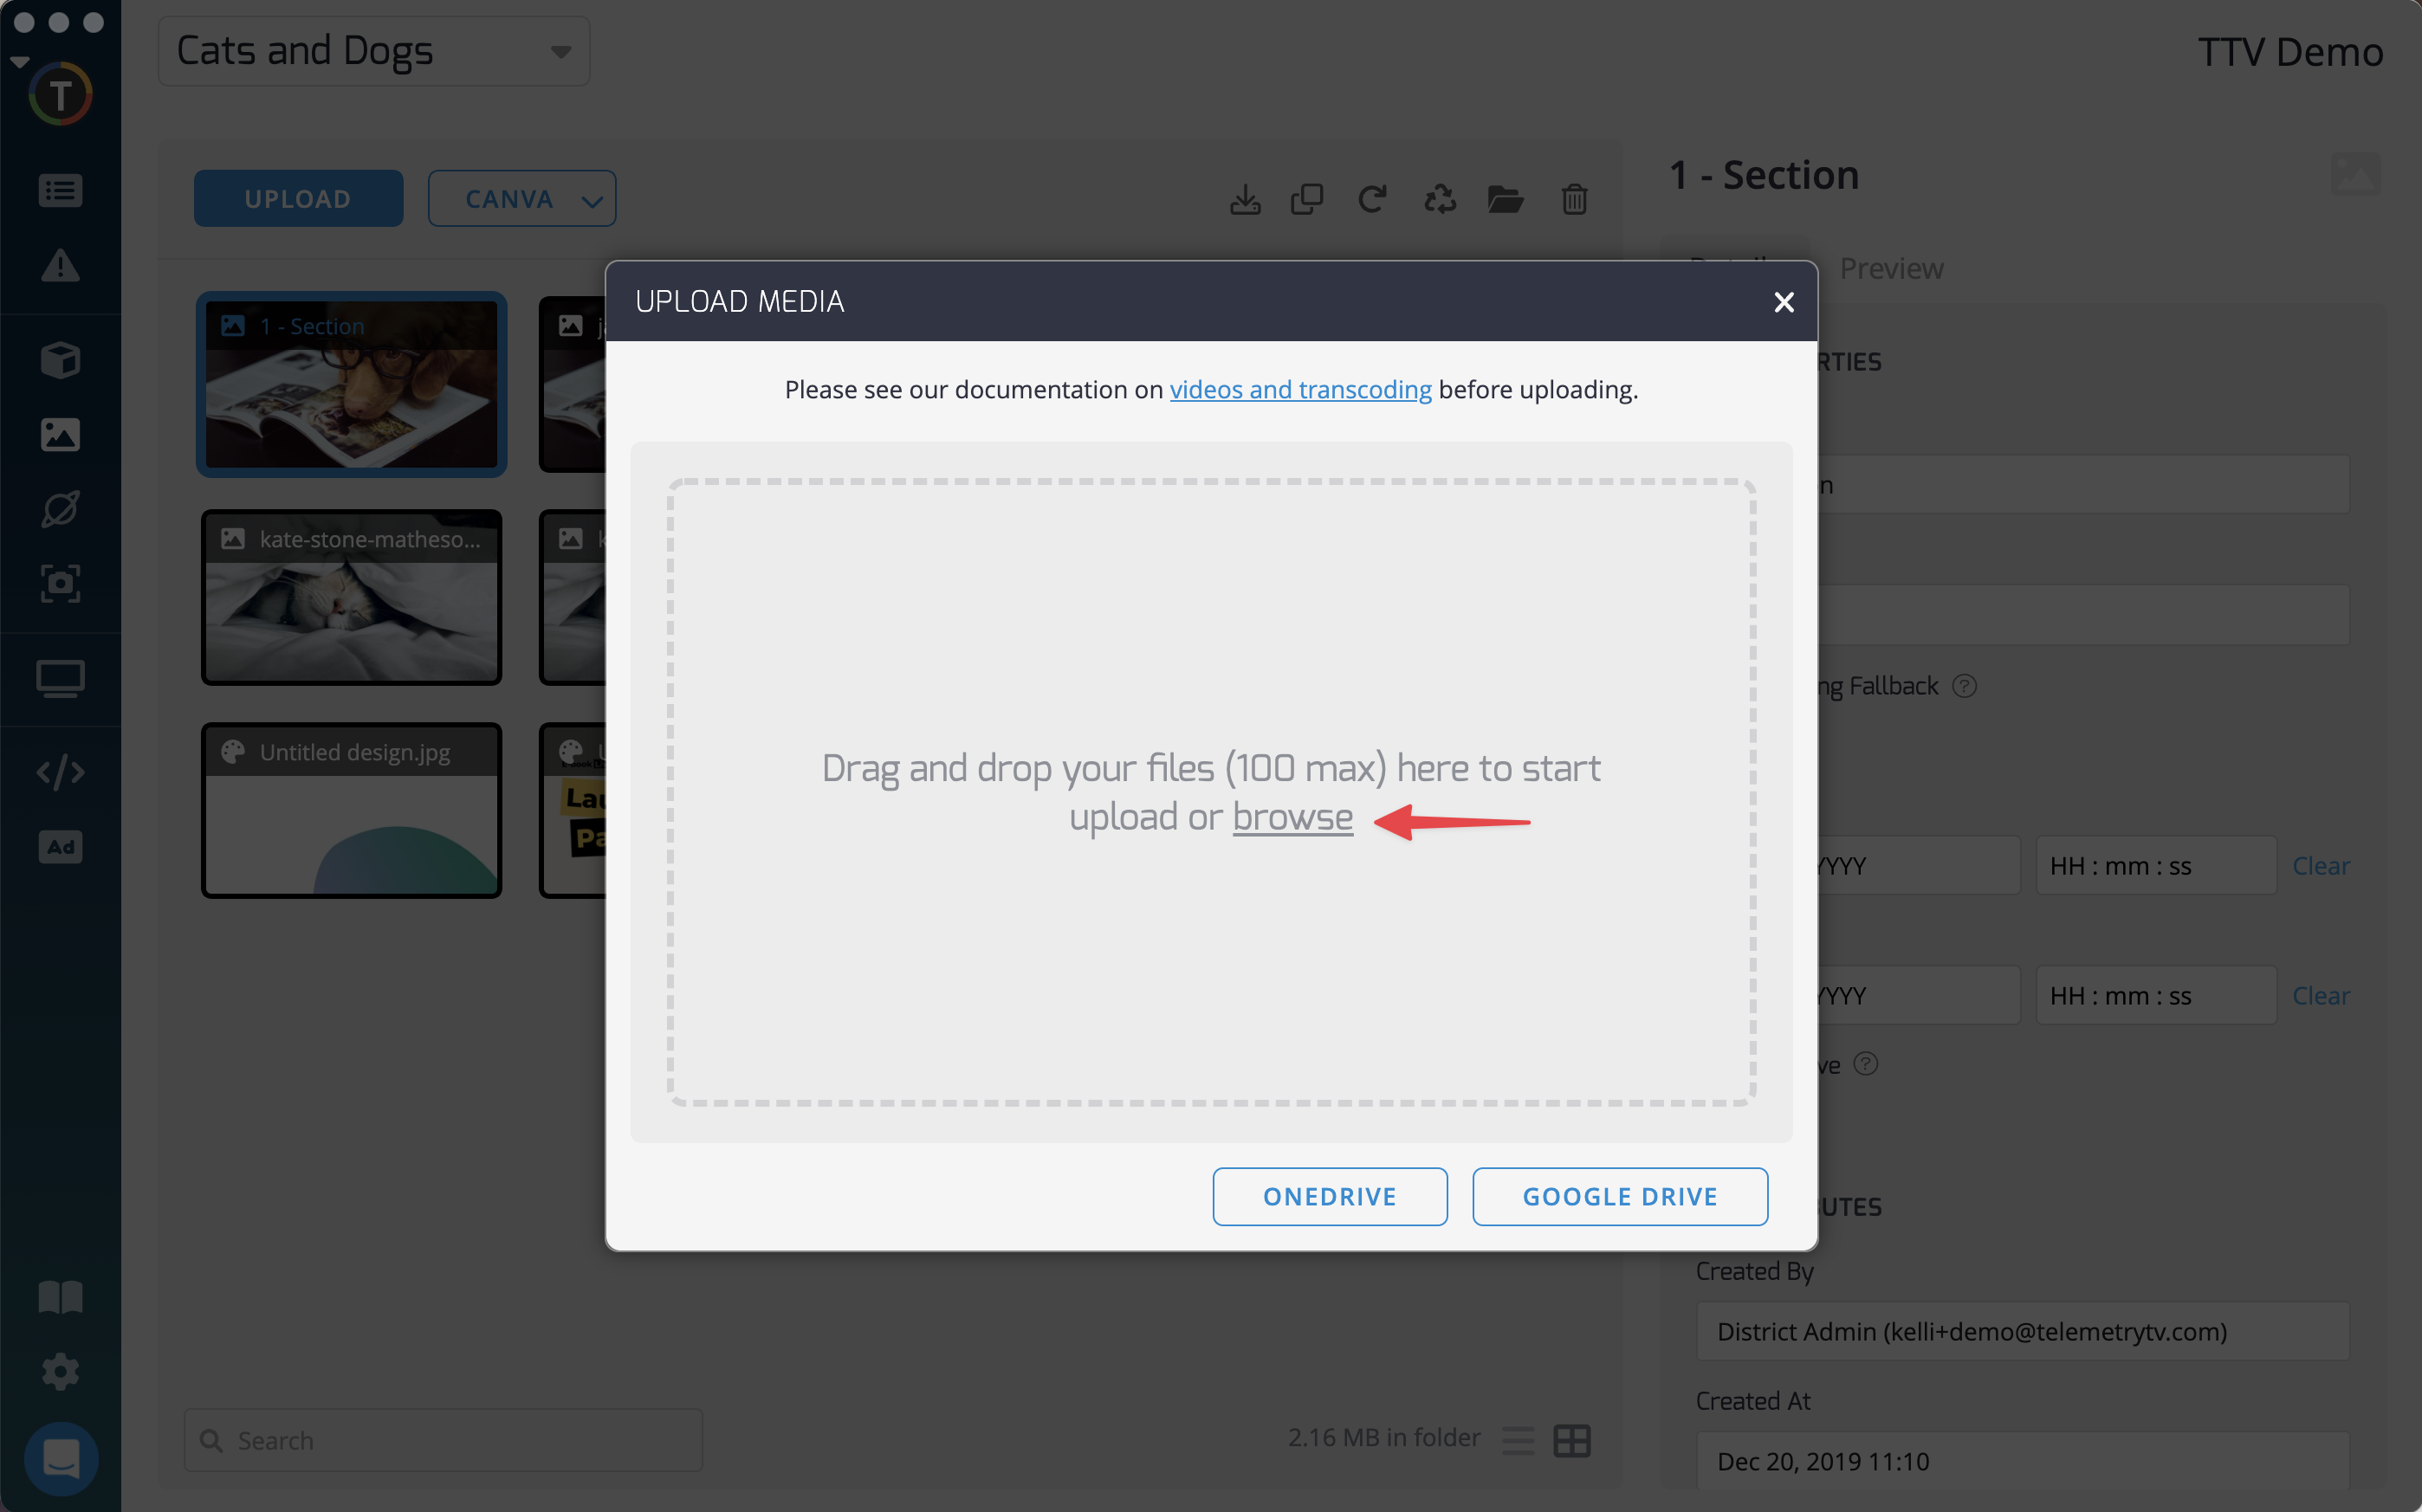
- Access the Media Repository: Log in to your TelemetryTV account and navigate to the dashboard, then click on the Media tab in the top navigation menu.
- Upload the Power BI File: Within the Media interface, click on the Select button. Then choose the exported Power BI file (PPT or PDF) from your local device.
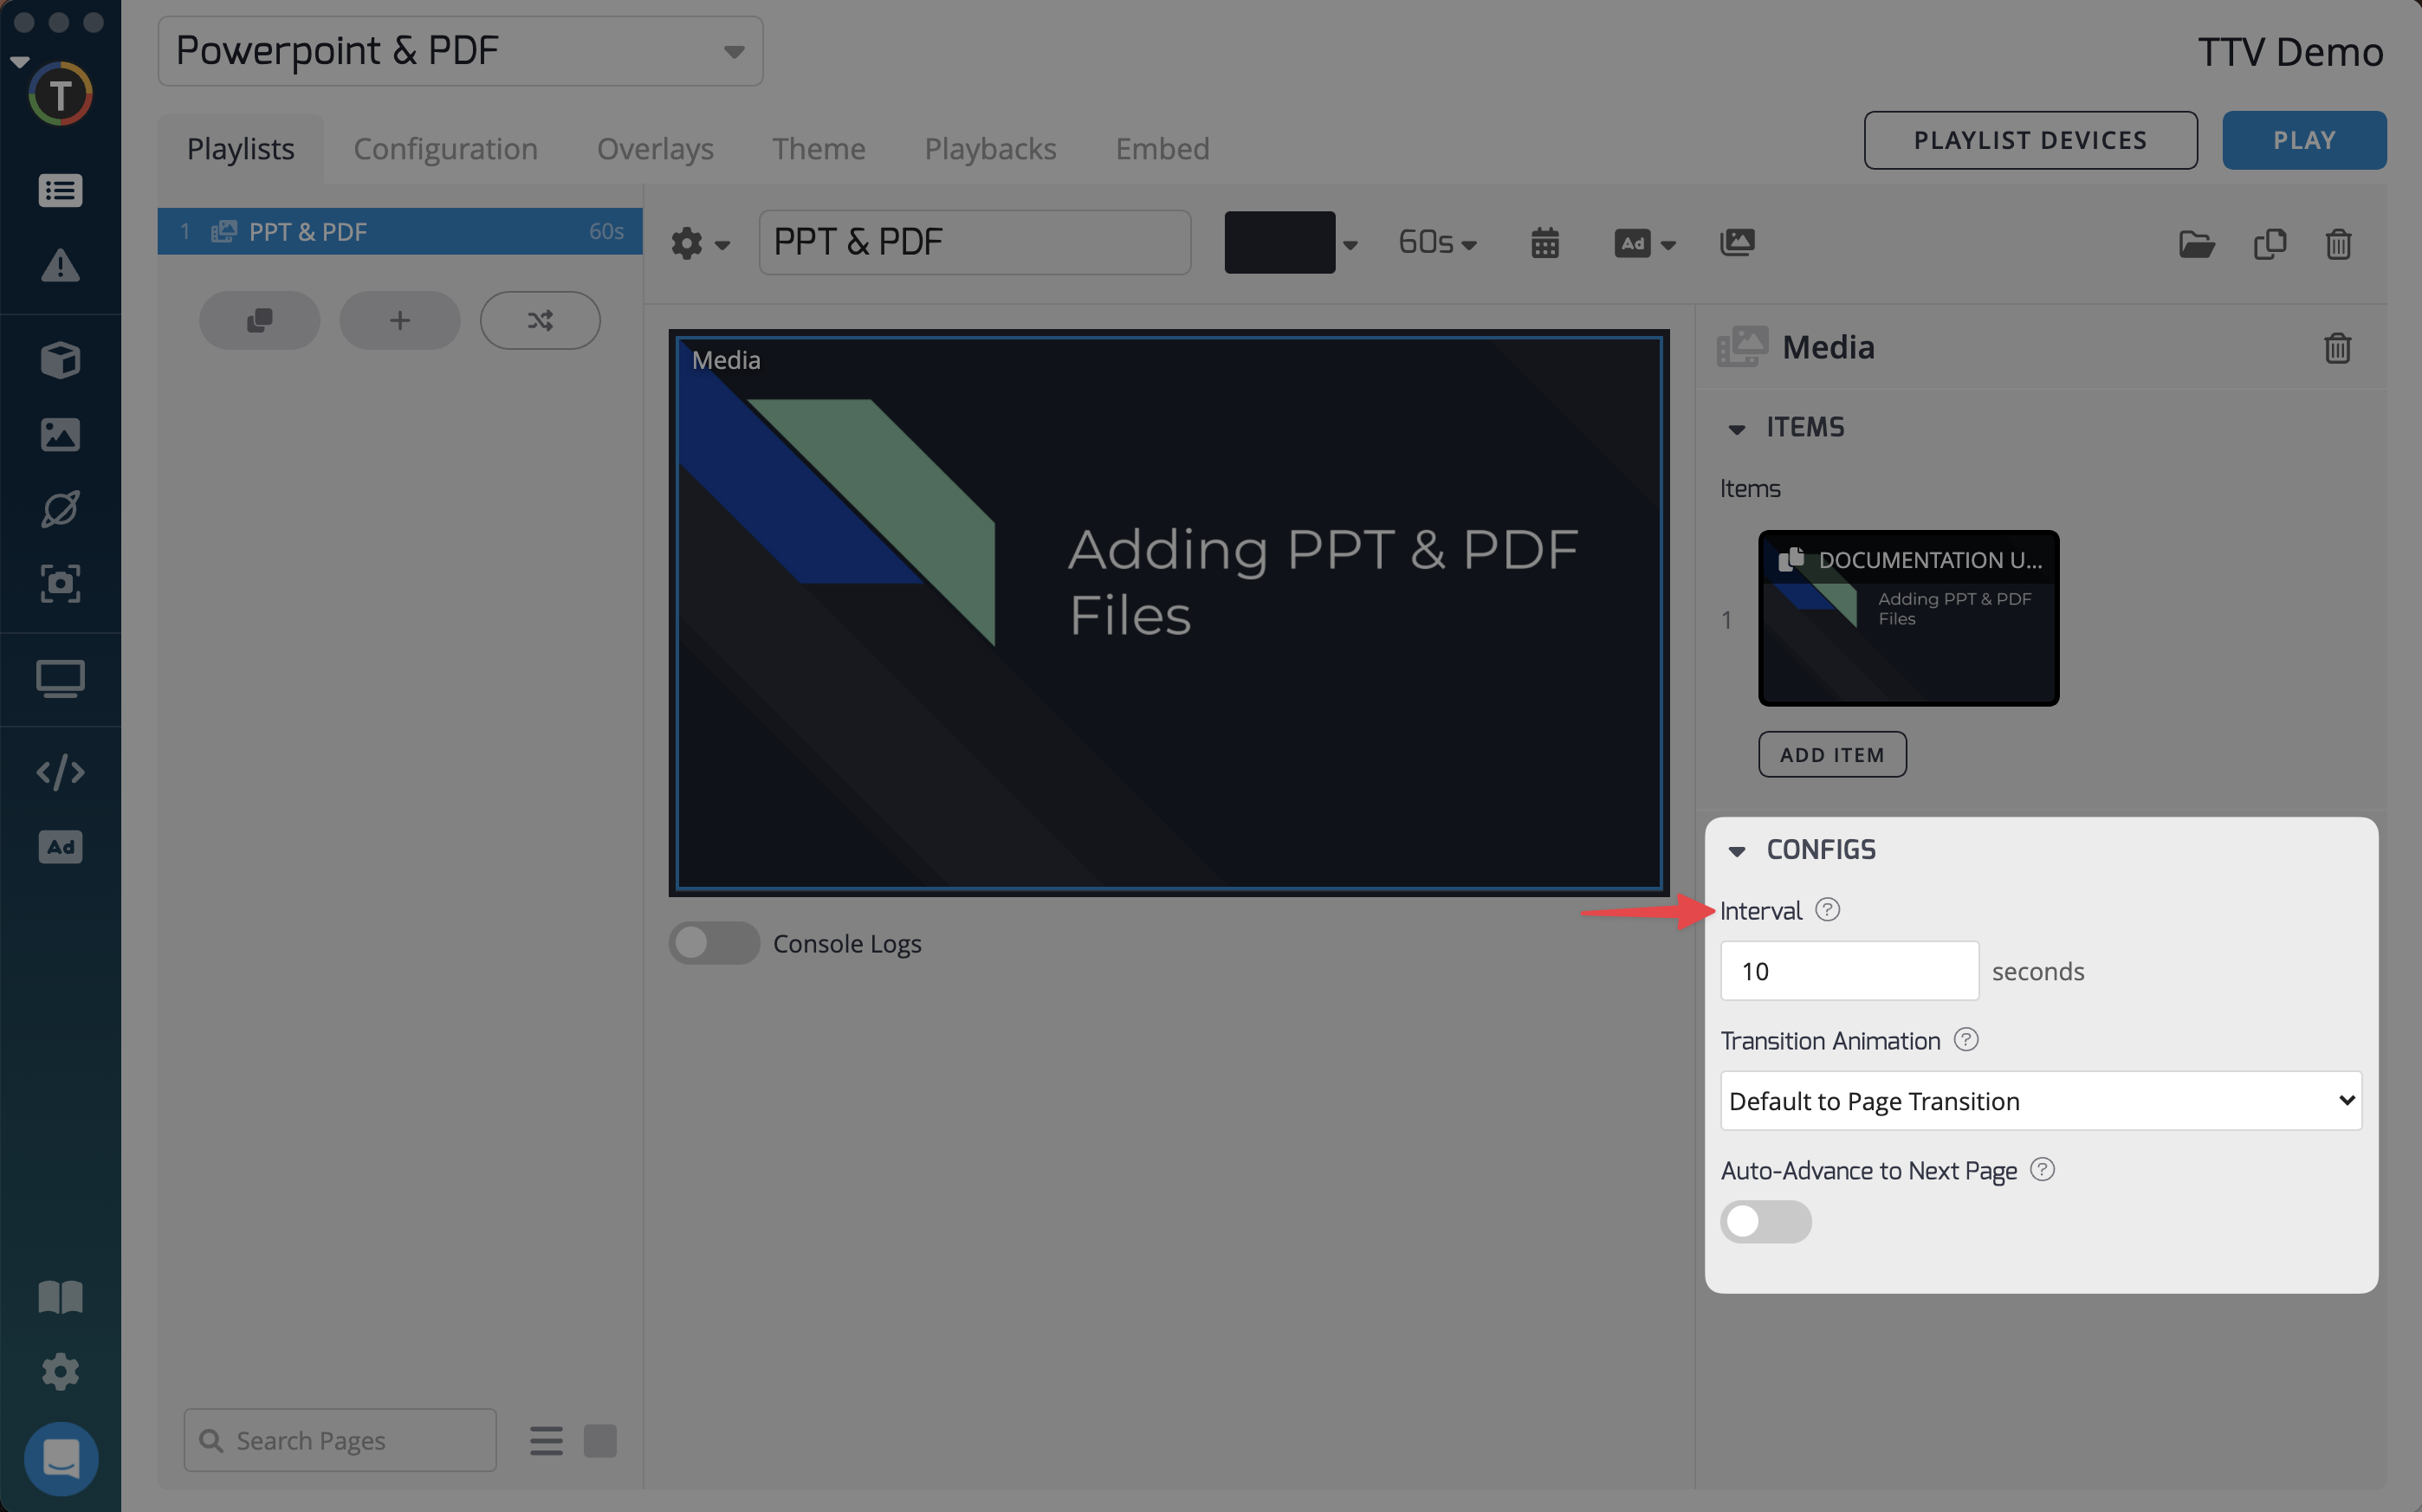
- Adjust the Slide Rotation Duration: Go to the Playlist interface by clicking on the Playlist tab in the top navigation menu. Add the uploaded Power BI slide as content to your playlist. In the Interval field, specify the duration of slide rotation in seconds.
This value determines the amount of time each slide will be displayed before moving on to the next one.
That's it! Your Power BI slides are now added to your playlist and will be displayed on your digital signage screens. Make sure to adjust the interval duration according to your desired slide rotation speed.
View Microsoft PowerBI Dashboards Using the Website App
To add Microsoft Power BI URLs to TelemetryTV, you need to follow the same steps as adding any other Website App on TelemetryTV. However, there are some important things to consider when adding to ensure that they work properly on TelemetryTV.
First, make sure that your Power BI URL is published and public and private URLs will not be accessible. To publish your Power BI report, go to the Power BI service, click on the report you want to publish, and then click on the "Publish" button.
For more information on how to obtain a PowerBI URL, please visit the Microsoft Website at this link.
Once your Power BI report is published and public, follow these steps to add it to TelemetryTV:
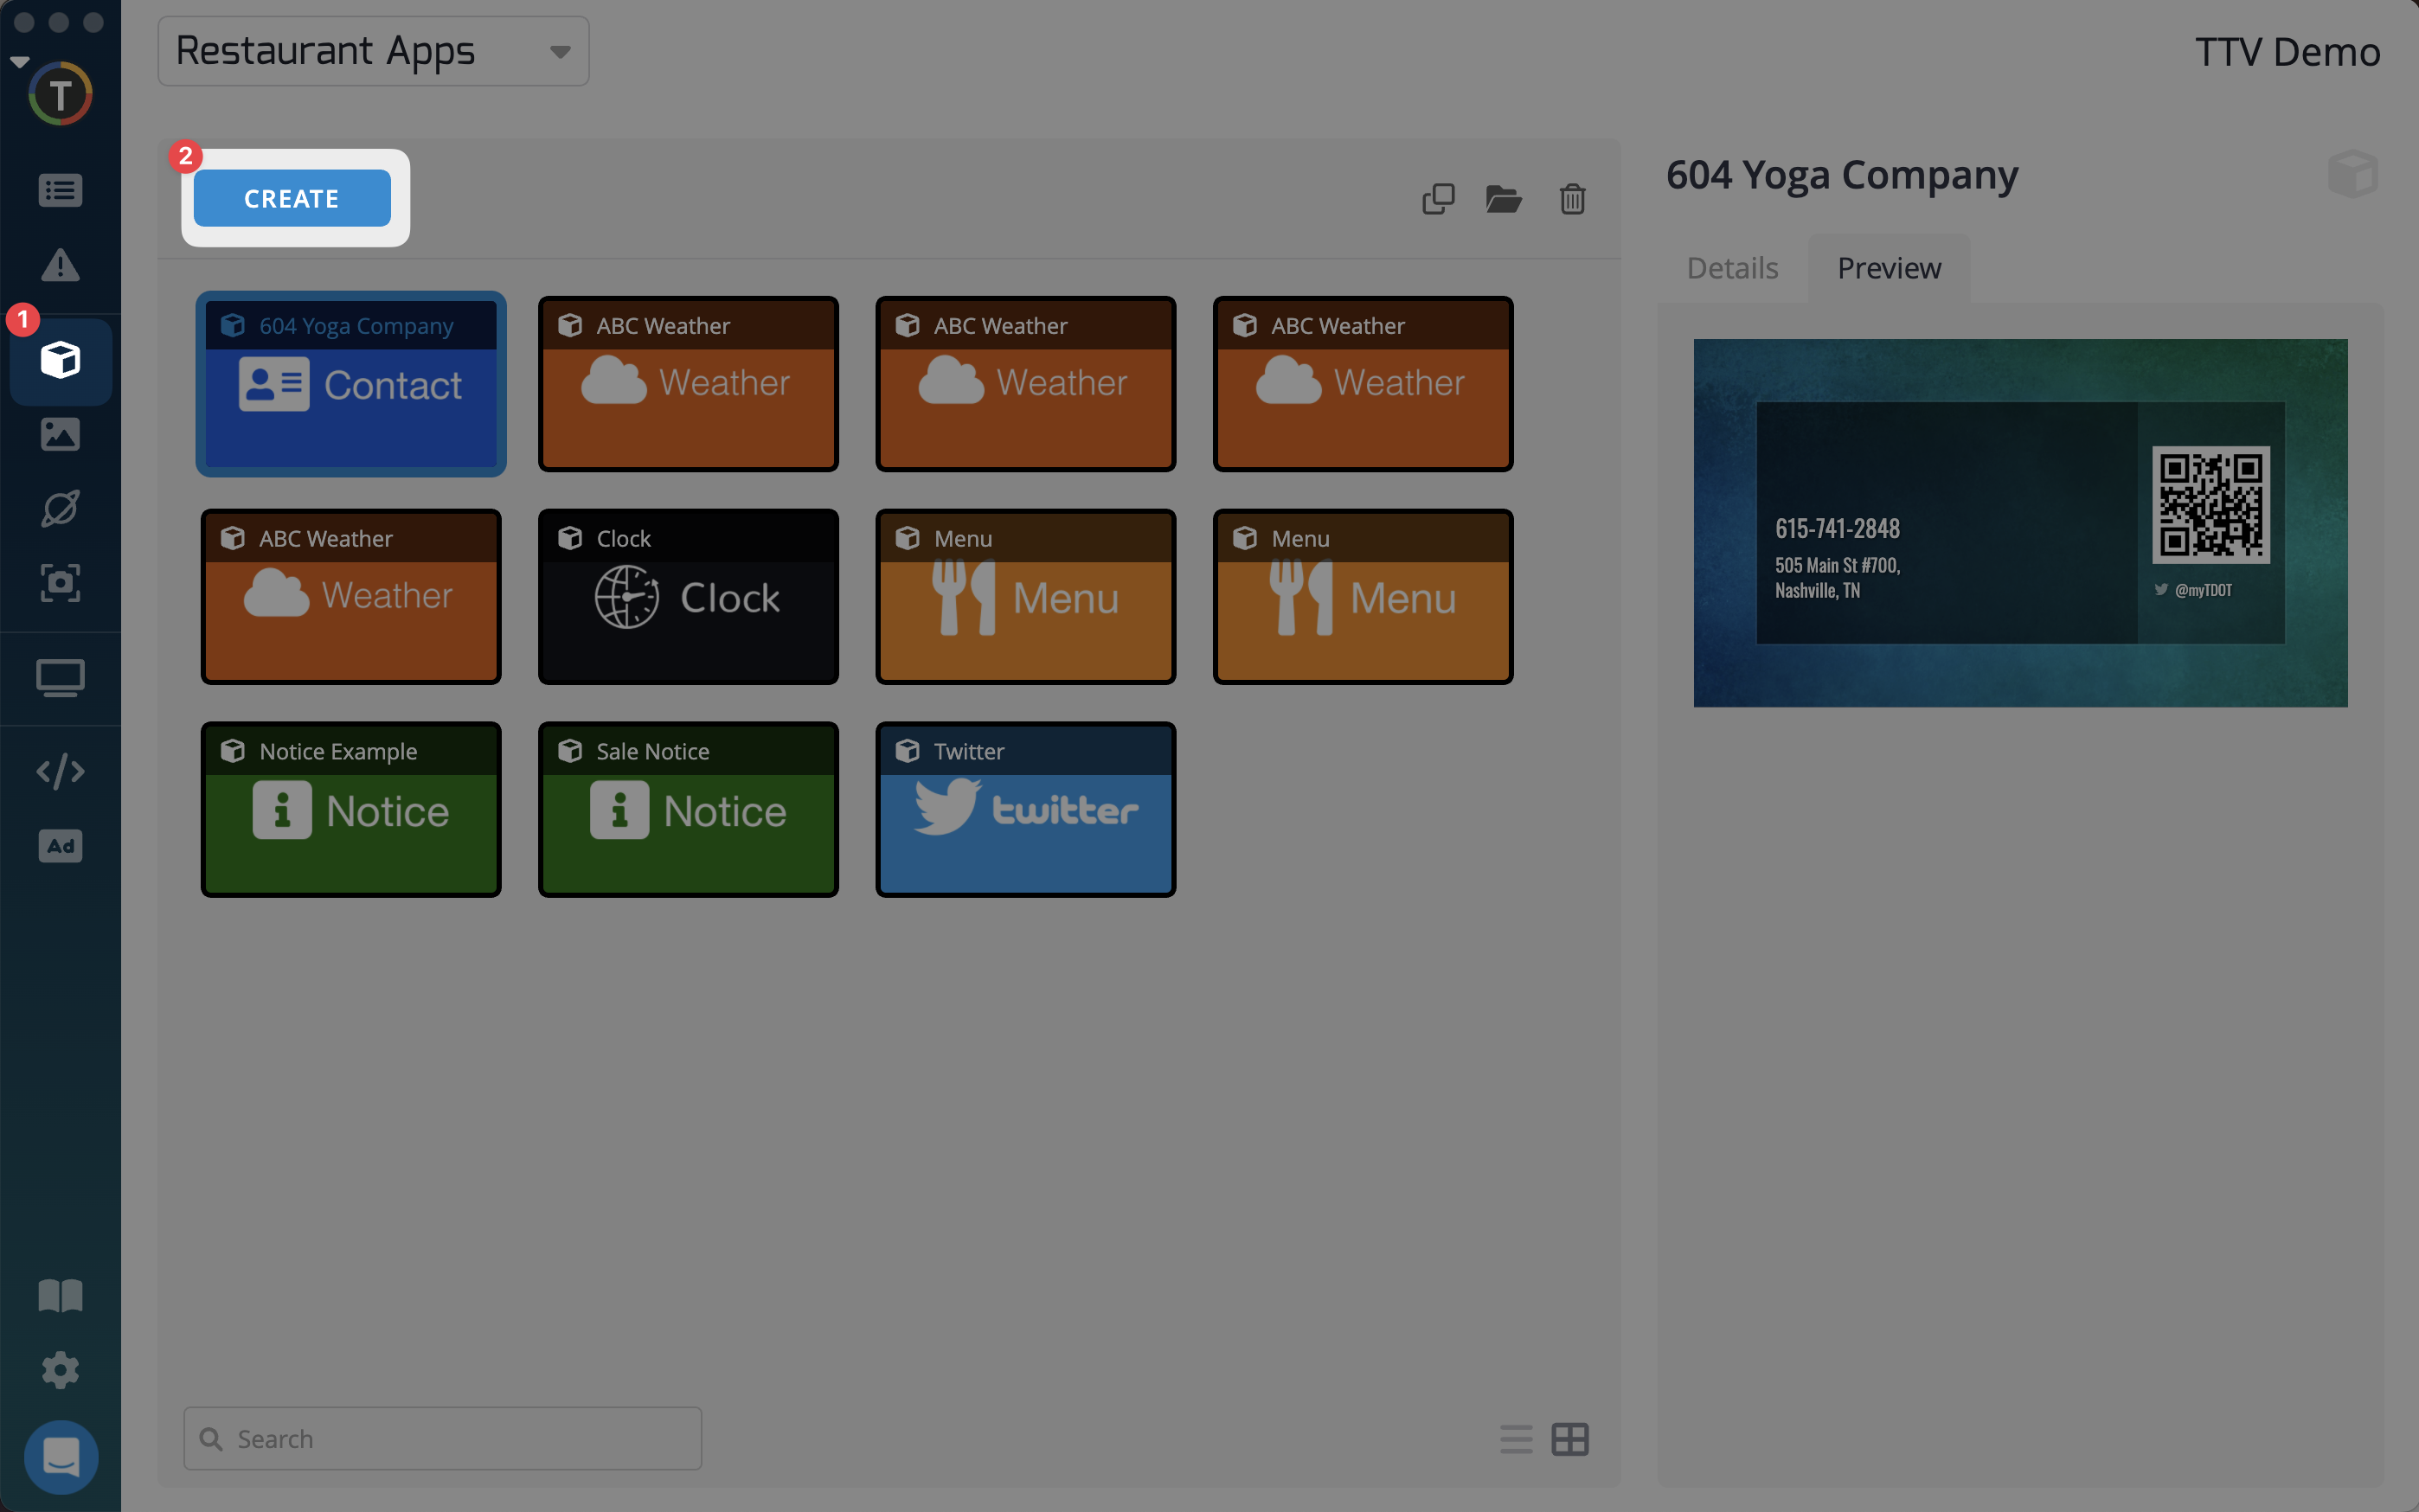
- Log in to your TelemetryTV account and navigate to the "Apps" tab in the lefthand toolbar.
- Click the "Create" button to launch the application list.
- Once you select the Website App, you will see a list of Website Properties on the right which you will need to configure.
- Add a name for your app in the Label section.
- Paste the URL of your published Power BI report in the URL section.
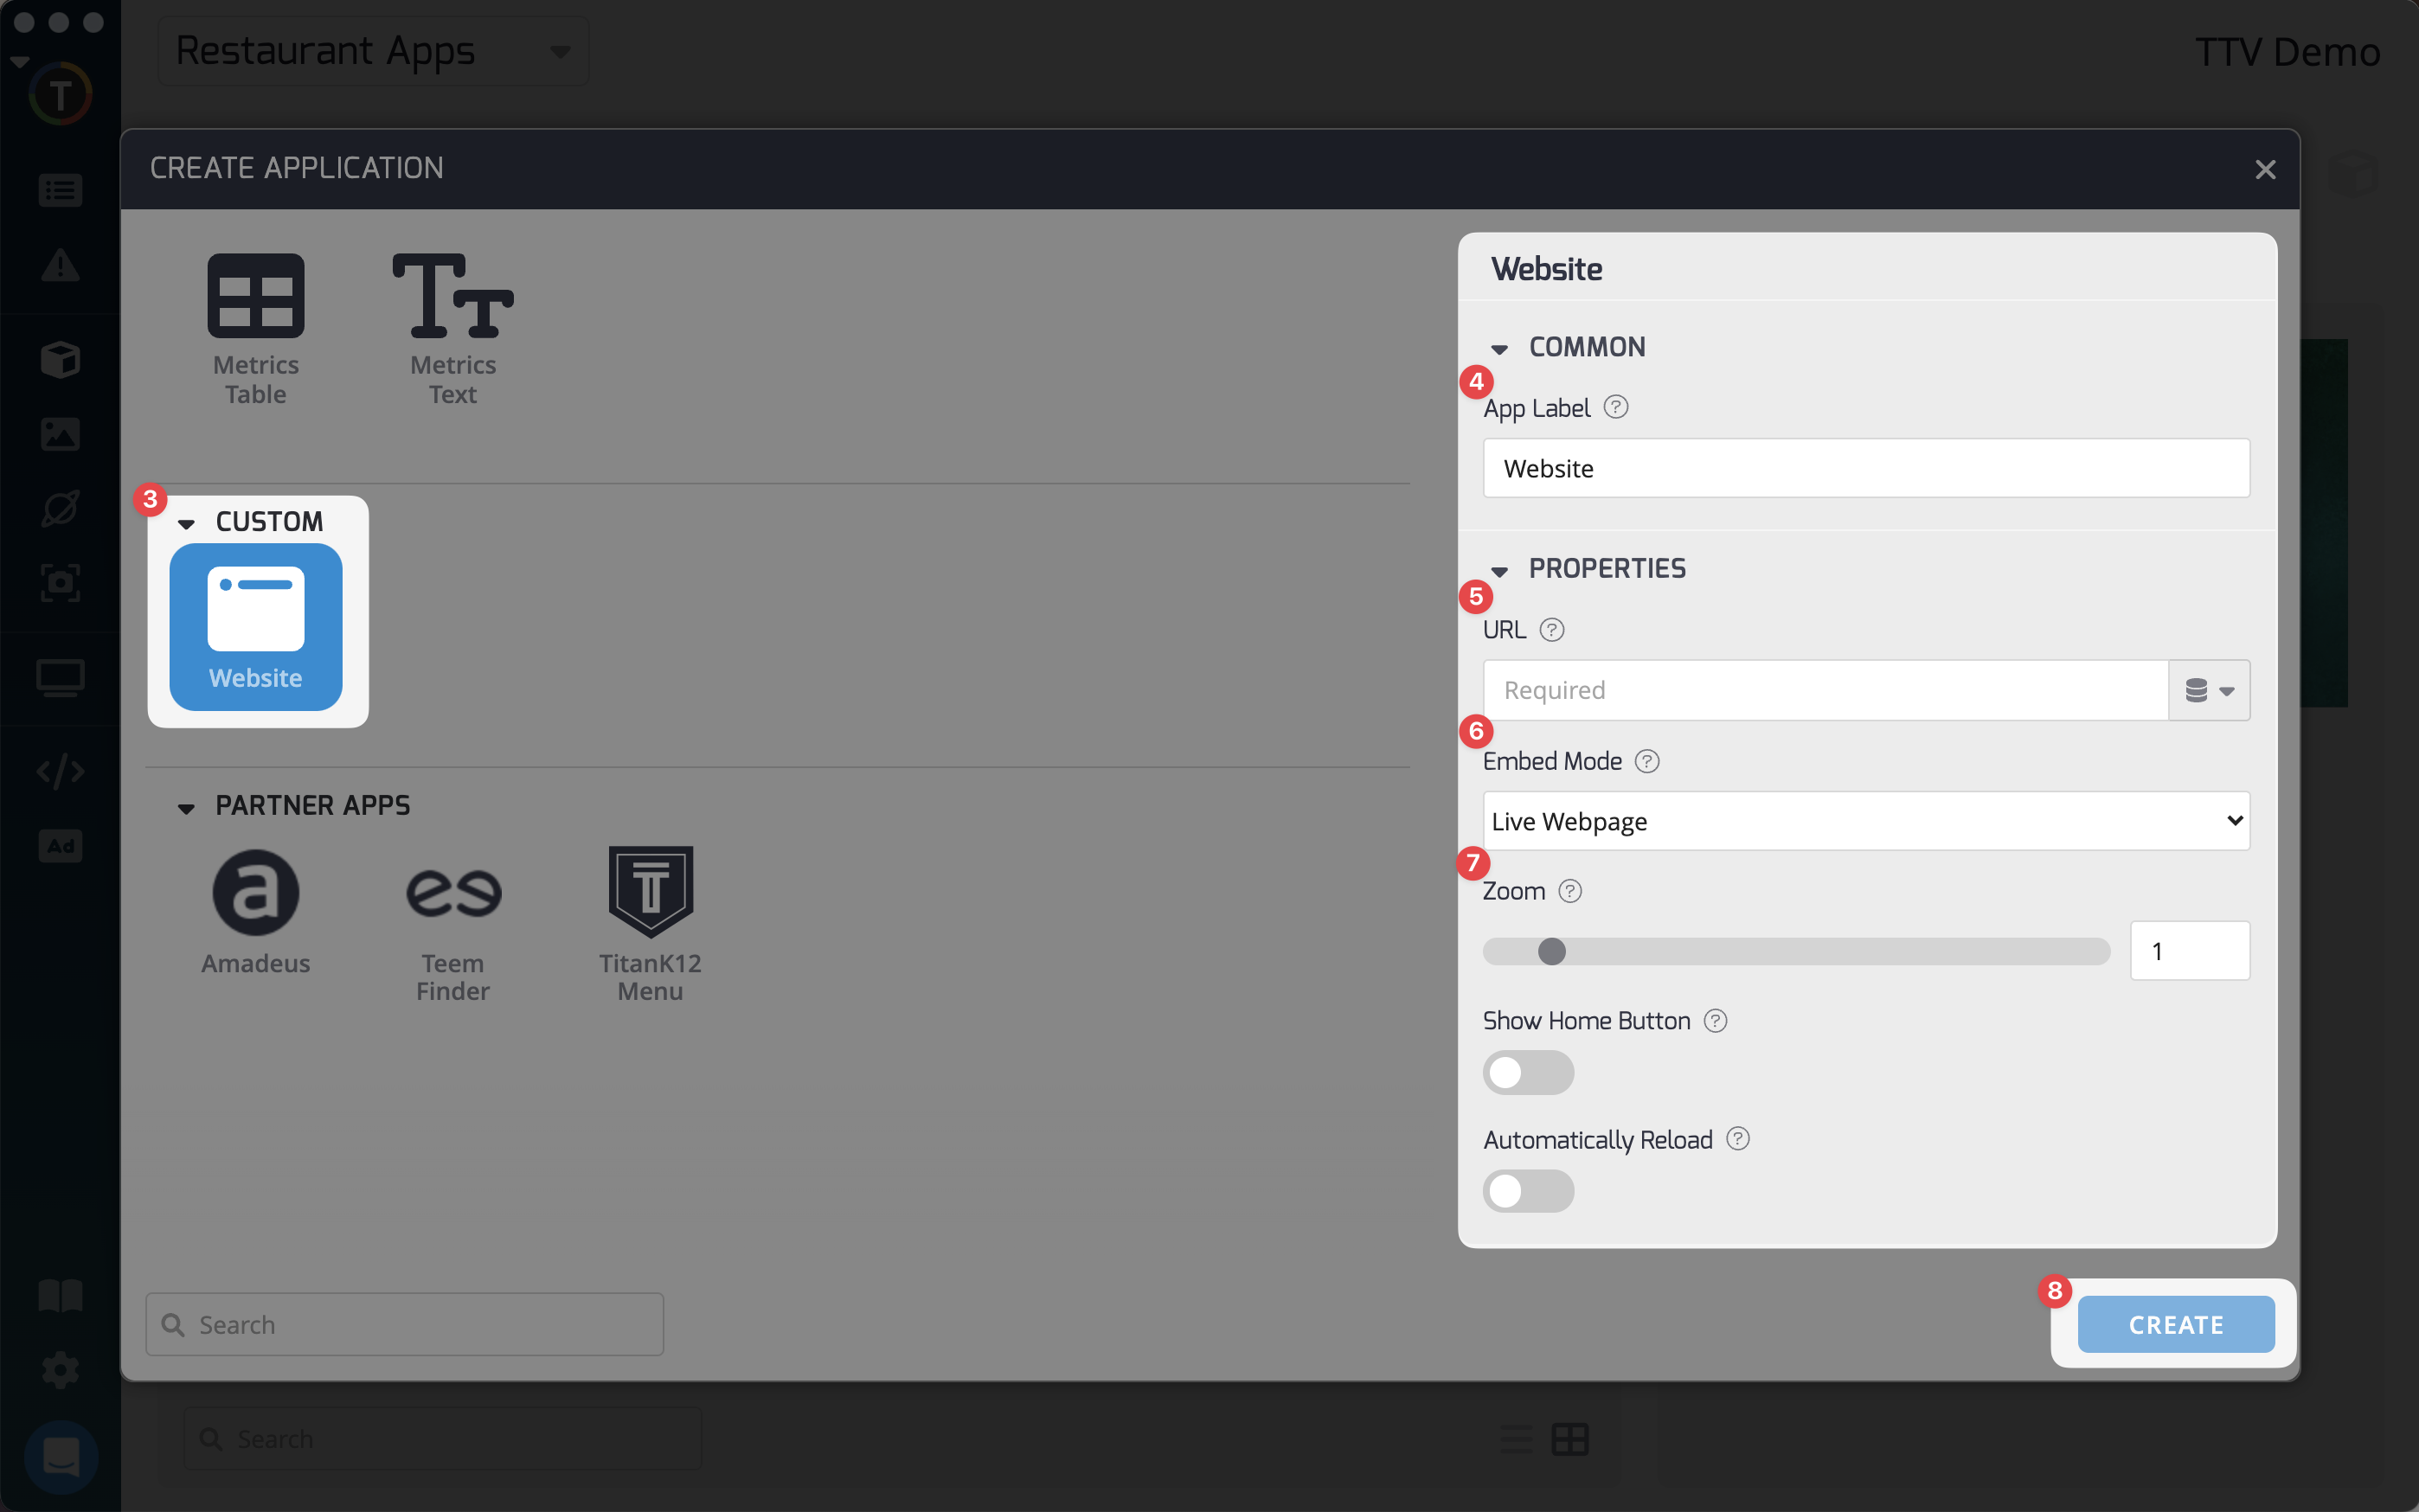
- Select "Live Webpage" as the Embed Mode. This will display your Power BI report live on TelemetryTV. Or select “Capture as Image” and this will capture an image of your report periodically every time the “Refresh Interval” elapses.
- Select a size based on the screen resolution on which you will be displaying the Power BI report.
- Save your settings and add the Website App to your TelemetryTV playlist.
That's it! Your Power BI report should now be displayed live on TelemetryTV. If you have any issues, make sure that your Power BI report is published and public, and try adjusting the settings in the Website Properties section of the Website App.
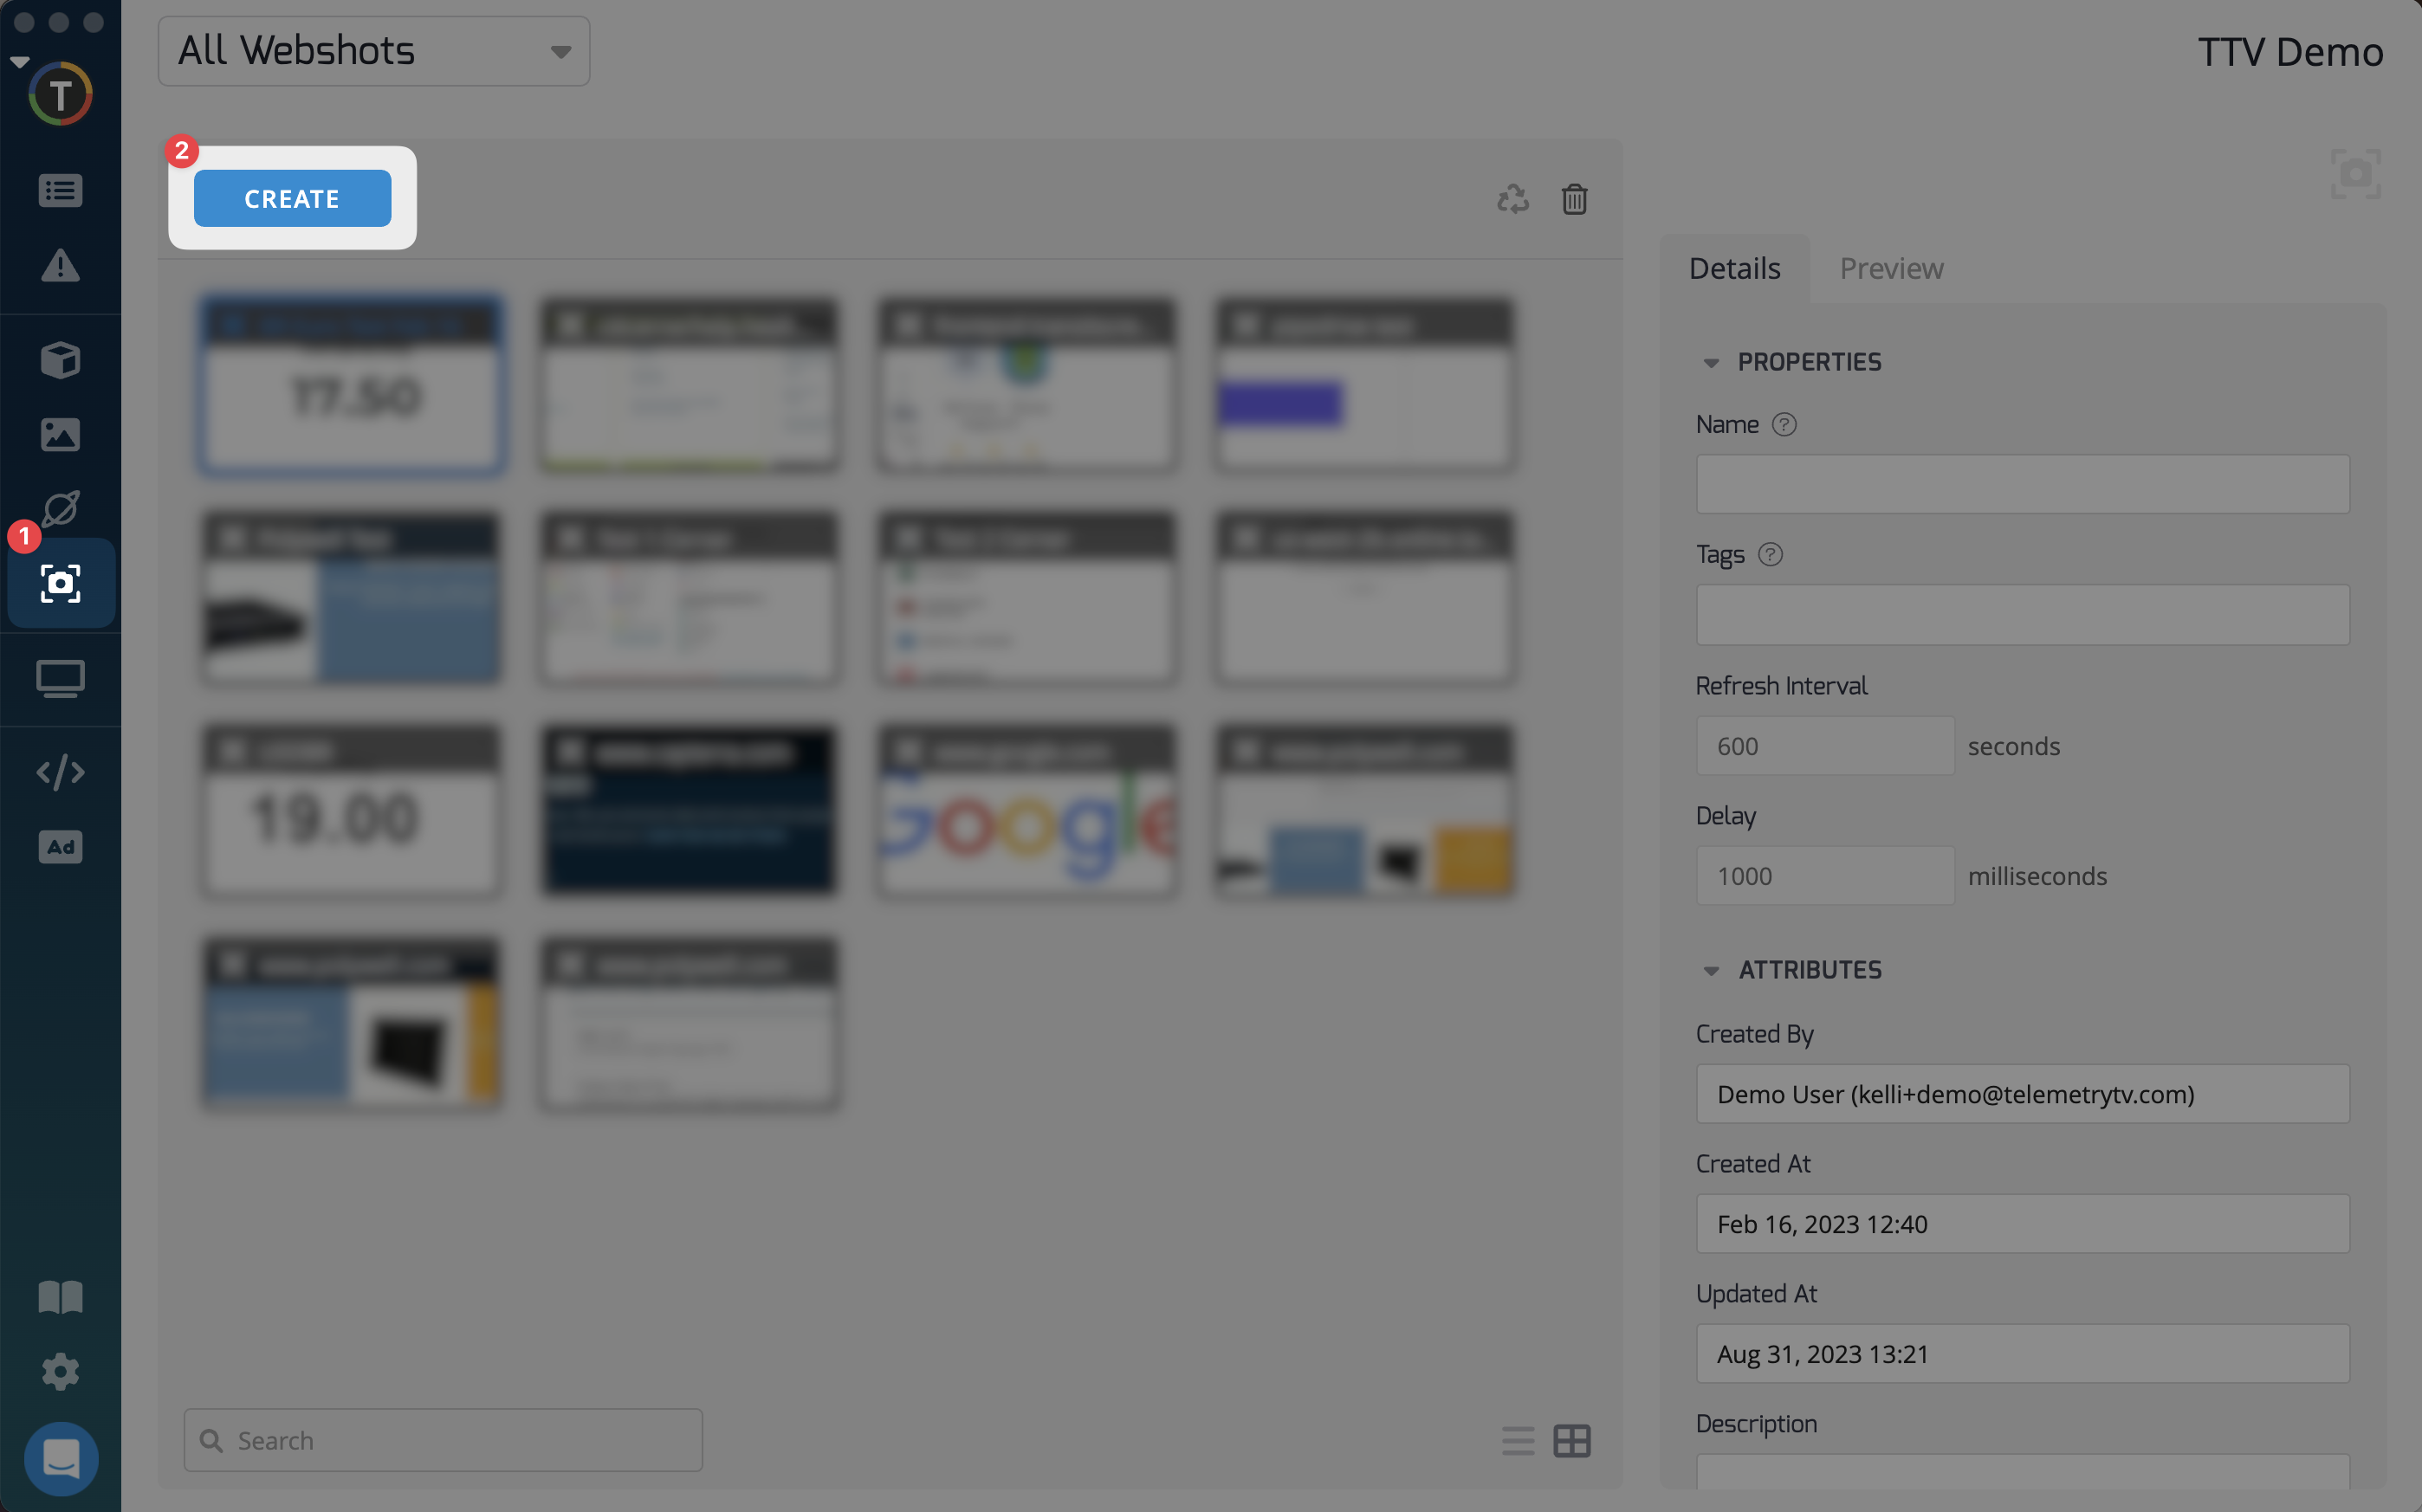
View Microsoft PowerBi Visuals Using Webshots
In addition to using the Website App, you can also capture PowerBI files and display them on your digital signage.
To view Microsoft PowerBI files using Webshots, follow these steps:
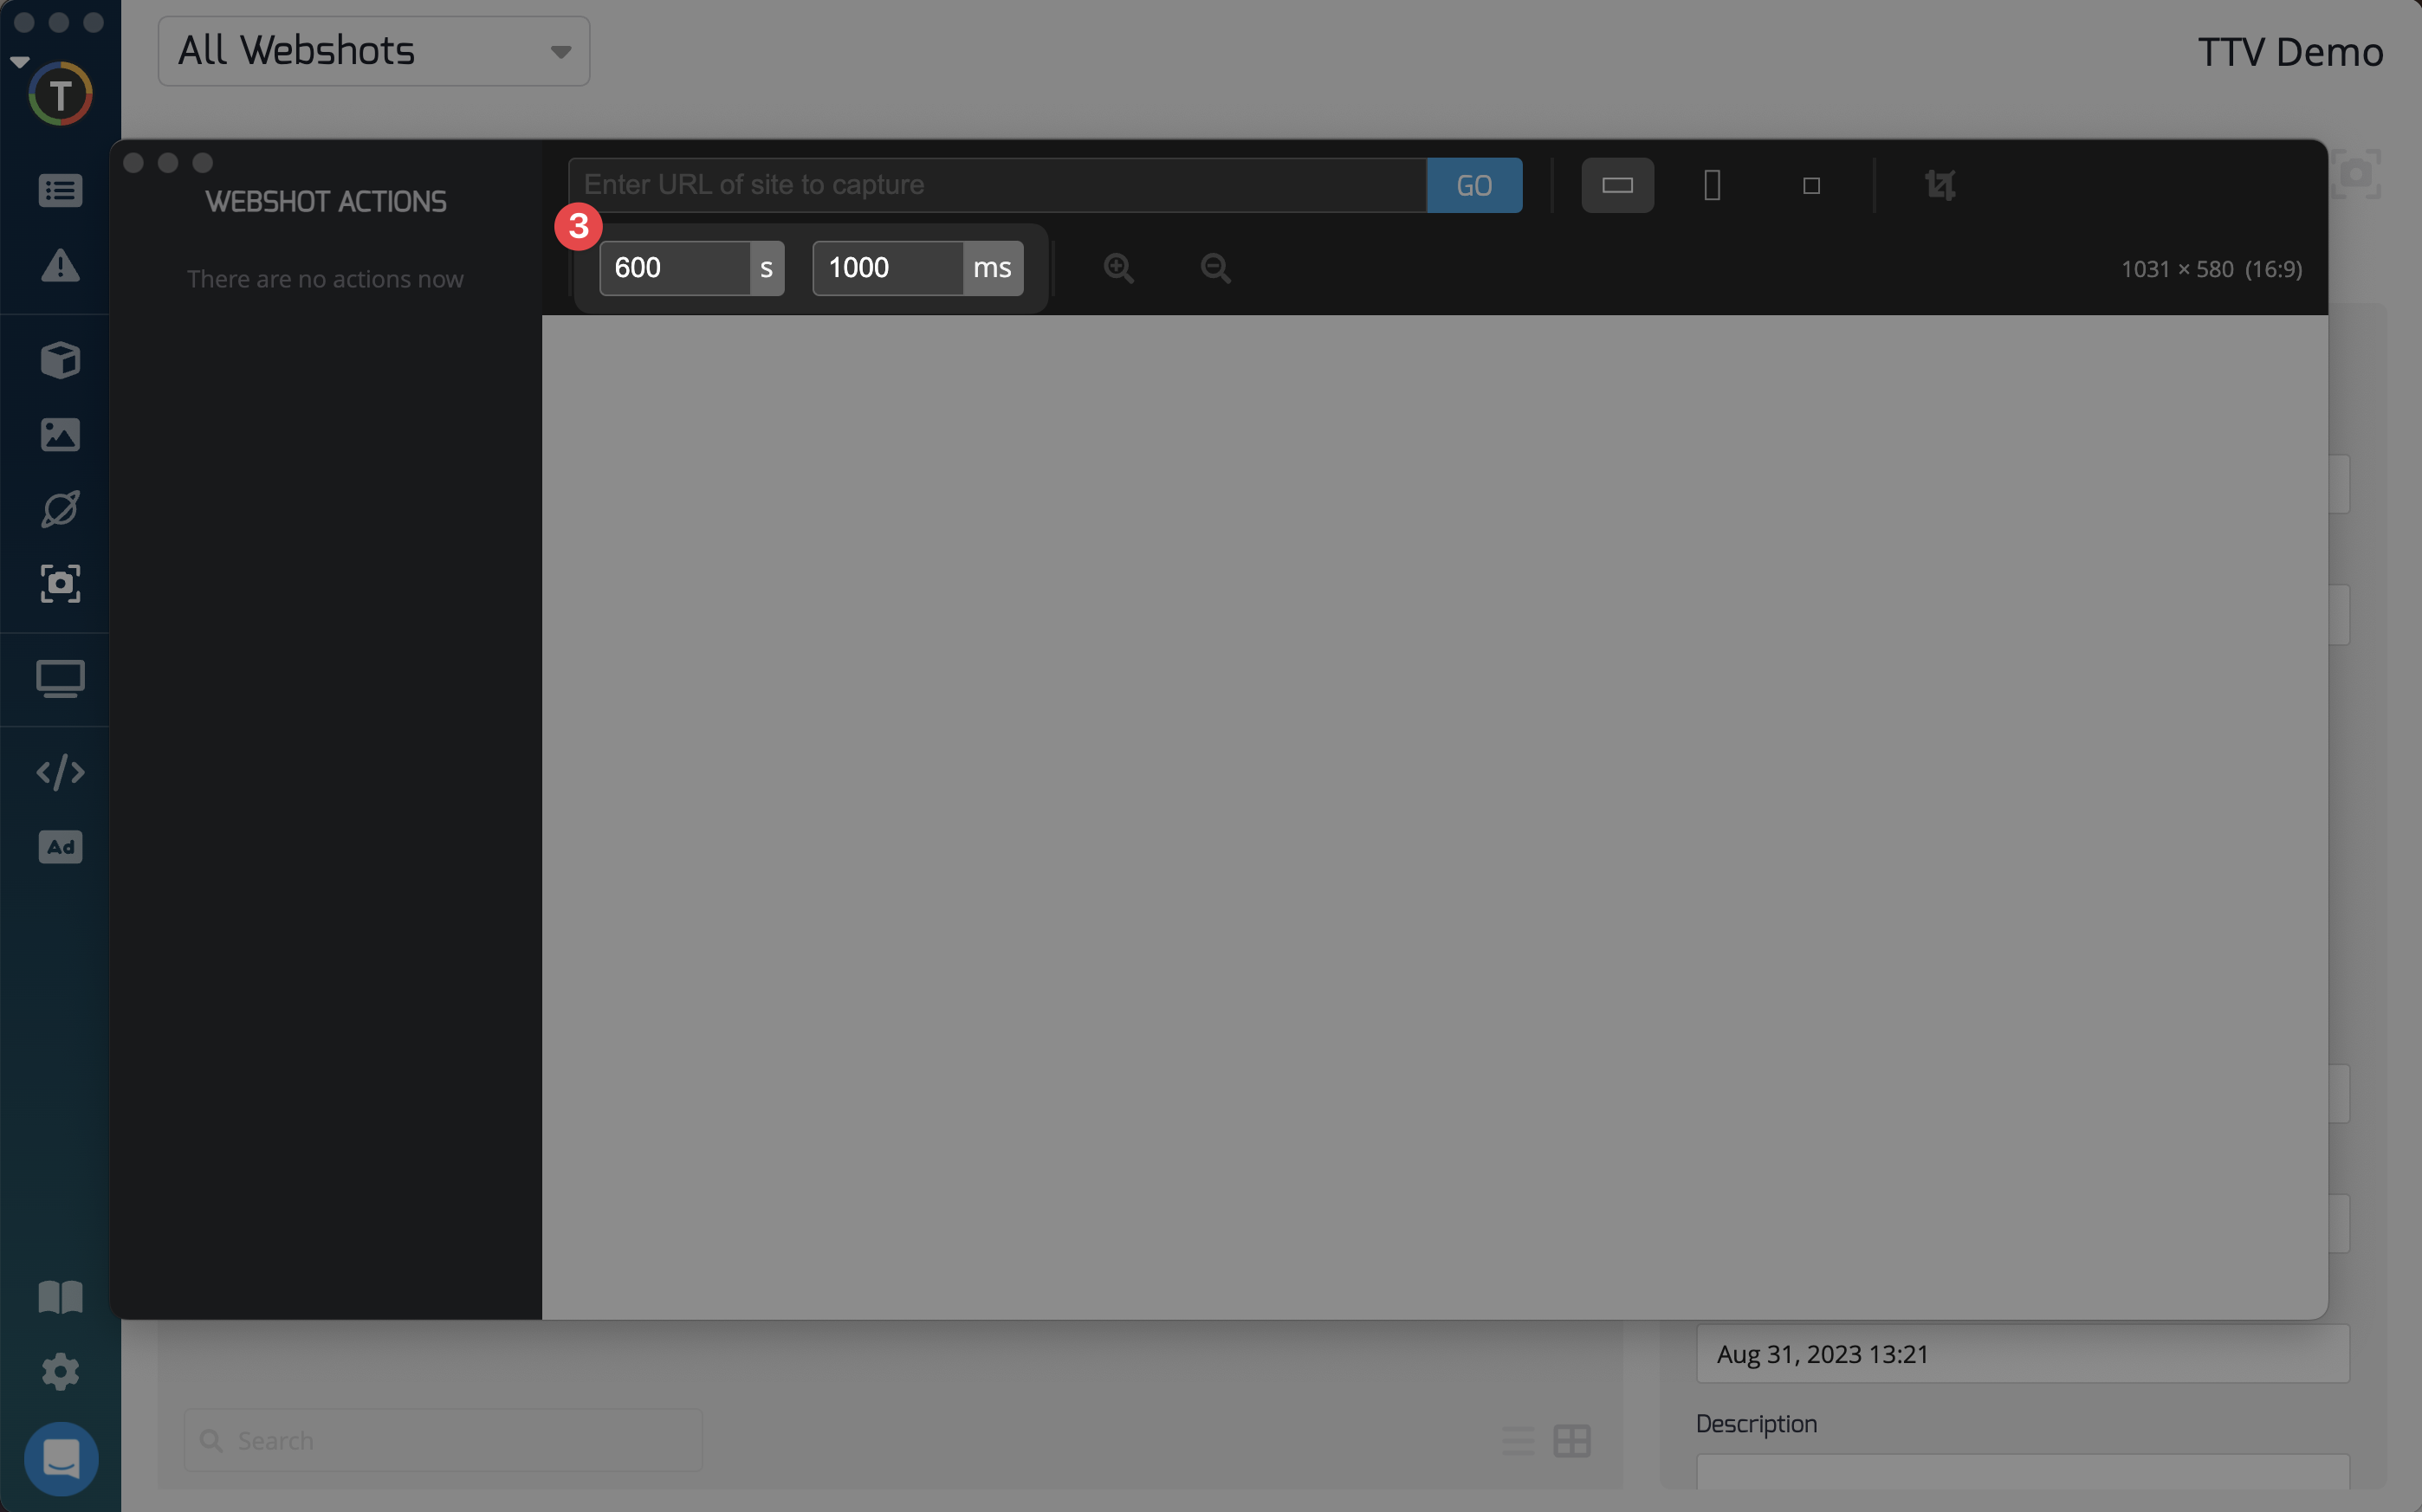
- Click on the "Webshots" option on the left-hand side menu, and click on the "Create" button.
- Enter the URL for your PowerBI file in the "URL" field.
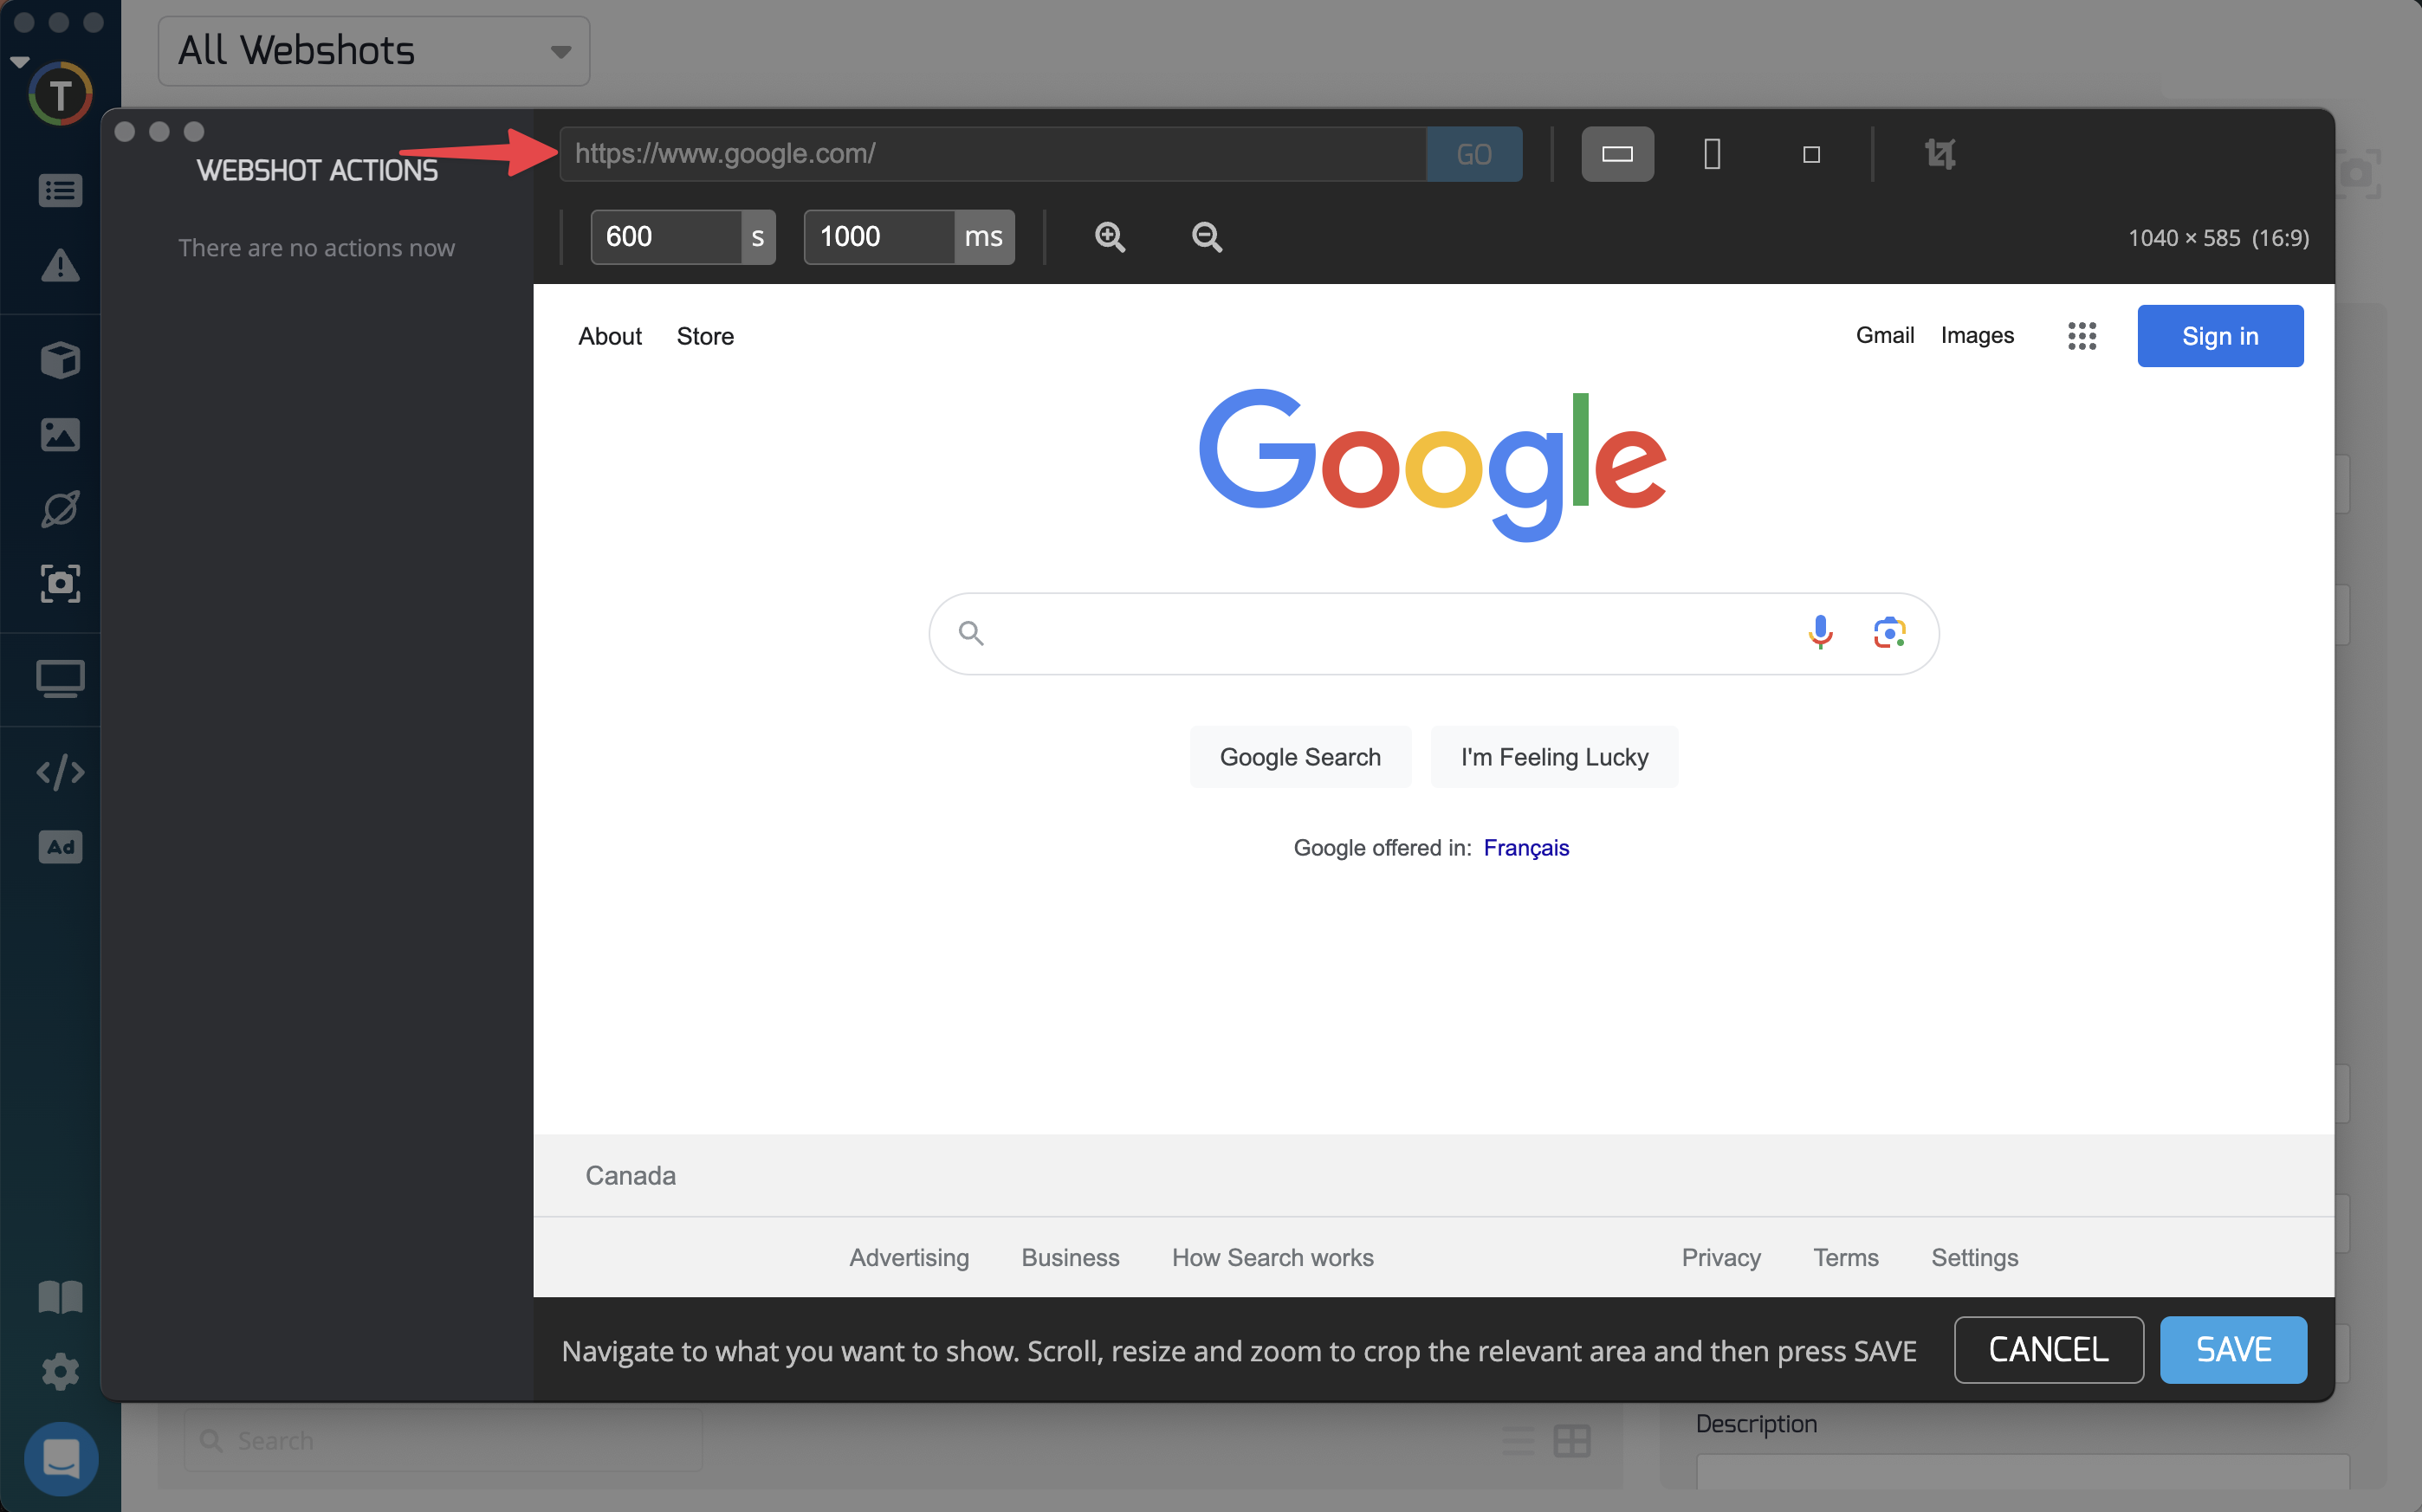
Using the Correct URL
Ensure that you enter the URL for the PowerBI file and not the URL for the PowerBI service. For more information, please see visit Microsoft’s website to view how to obtain a URL for PowerBI files
- In the "Delay" field, enter the number of seconds and milliseconds you want the Webshots to wait before capturing the screenshot. This is useful if you need to allow time for the PowerBI file to load before taking the screenshot.
- Users can also customize the size and orientation of the Webshot
- Click on the "Capture Webshot" button.
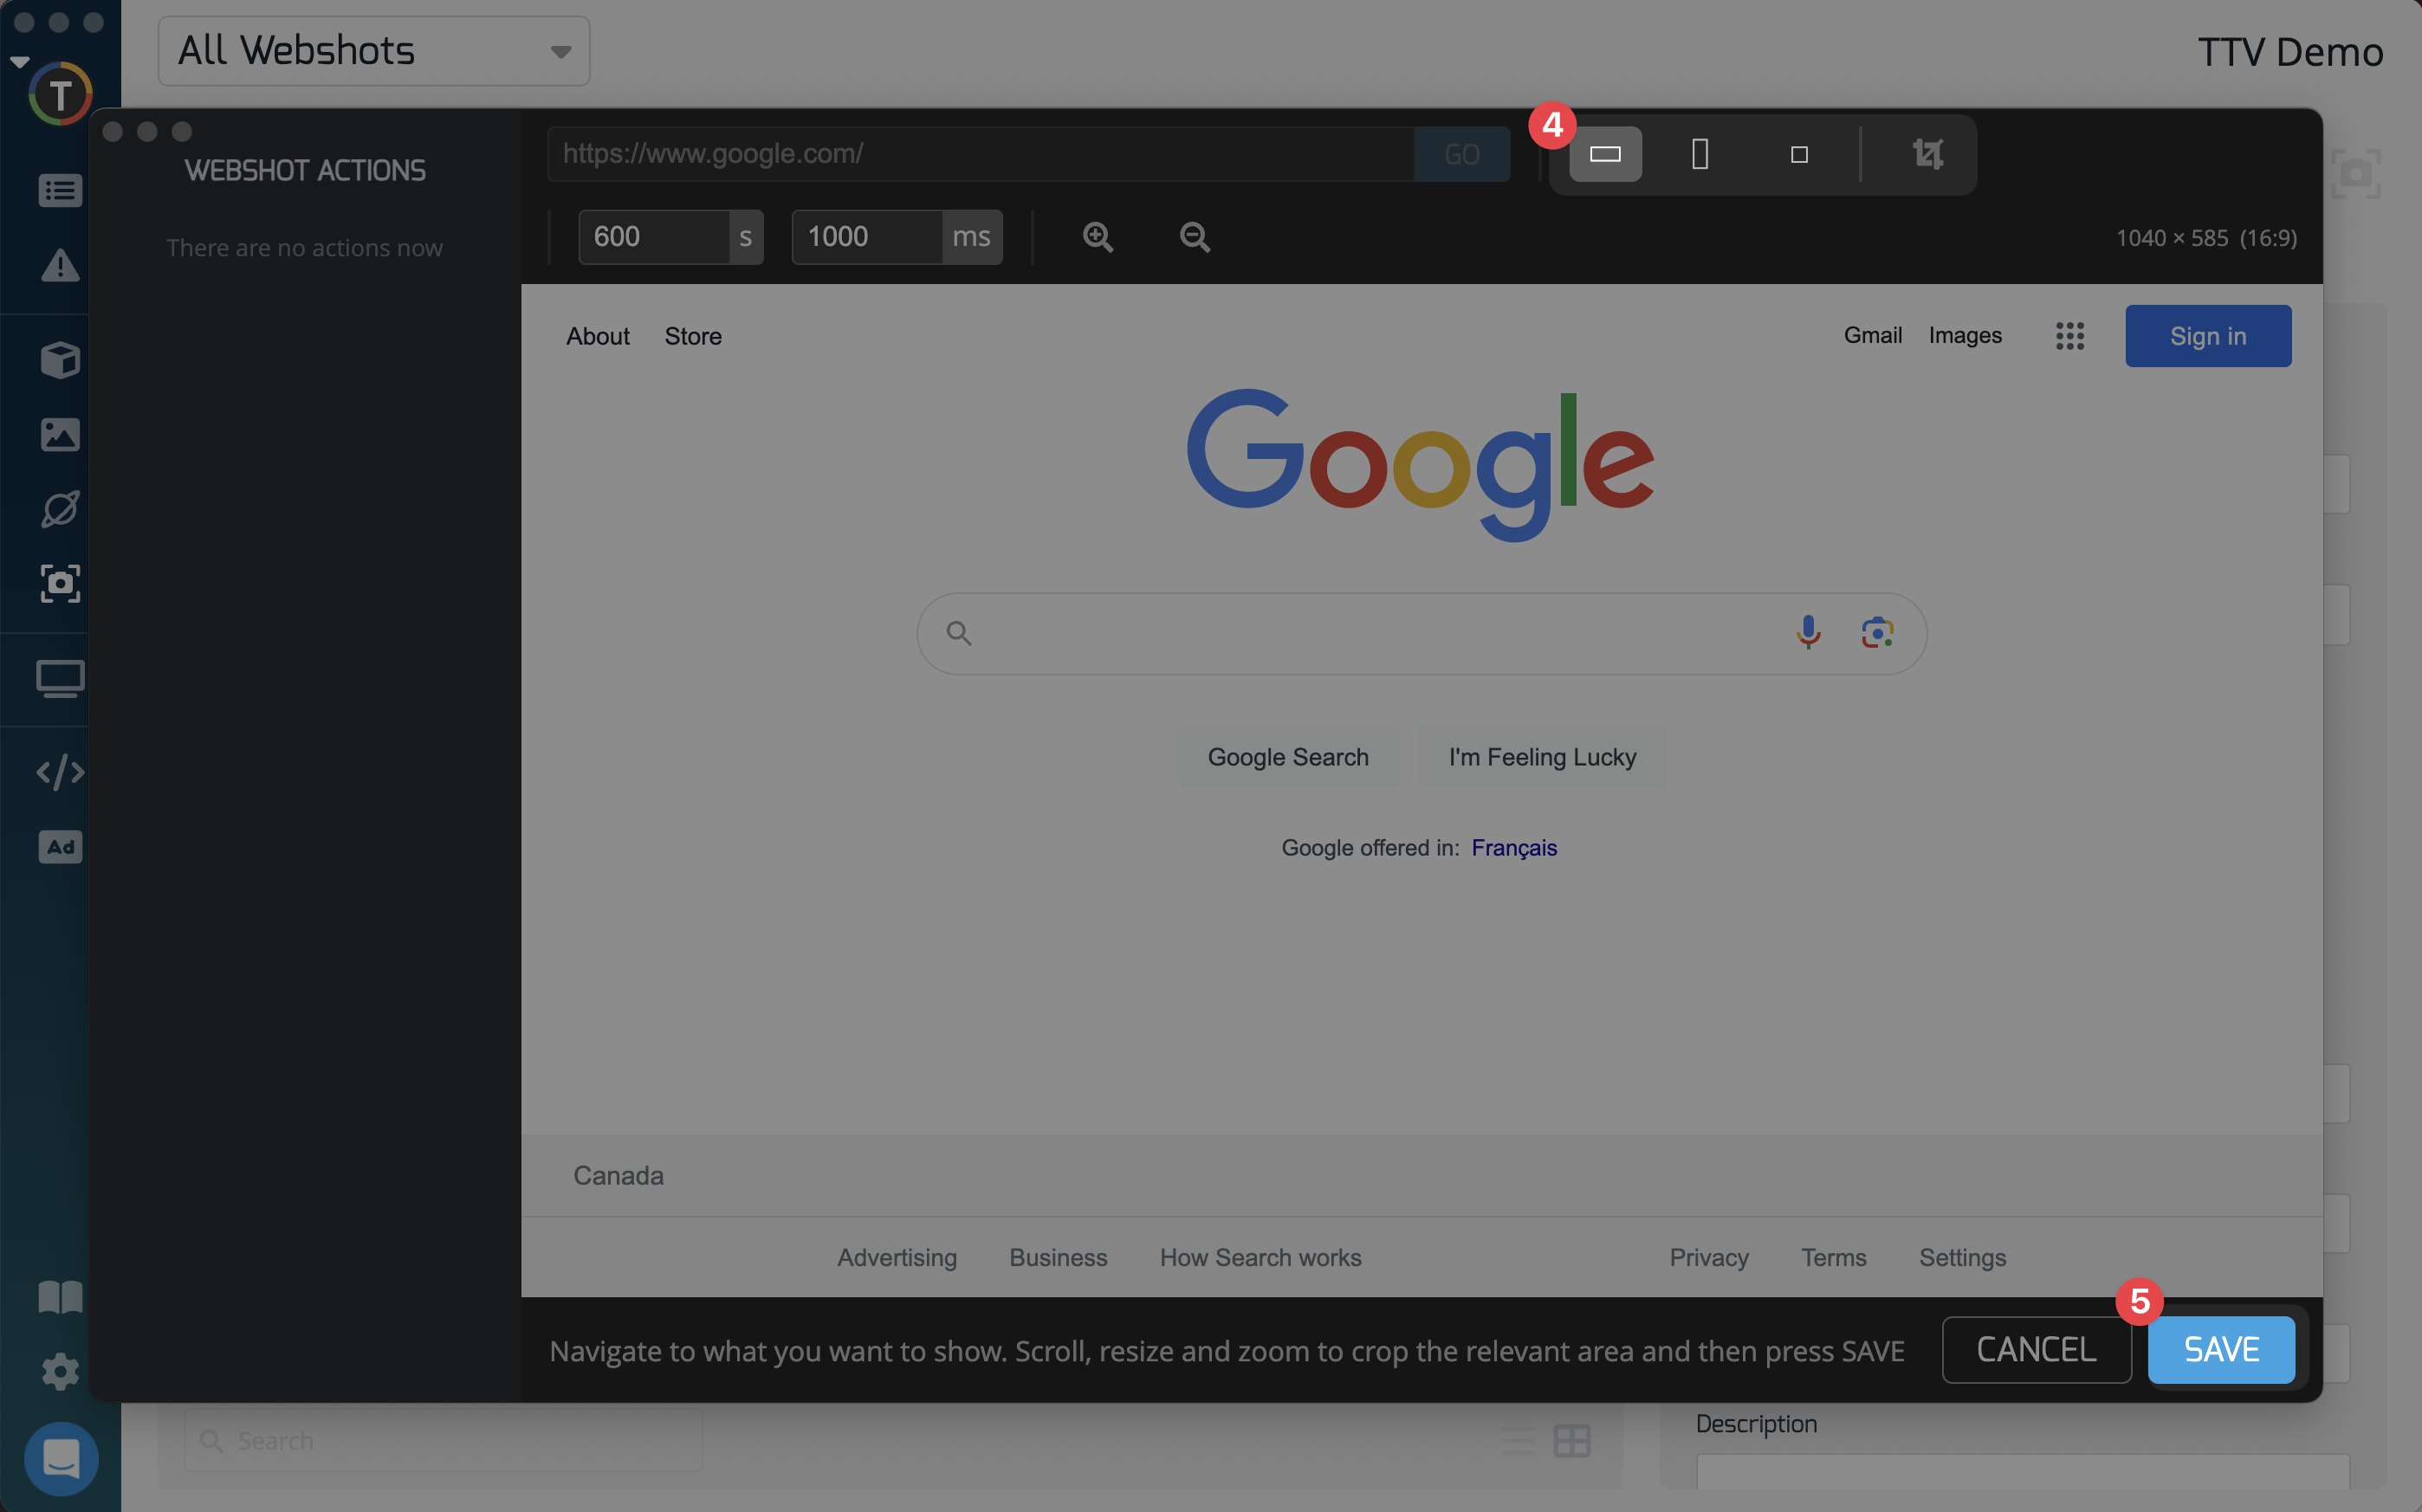
- You can now add the Webshot to a playlist of your choosing
That's it! You have successfully uploaded a PowerBI file using Webshots. If you have any questions or encounter any issues, please contact our support team.
Updated 7 months ago