
Federated Authentication
Using SAML and SCIM Okta with TelemetryTV
Using Single Sign-on (SAML) with TelemetryTV
This guide demonstrates the process of understanding and configuring SAML (Security Assertion Markup Language) authentication in TelemetryTV. Here, you will get to know about key terms and the steps needed for settings configuration.
Understanding SAML
SAML is a communication tool based on XML that's used to authenticate user identities between organizations. Essentially, it allows users to log in using their credentials from third-party applications. For example, you can use an email address to verify your identity and log in to TelemetryTV.
SAML Workflow
SAML uses an open standard protocol where two distinct applications exchange information about user attributes and their relationships. This "handshake" process involves an Identity Provider (iDP) and a Service Provider (SP). The iDP verifies the user's identity, and the SP, which is TelemetryTV in our case, allows the authenticated user access.
Configuring SAML with TelemetryTV
You'll need to configure your SAML credentials inside the Service Provider (TelemetryTV App). These include the Entity ID, Sign-in URL, and Certificate, which you can obtain from your iDP like Azure or Okta. Also, you'll need to provide a Team Name, a user-defined term to represent a group of users.
Service Provider Configuration
Here are the steps to configure SAML in TelemetryTV:
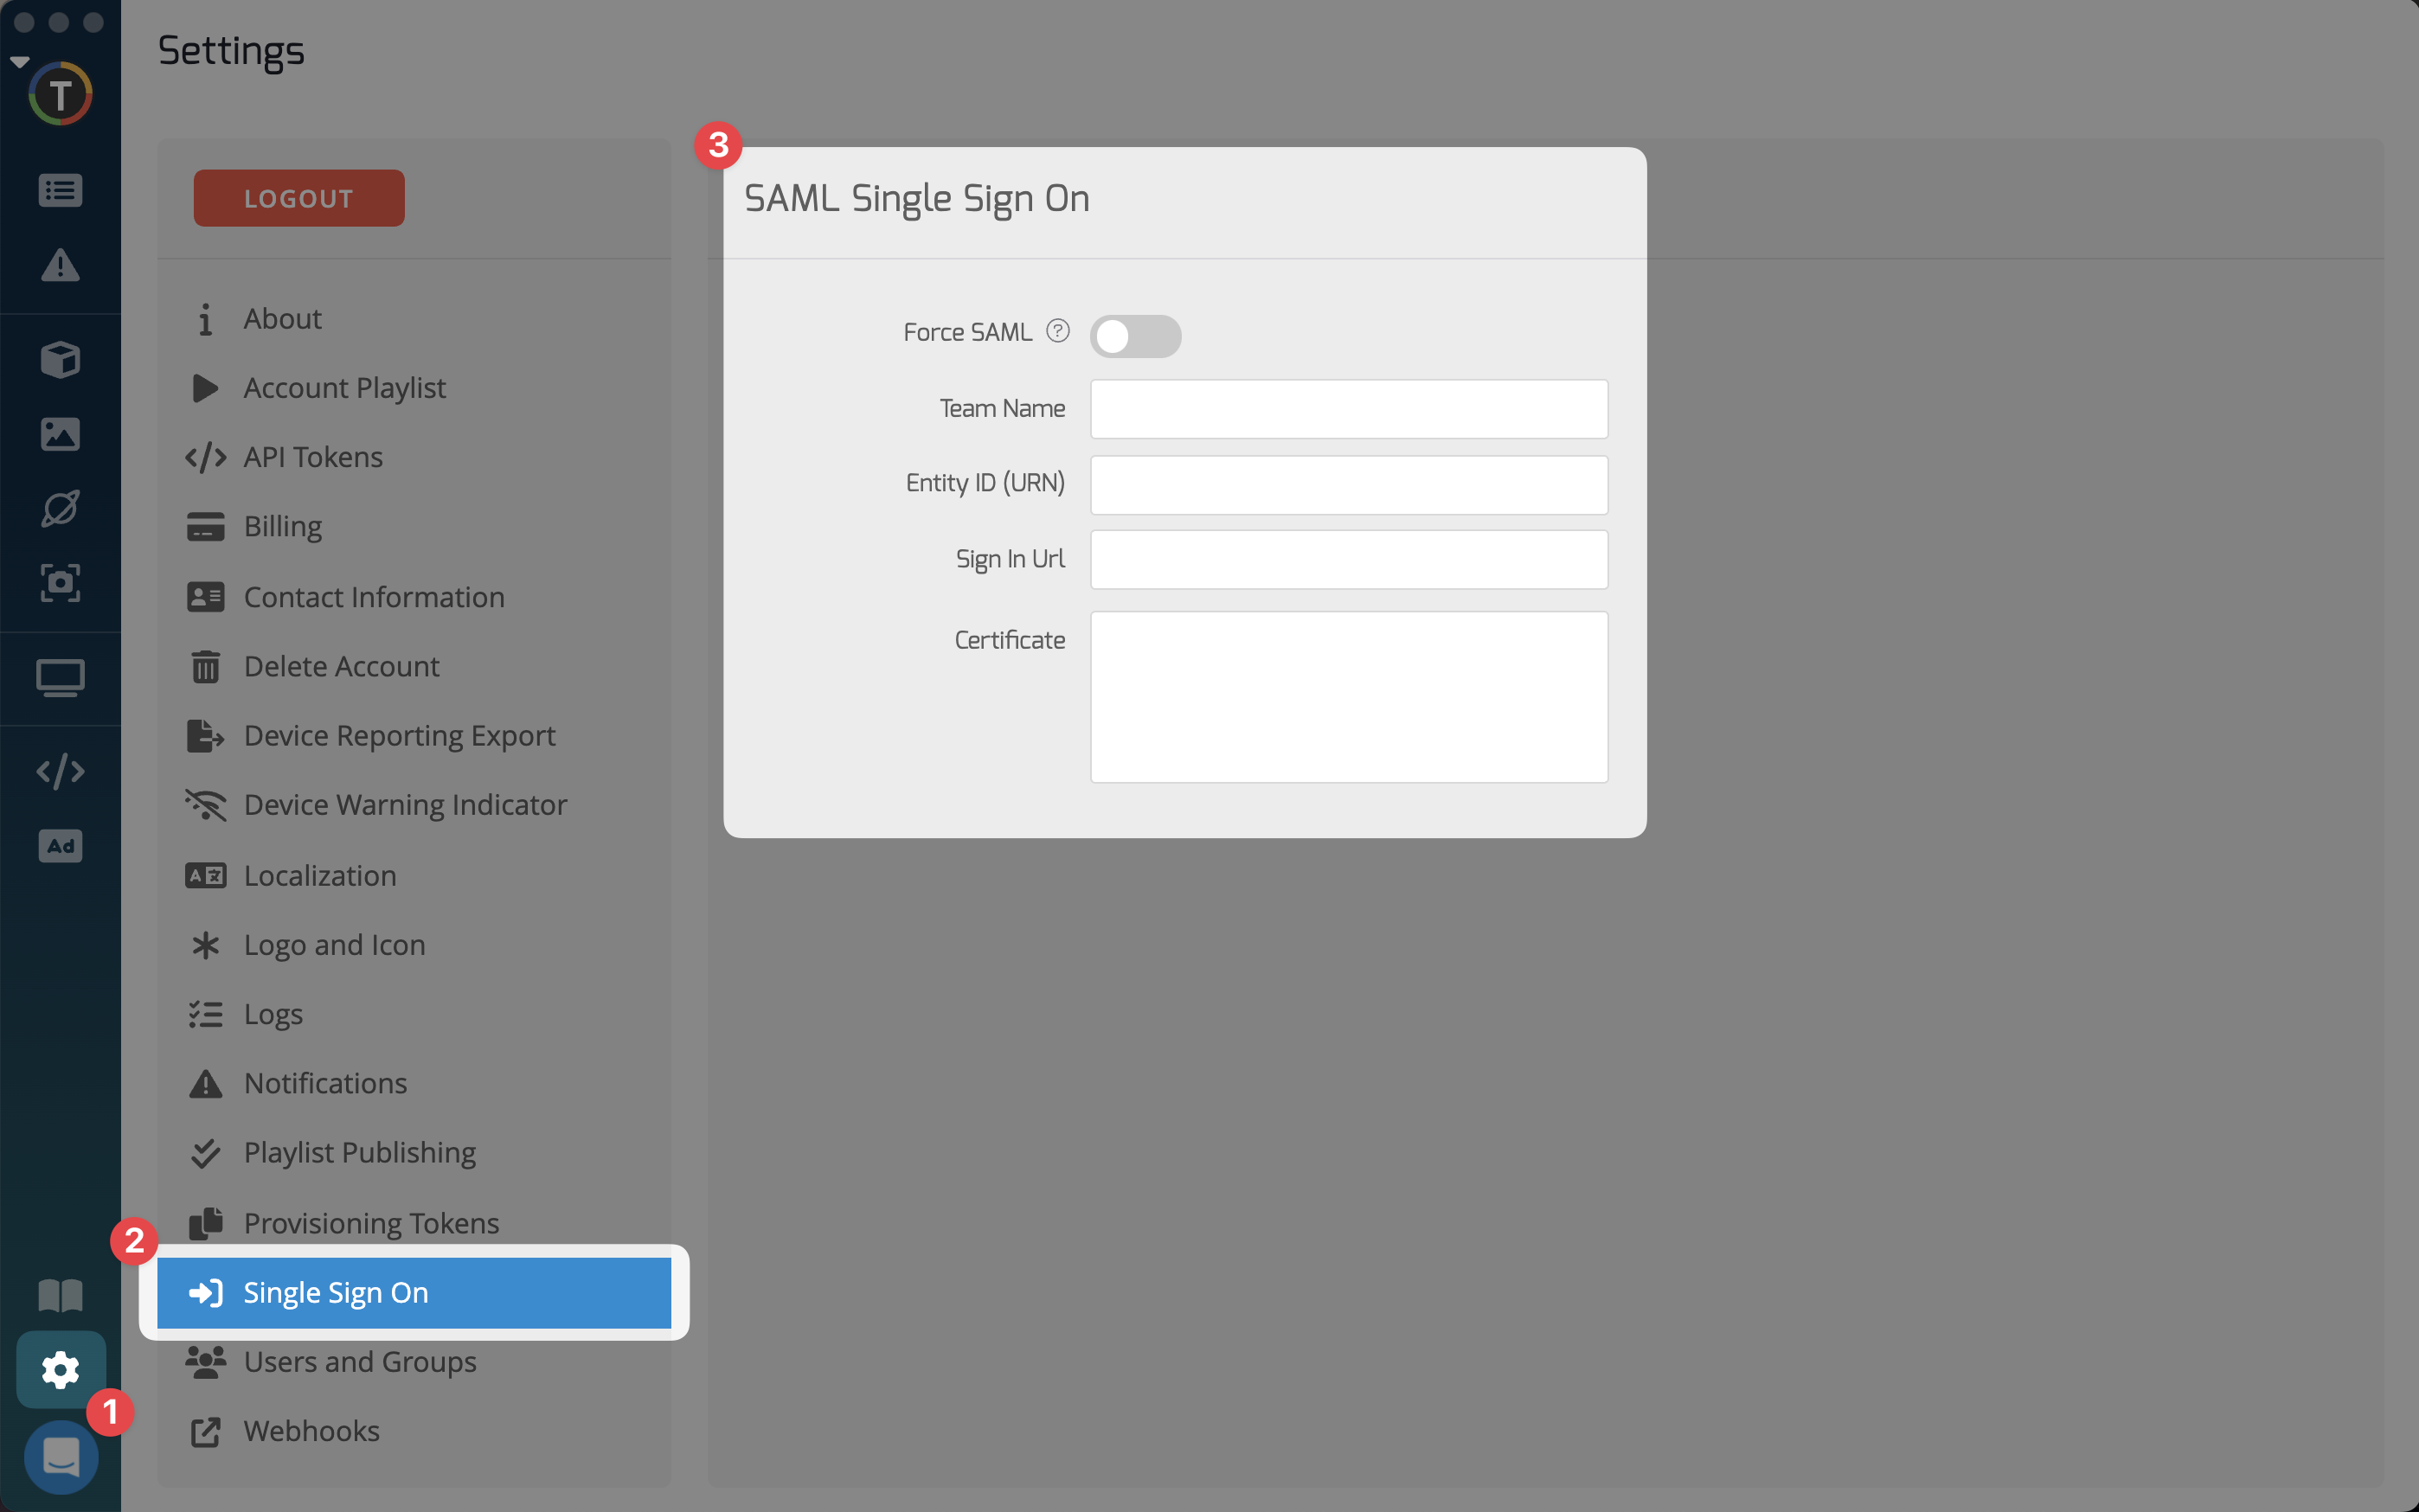
1. Open TelemetryTV App
navigate to 'Settings'> 'Single Sign-On'.
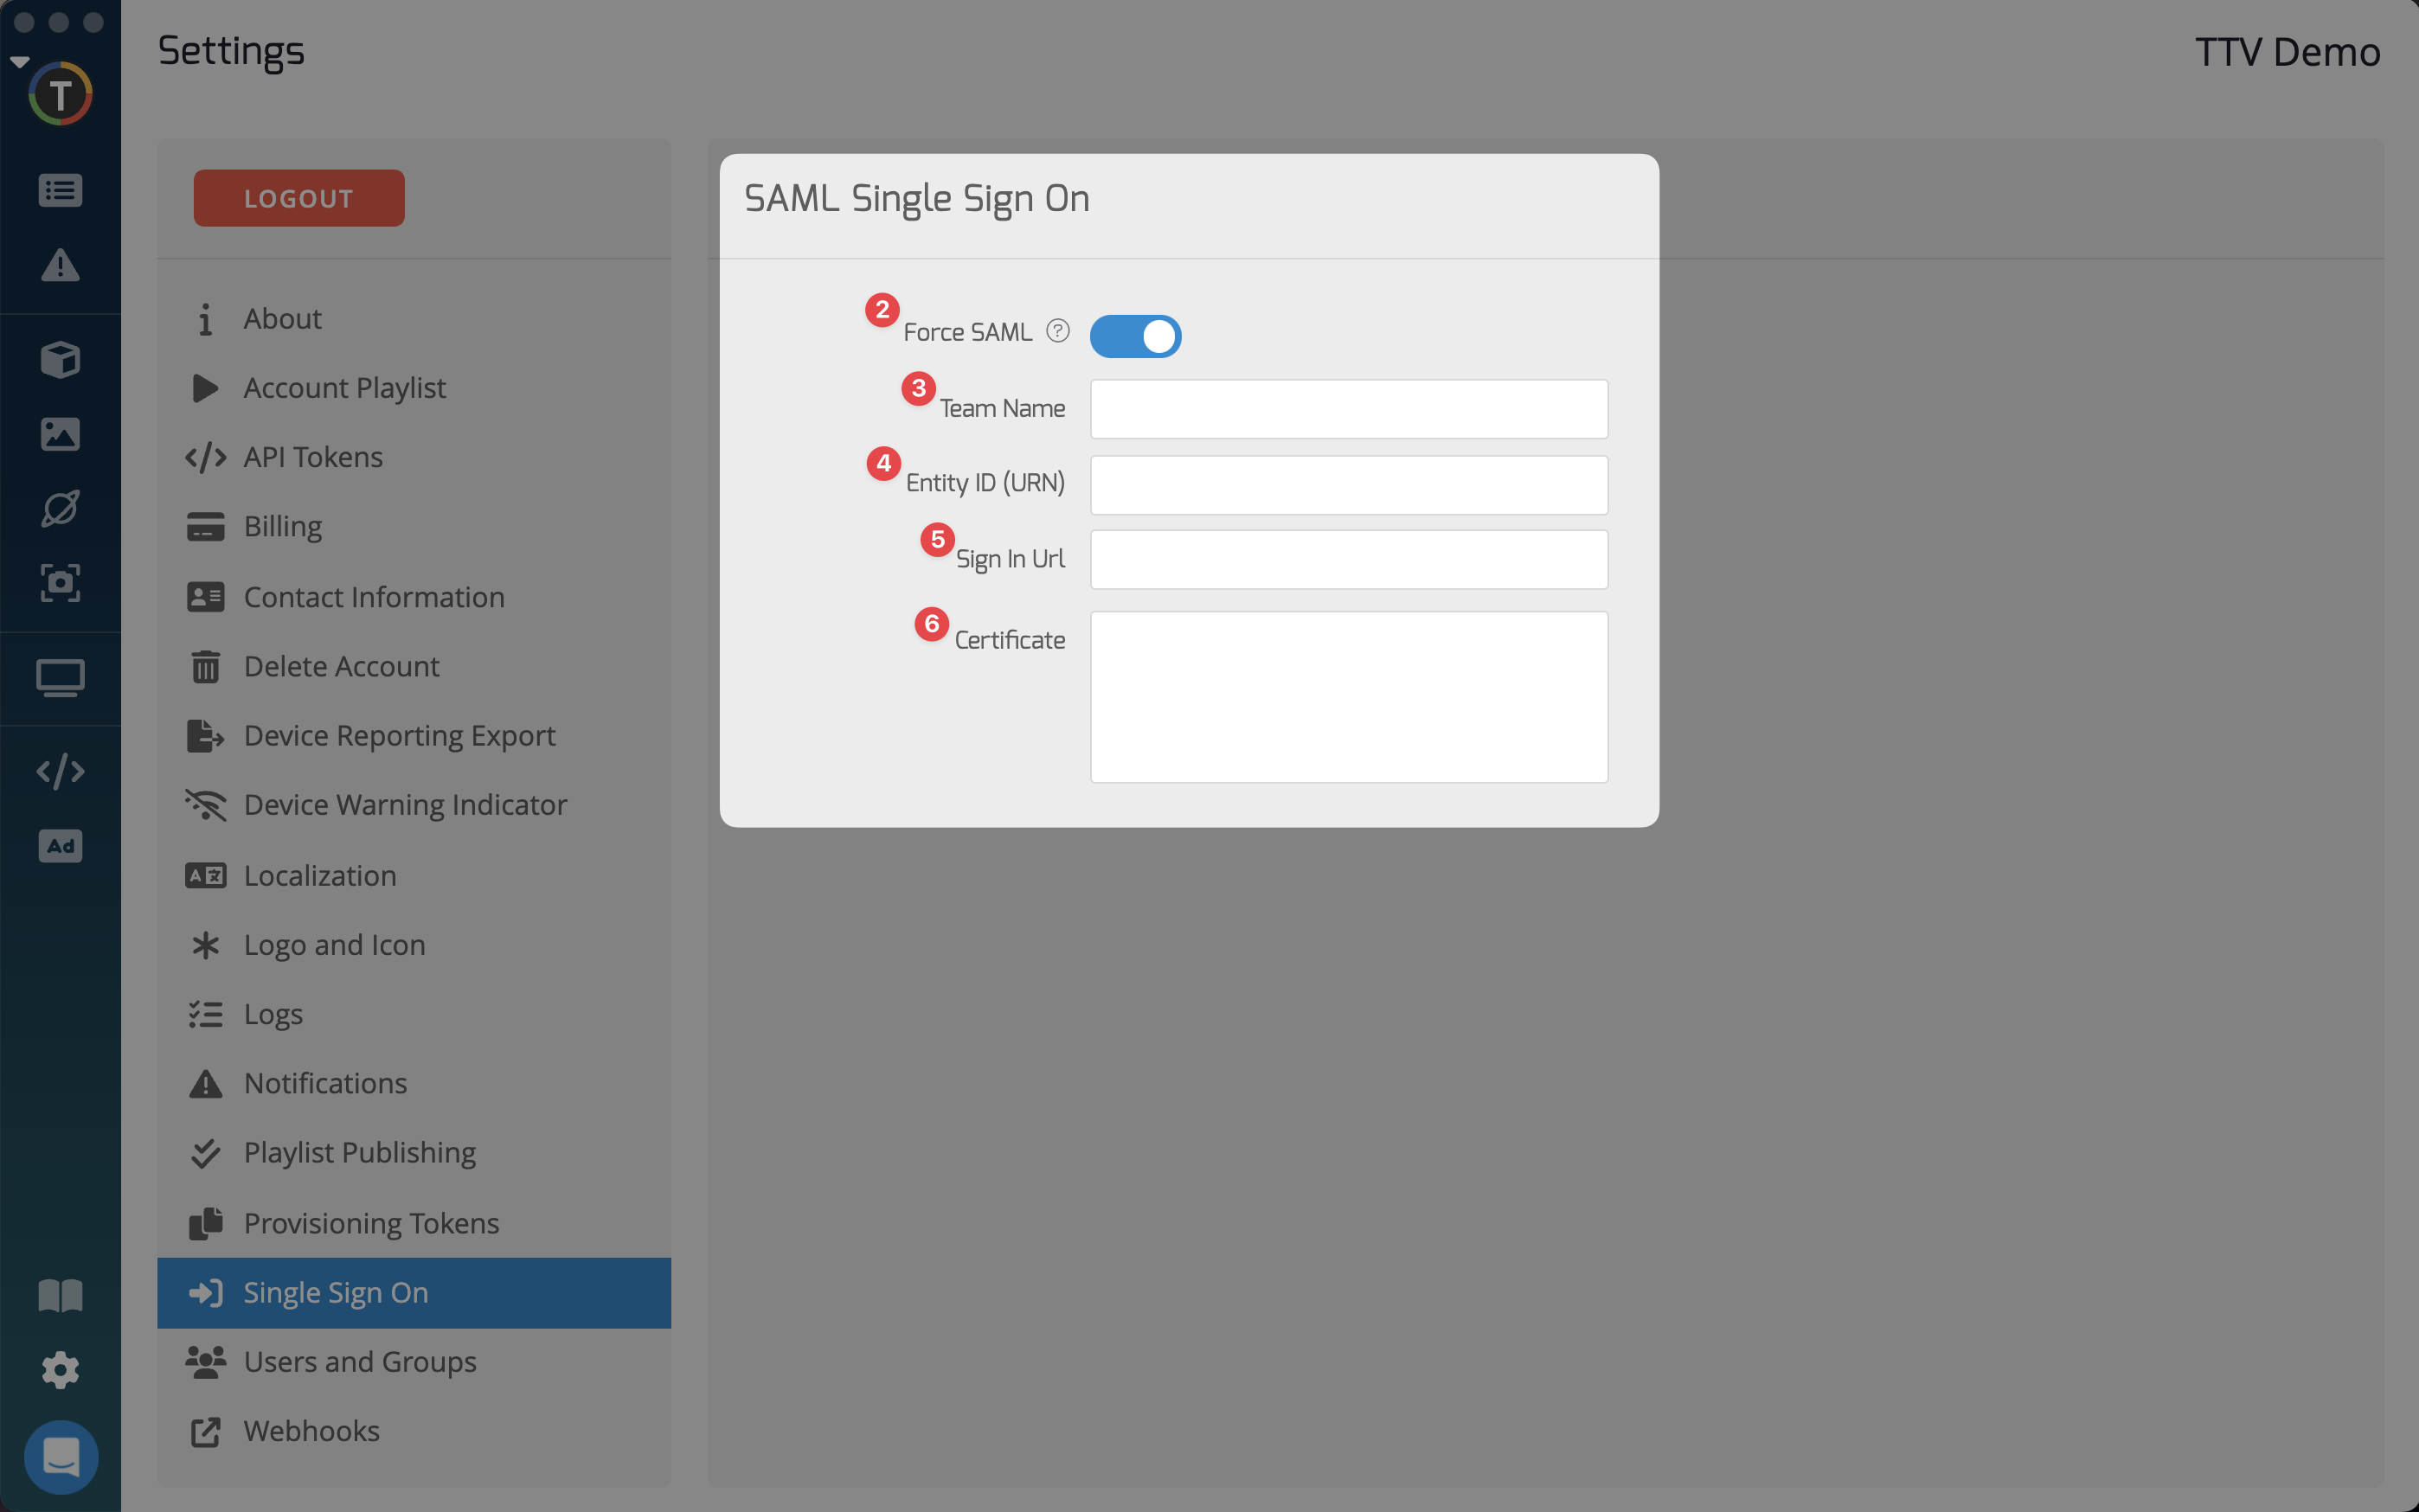
2. Force SAML
Choosing to enable 'Force SAML' forces account users to log in using SAML only. However, administrators can still directly log in to TelemetryTV without SAML.
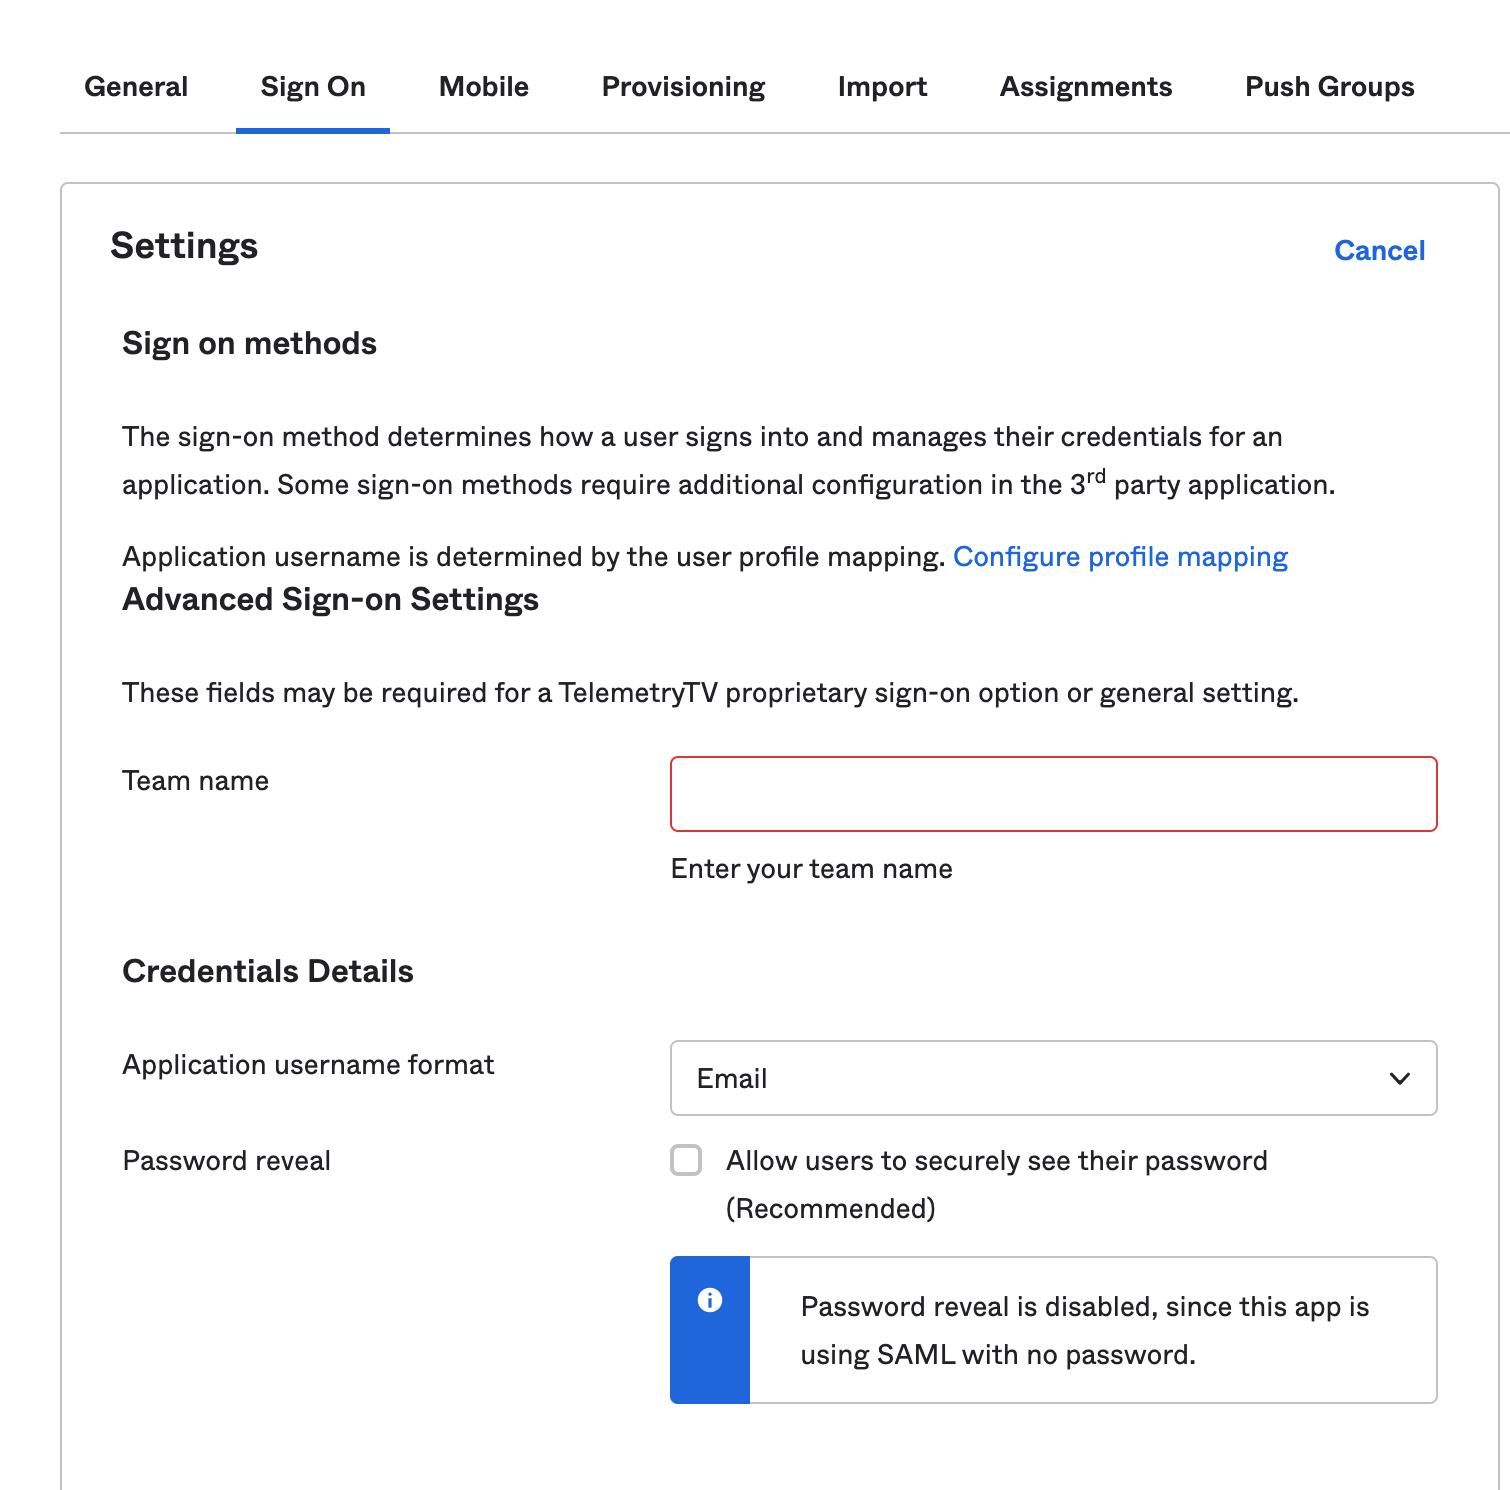
3. Team Name
This term represents a group of users and is also used in your iDP. It's commonly termed as 'Audience Restriction' or 'Identifier' (Entity ID).
4. Entity ID
This is an authentication attribute taken from your iDP.
5. Sign in URL
This URL provided by your iDP captures your login credentials. Your Service Provider will redirect here for authentication.
6. Certificate
Insert an X.509 Certificate, which is a public key you have taken from your Identity Service Provider.
Identity Provider SAML Configuration
Configure the following Service Provider attributes on your Identity Provider side:
Reply URL (Assertion Consumer Service URL)
https://user-api.telemetrytv.com/accounts/saml/response
Sign On URL
https://app.telemetrytv.com/start/enterprise
Team Name
This attribute should match the 'Audience Restriction' or 'Identifier' (Entity ID) in your Service Provider.
NameID Format
Assign the value of "email" or "user.email"
Configuring SCIM with Okta for TelemetryTV
SCIM, or System for Cross-domain Identity Management, is a common open standard that enables the automation of user provisioning. This guide will help you configure users and groups in TelemetryTV using Okta.
Supported Features:
- Create users
- Update user attributes
- Deactivate users
- Import users
- Import groups
- Sync password
- Group push
Requirements:
- Enterprise subscription
1. Preliminary Configuration for the TelemetryTV Application:
In Okta, navigate to 'Provisioning' and then to 'Integration'.
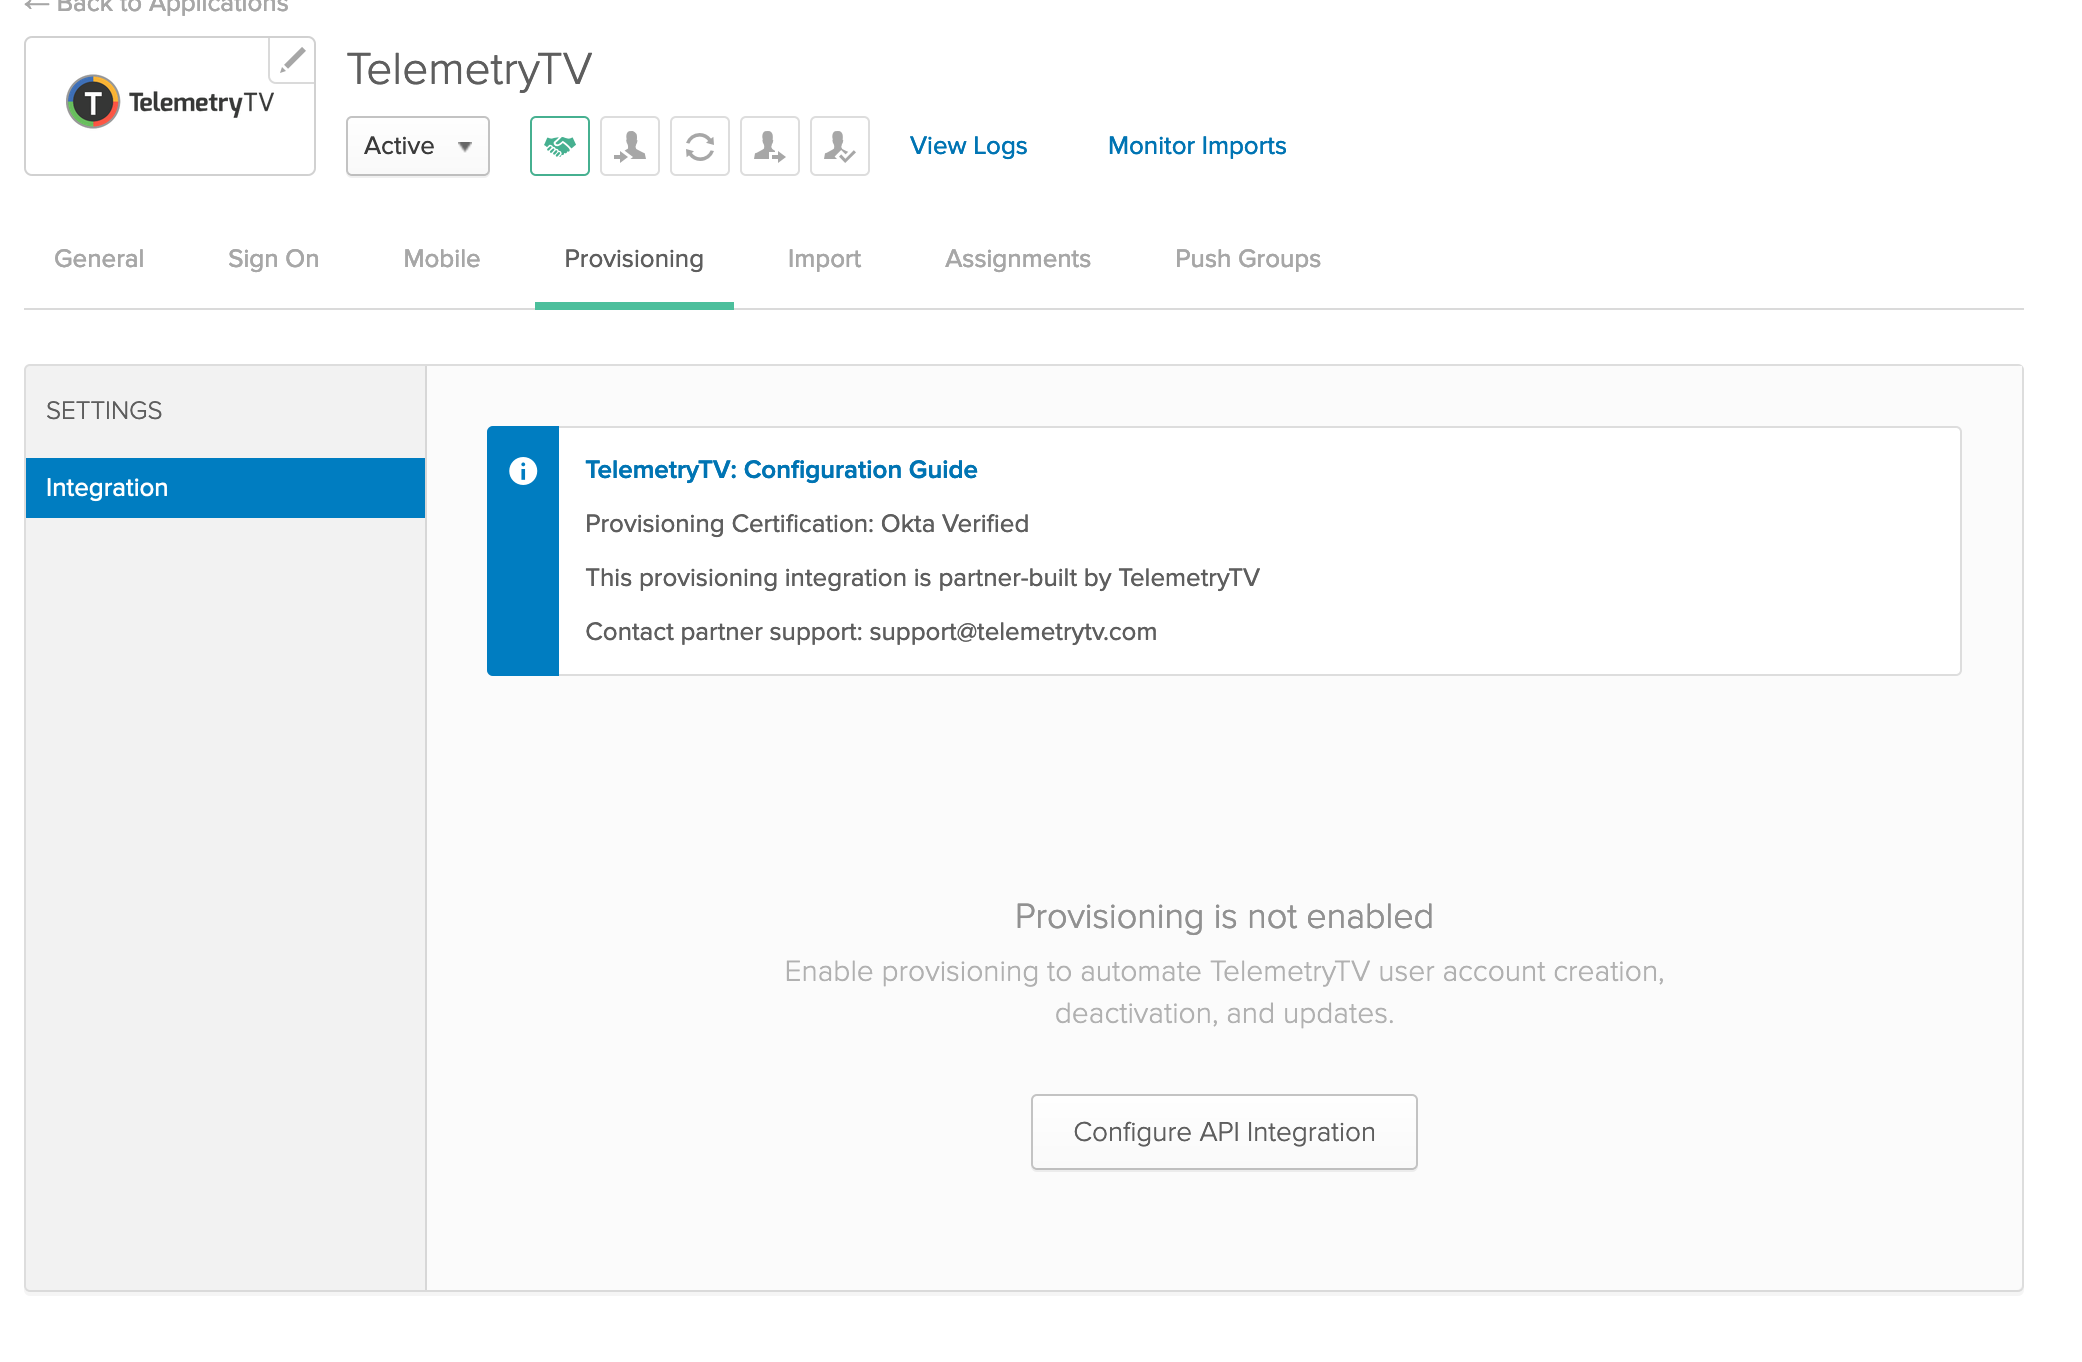
Click on 'Enable API integration'.
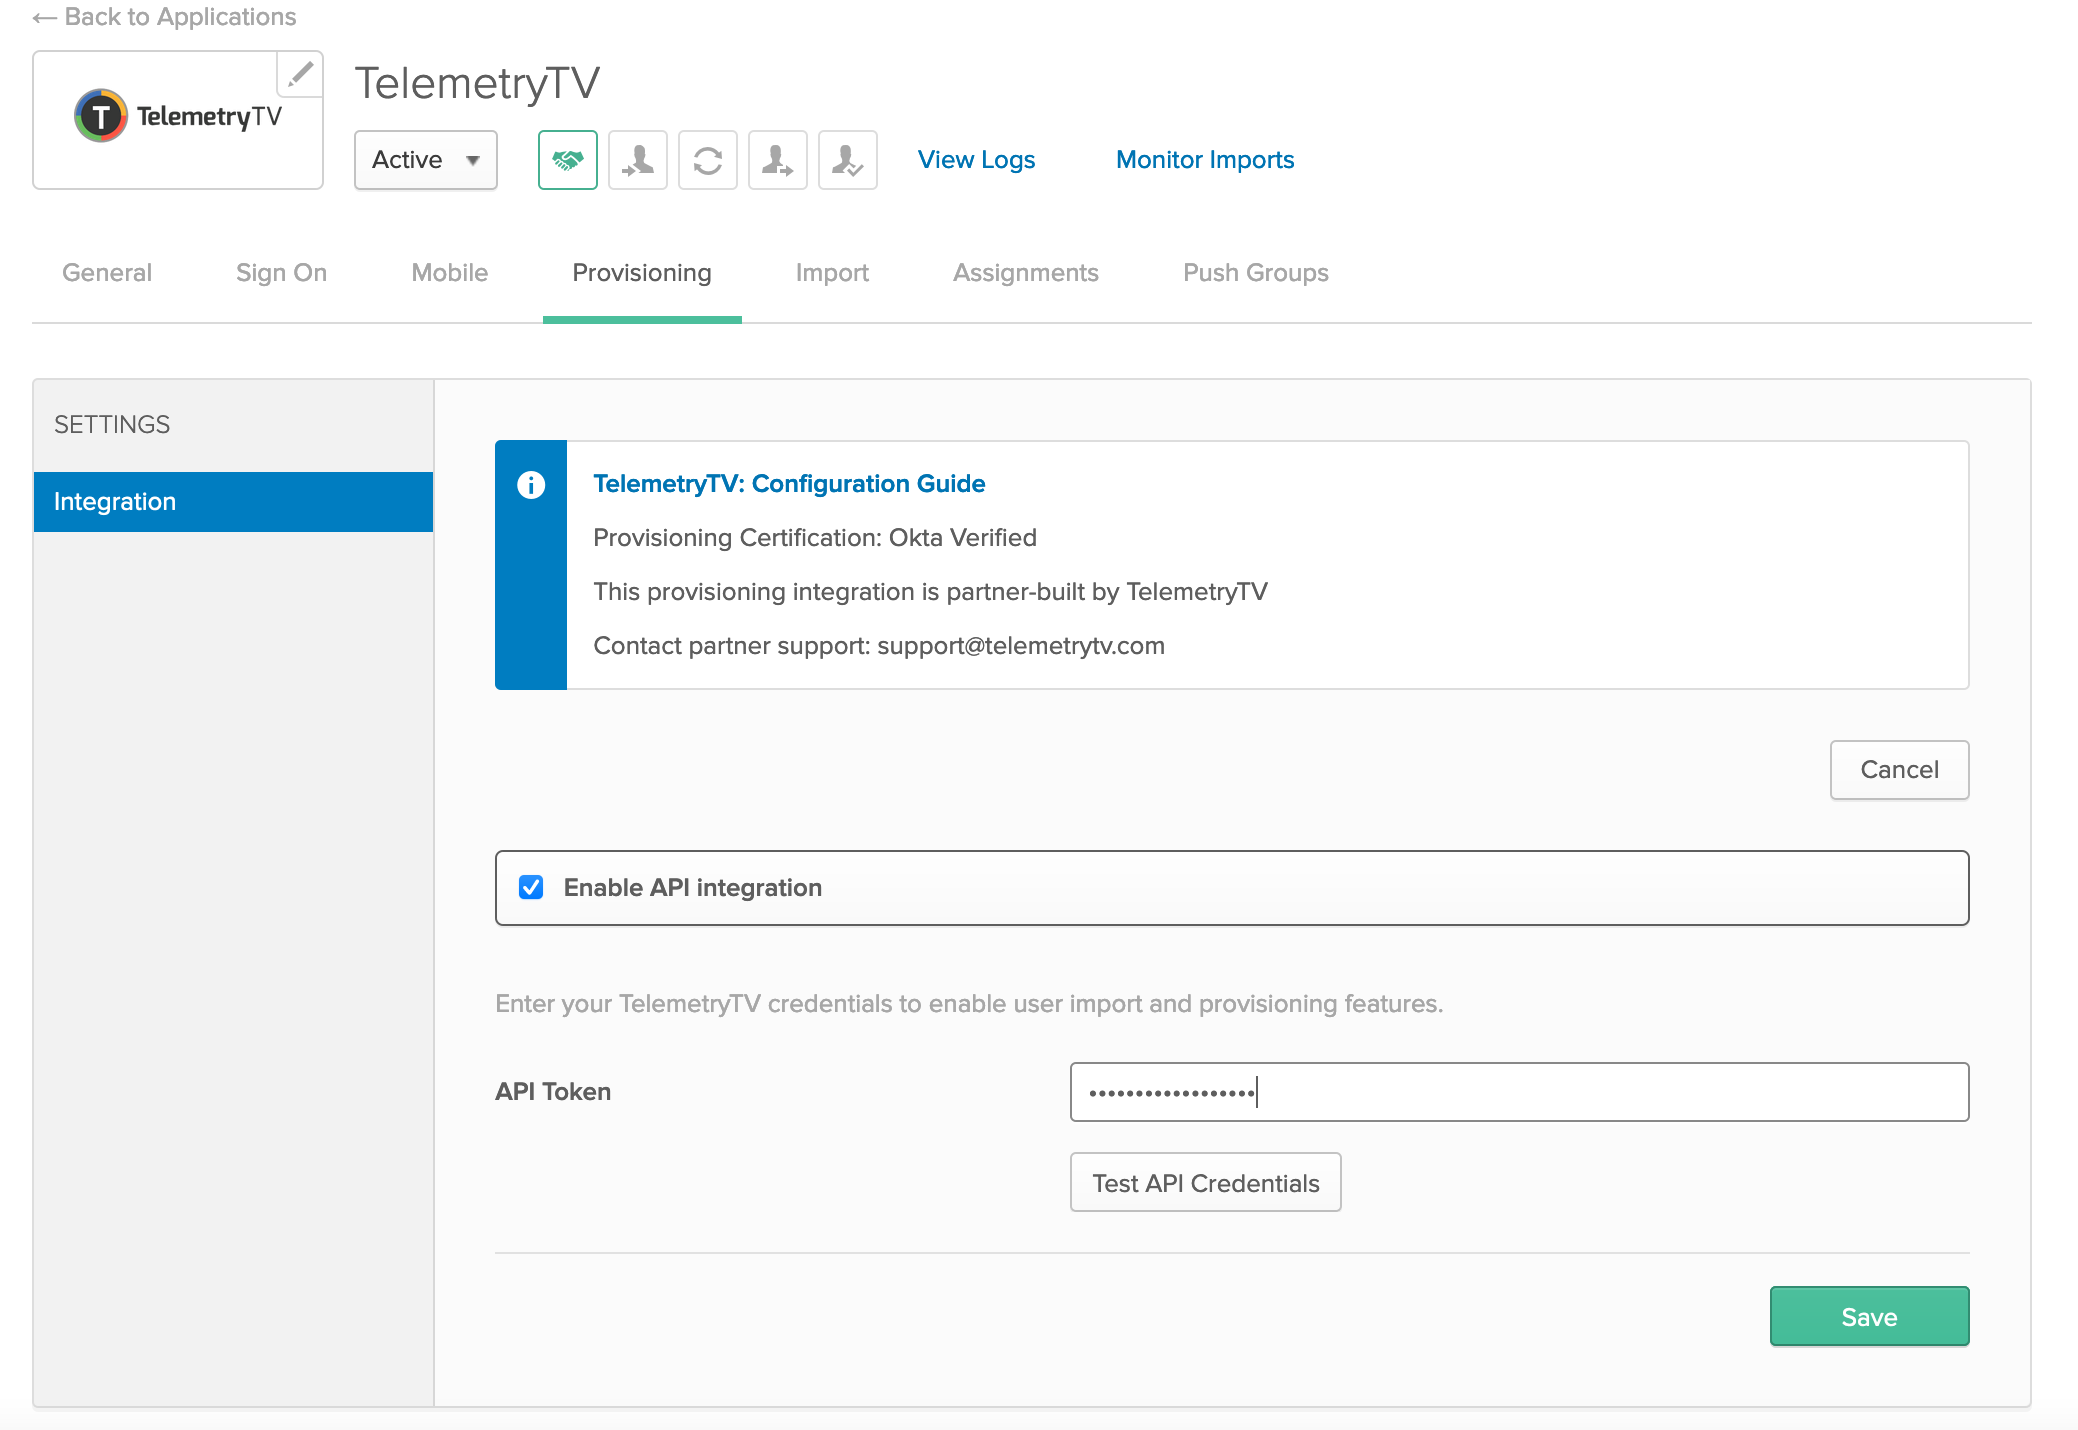
Insert your TTV API Token and click 'Save'.
2. Configuration Okta
In the 'Provisioning' menu, go to the 'To App' section. Ensure the following configuration is applied from Okta to your SCIM app to enable creating, updating, synchronizing, and deactivating users.
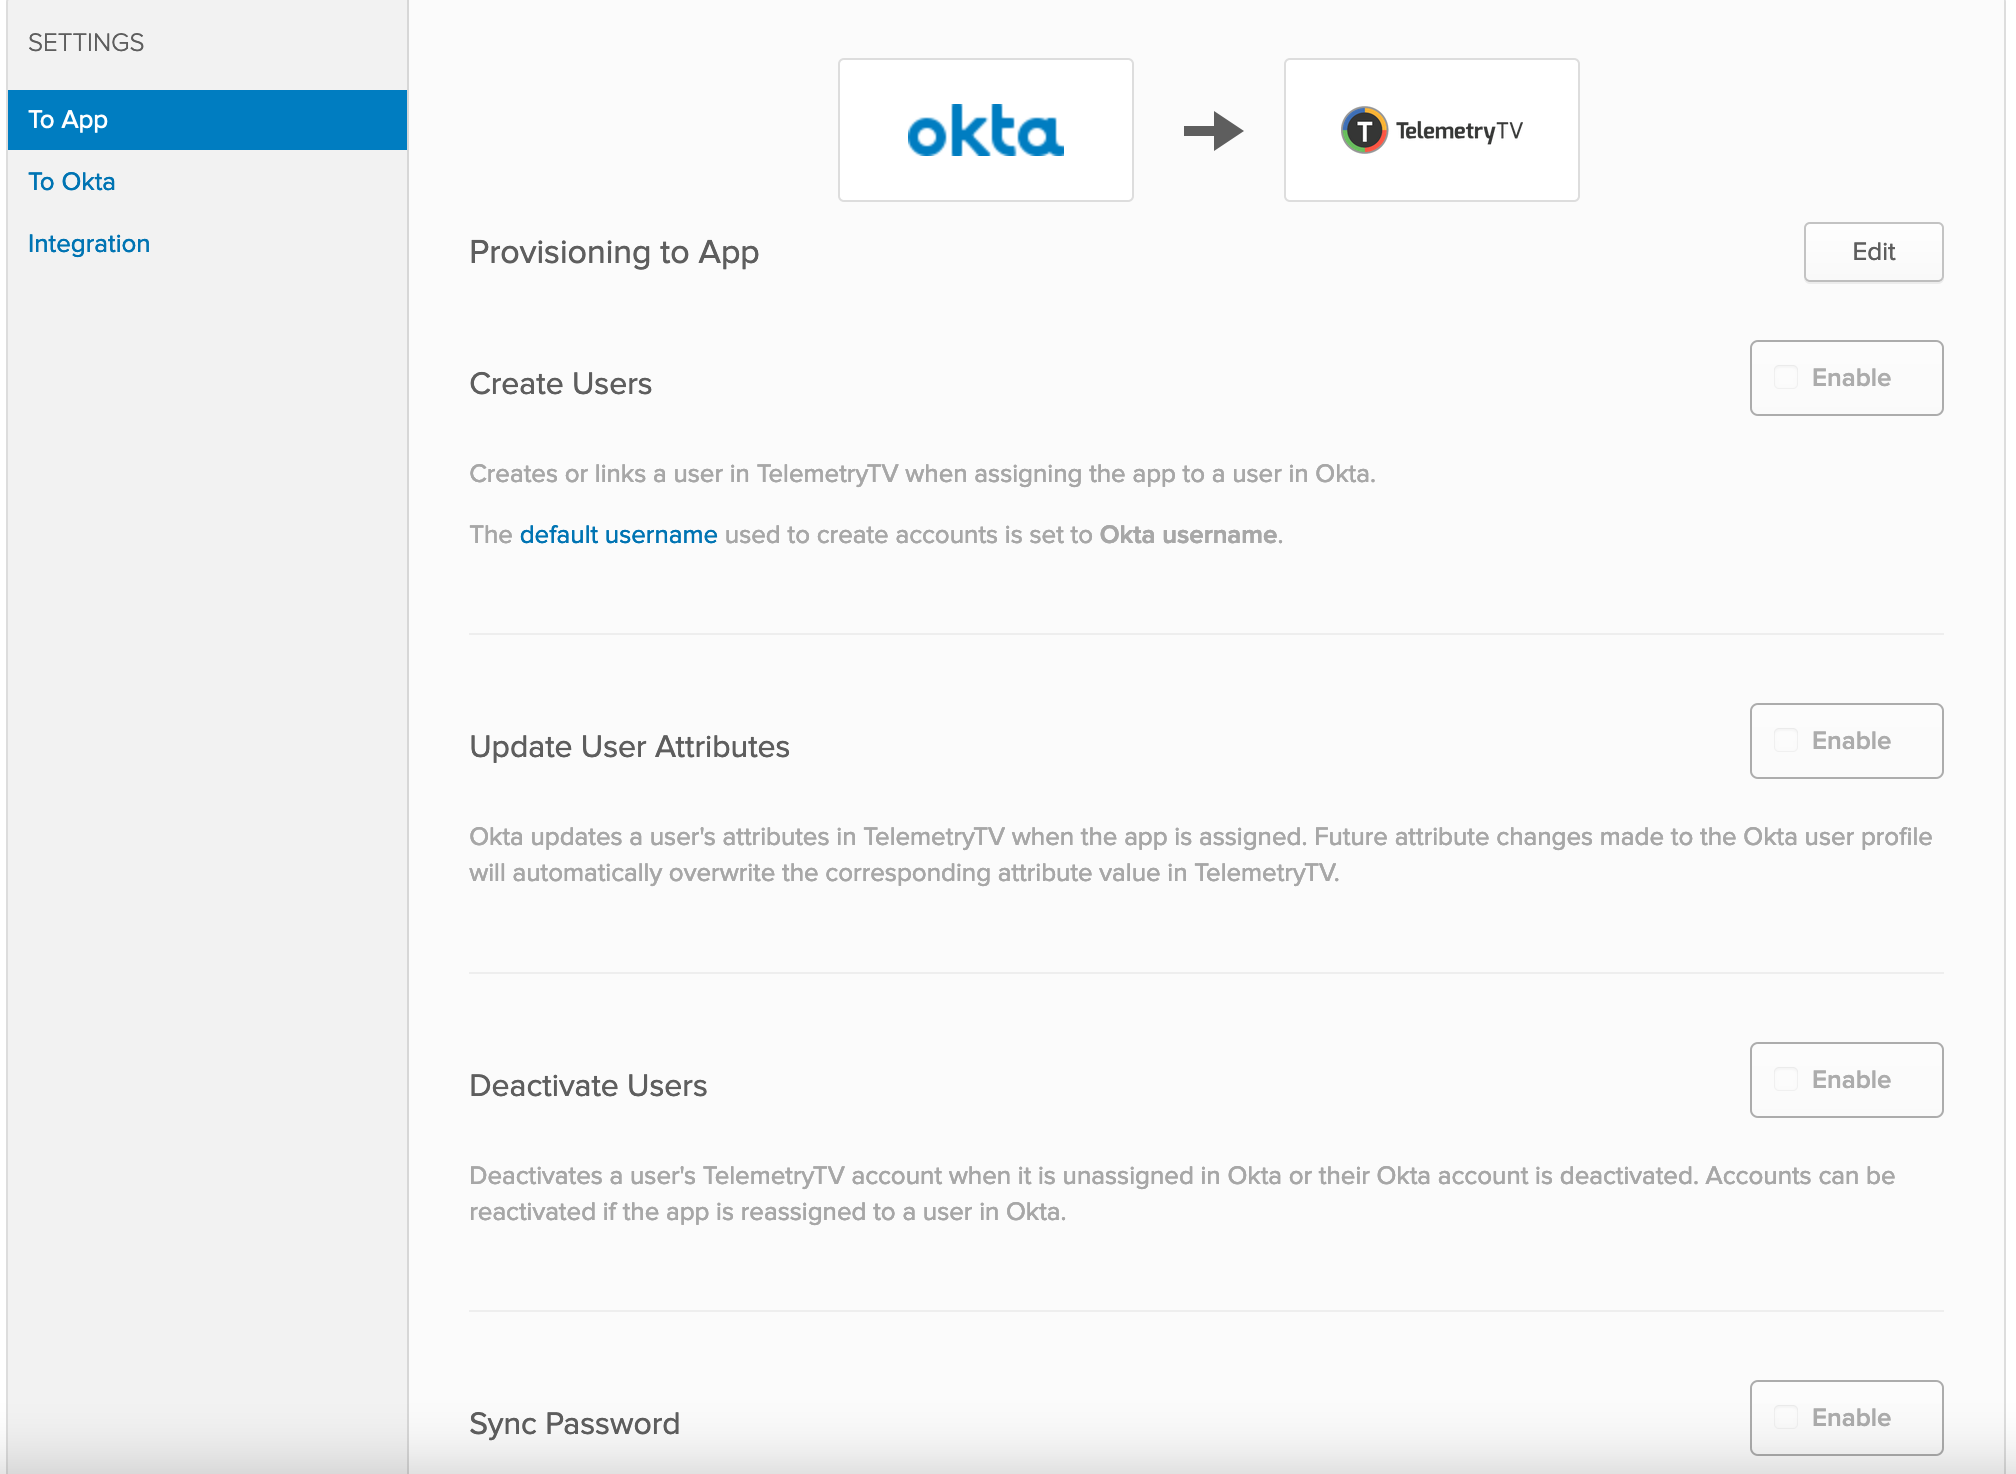
Important Note
To use this feature, users and groups must be already established in your Okta account.
Usernames are assigned emails and can be configured in 'Signon Settings'.
3. Importing Users from TelemetryTV
You can import users in TelemetryTV using the 'Import' function in Okta, located on the top left under 'Import Now'.
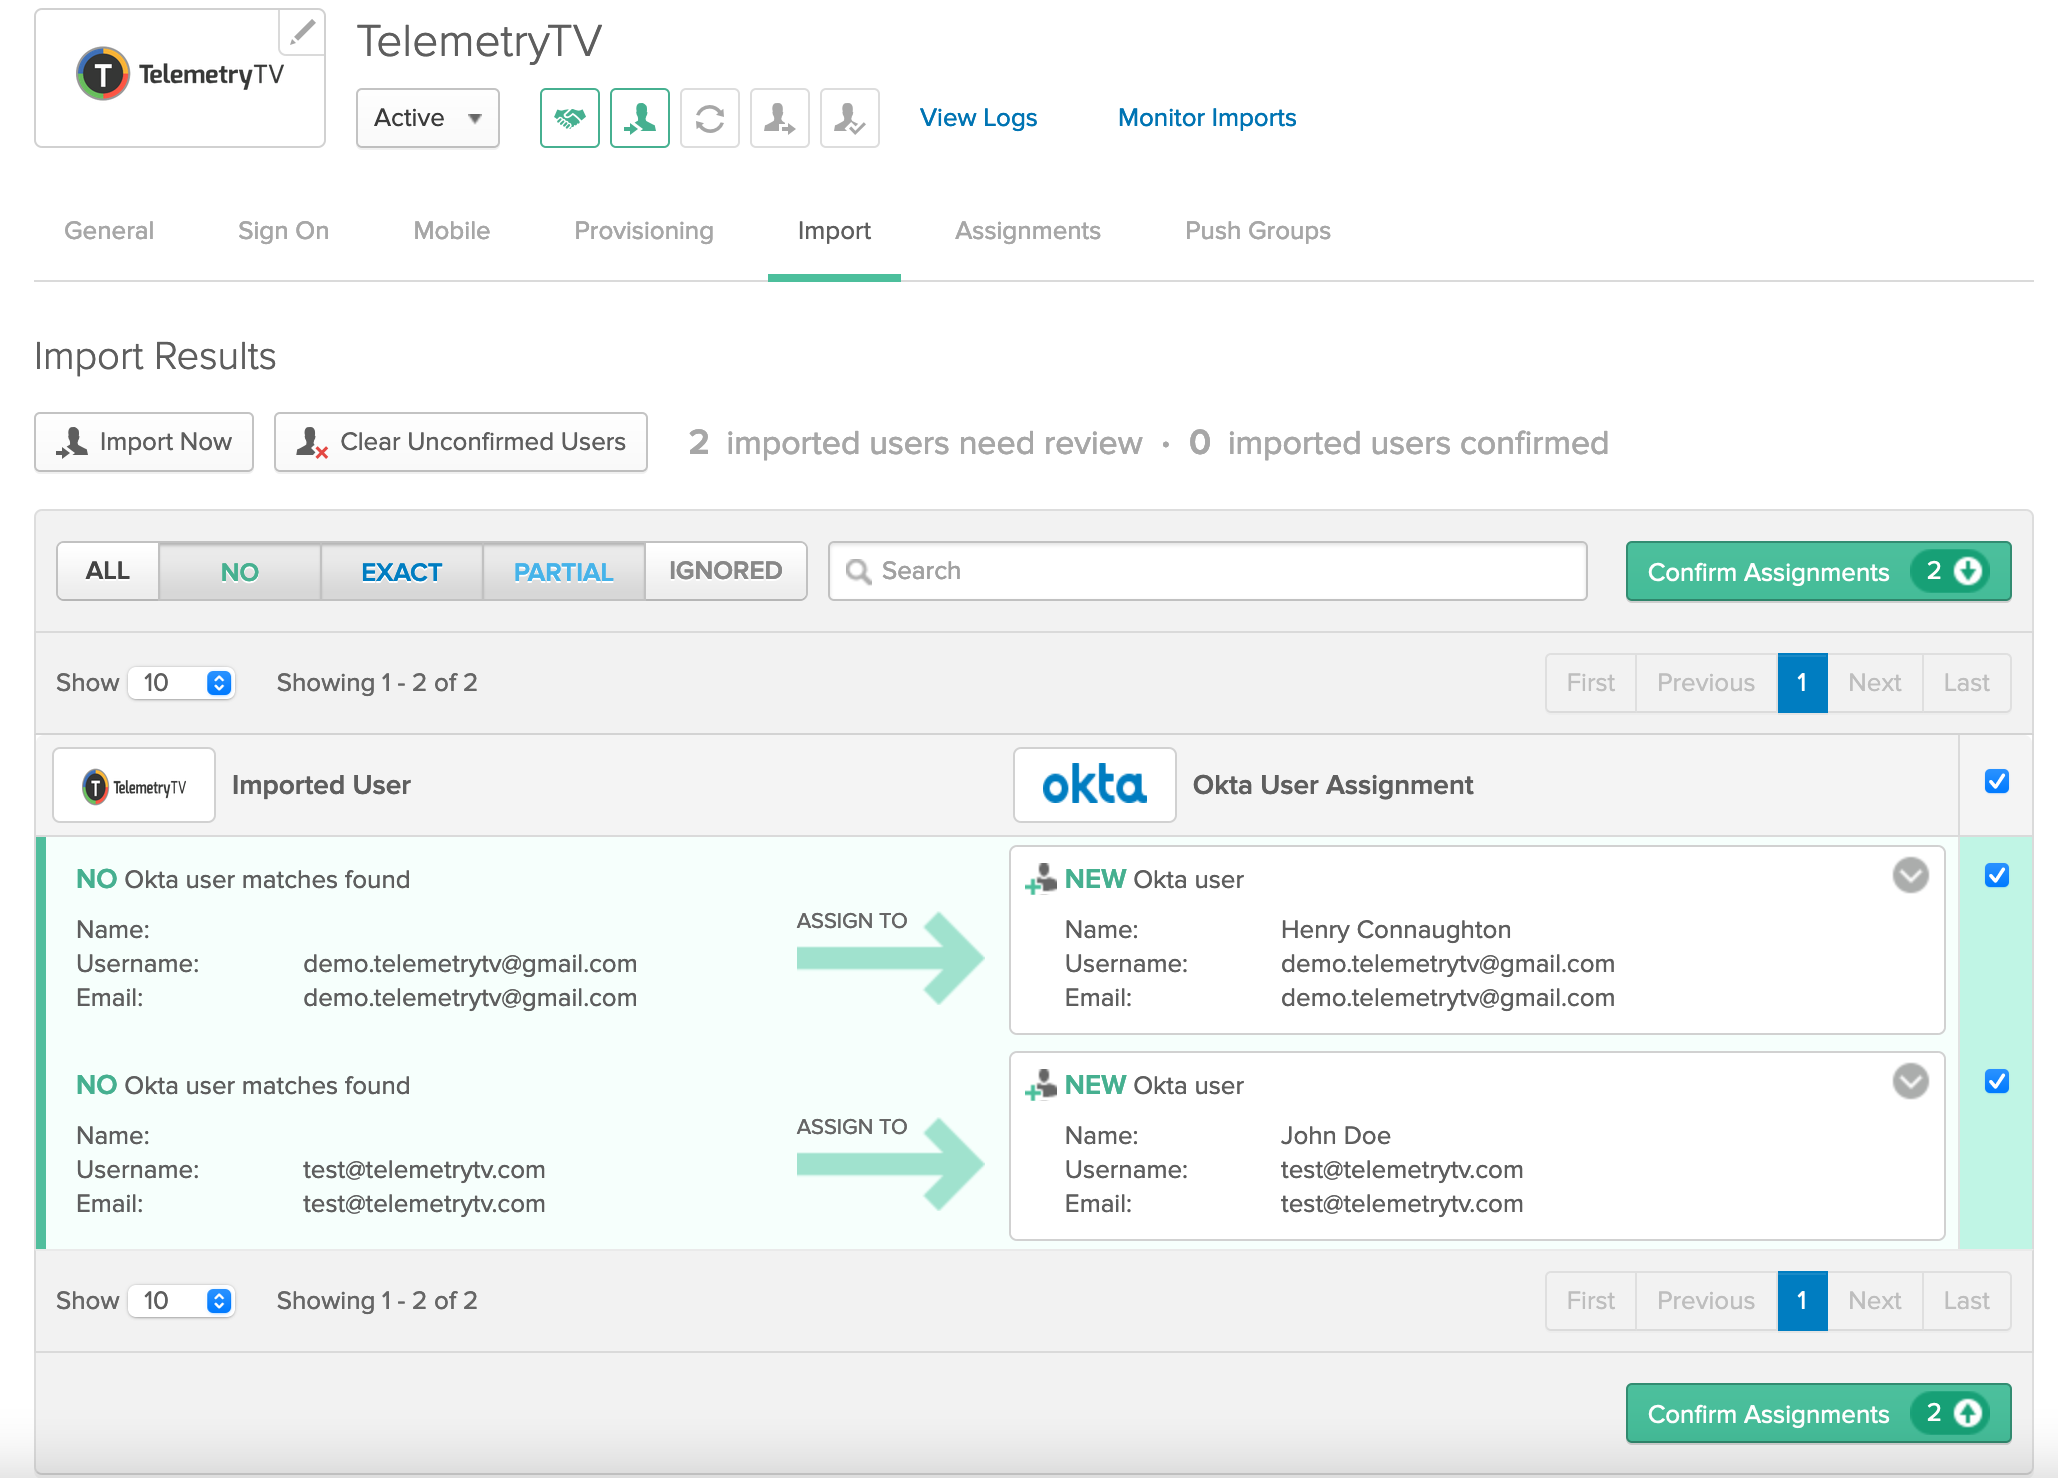
Select your users on the right side with the checkbox before clicking on 'Confirm Assignments' at the top of the page.
4. Updating User Profile Details
Okta allows centralized configuration of user details which can be pushed to TelemetryTV. User profiles can be accessed by navigating to 'Assignments'.
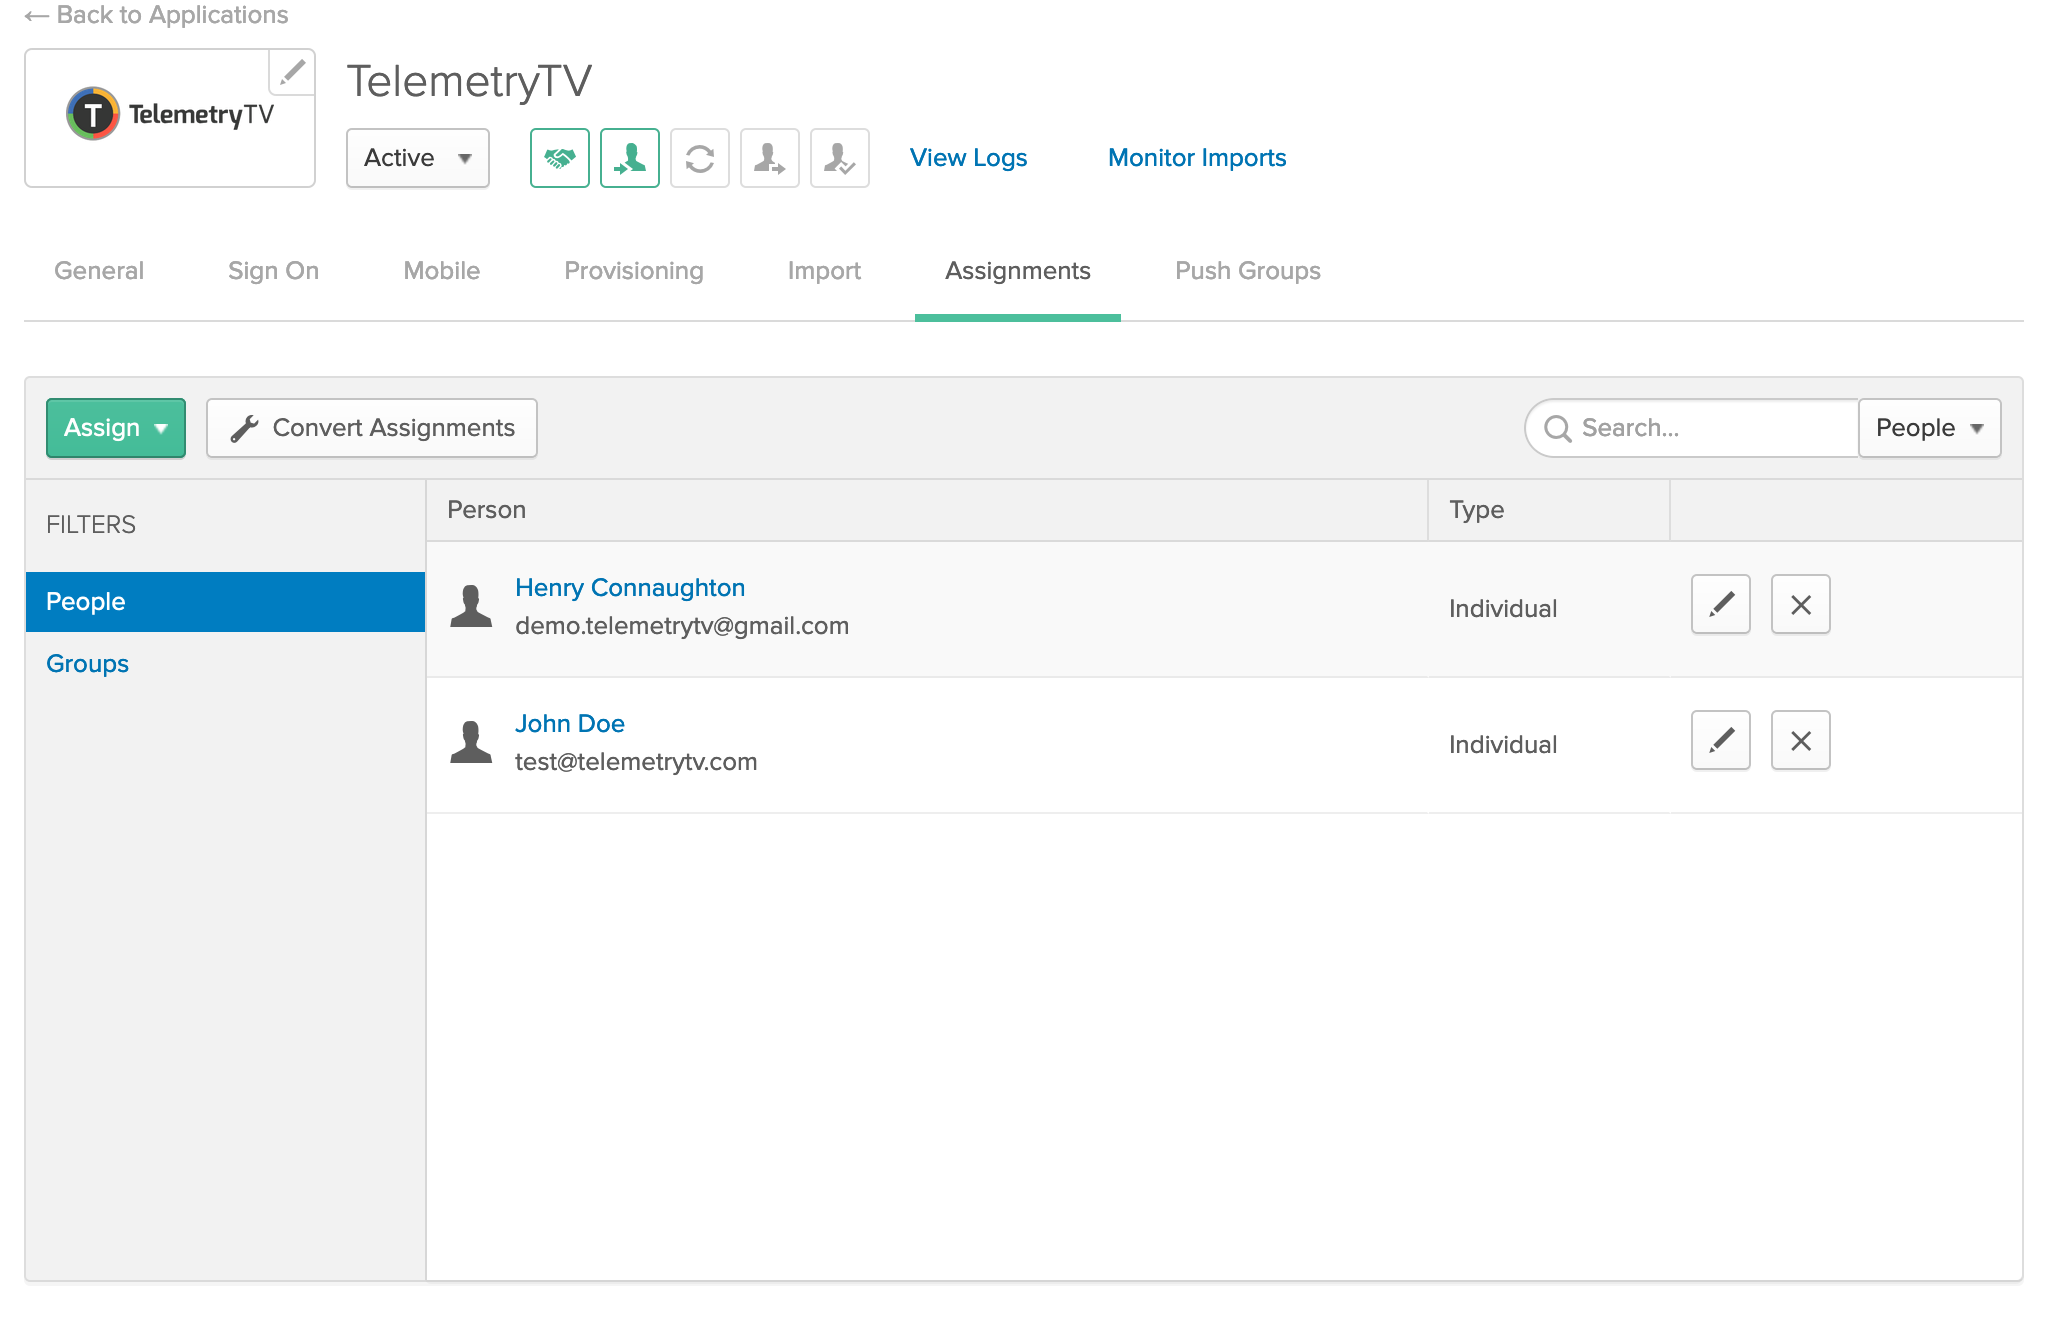
By selecting the 'User Application assignment' and clicking on the 'edit' icon, you can edit the user's details.
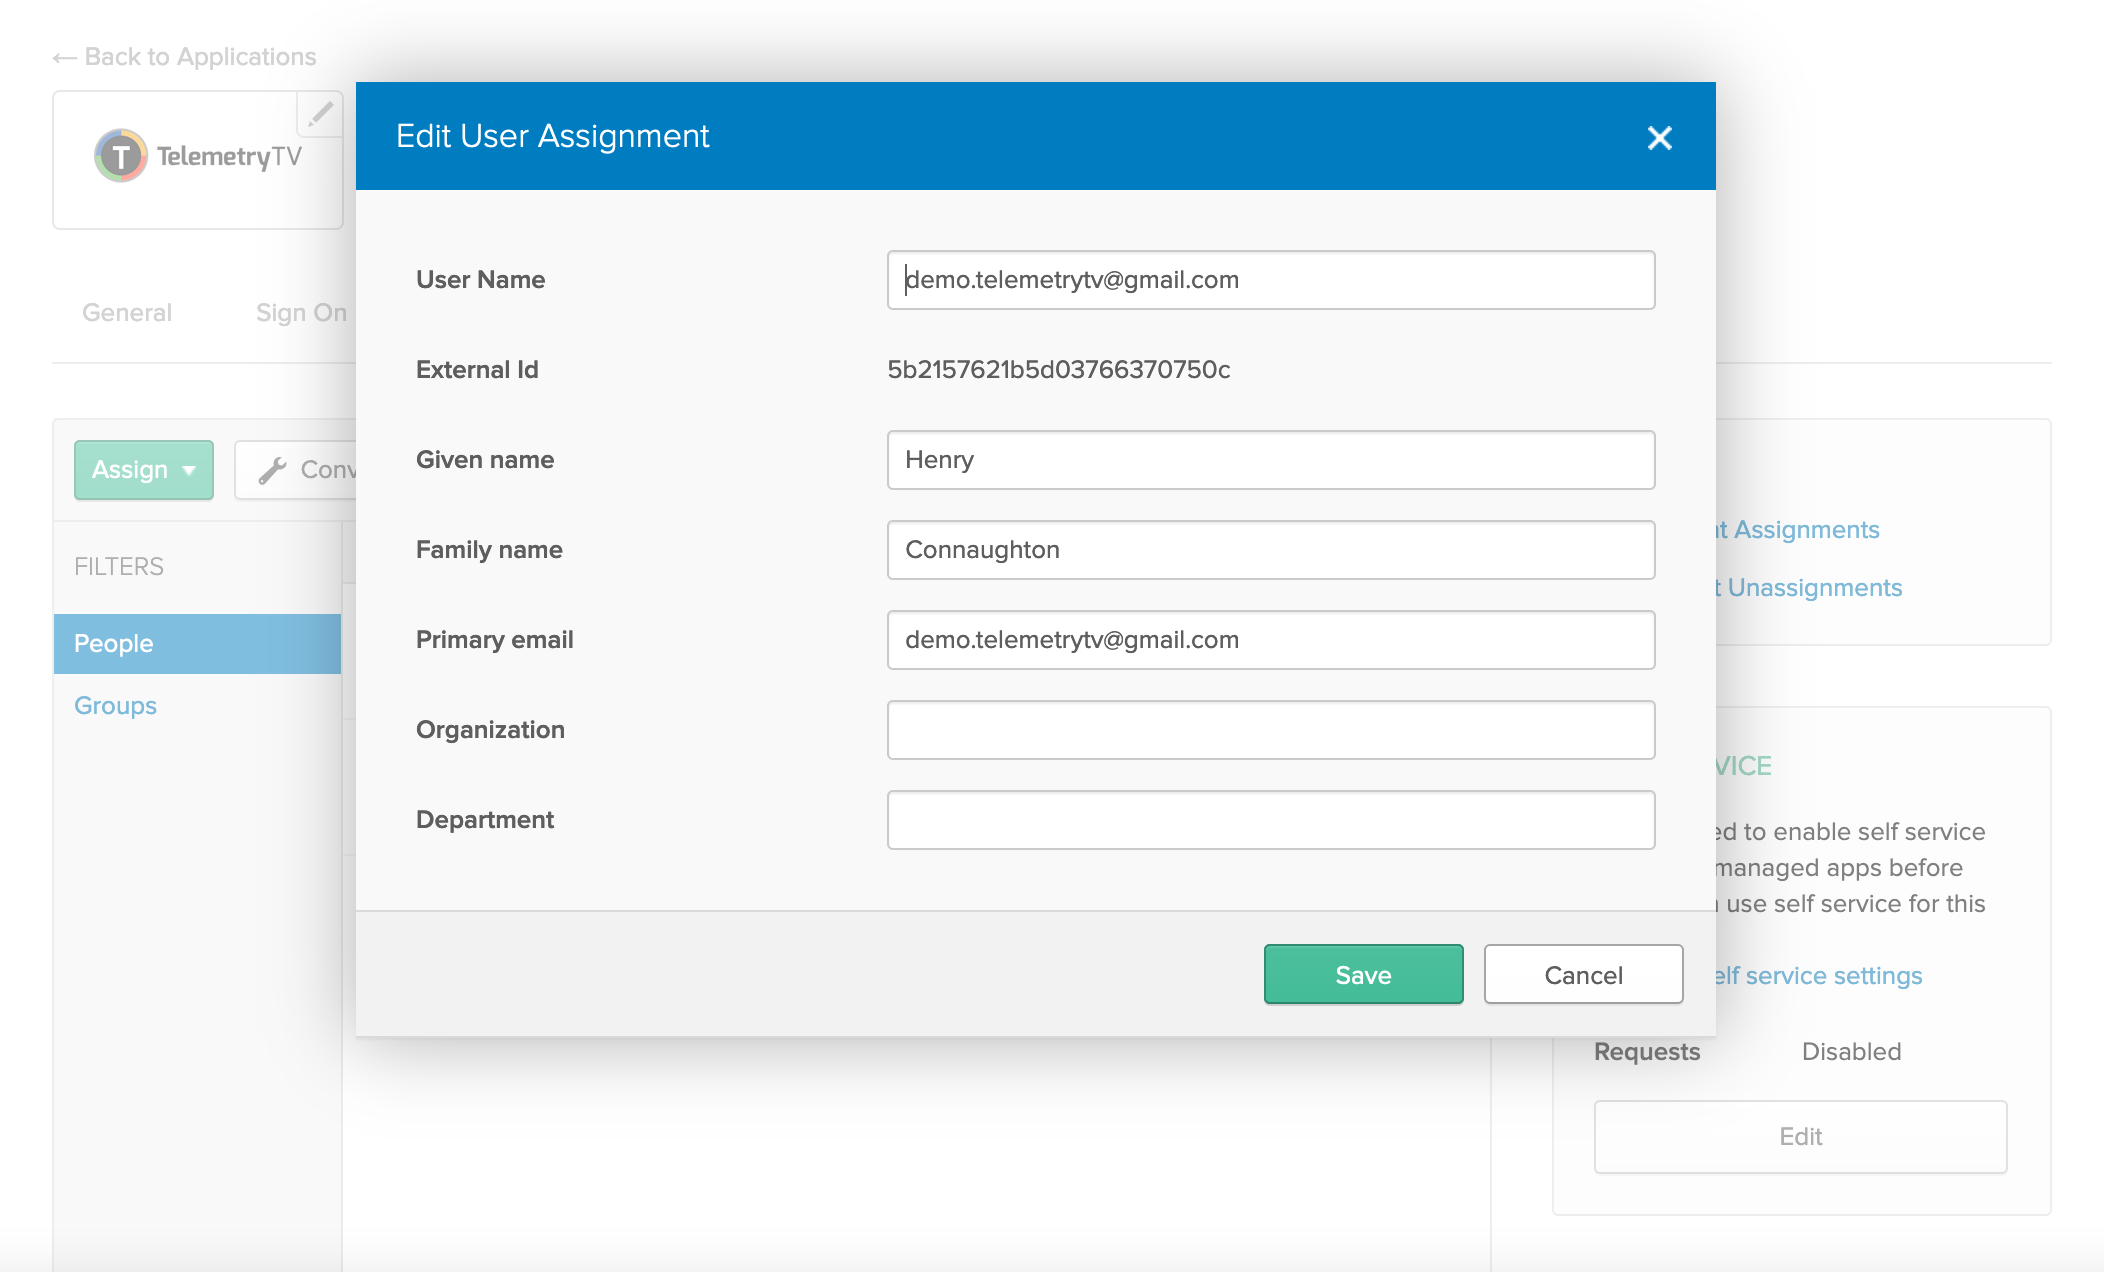
Important Note
Please note that username updates cannot be pushed from Okta to TelemetryTV, only email updates.
5. Creating and Pushing Groups to TelemetryTV
As a prerequisite for pushing groups, you should have the groups already established in Okta. Once this is done, navigate to 'Push Groups' within your Application's Okta admin panel and search the group by name to import to your application.
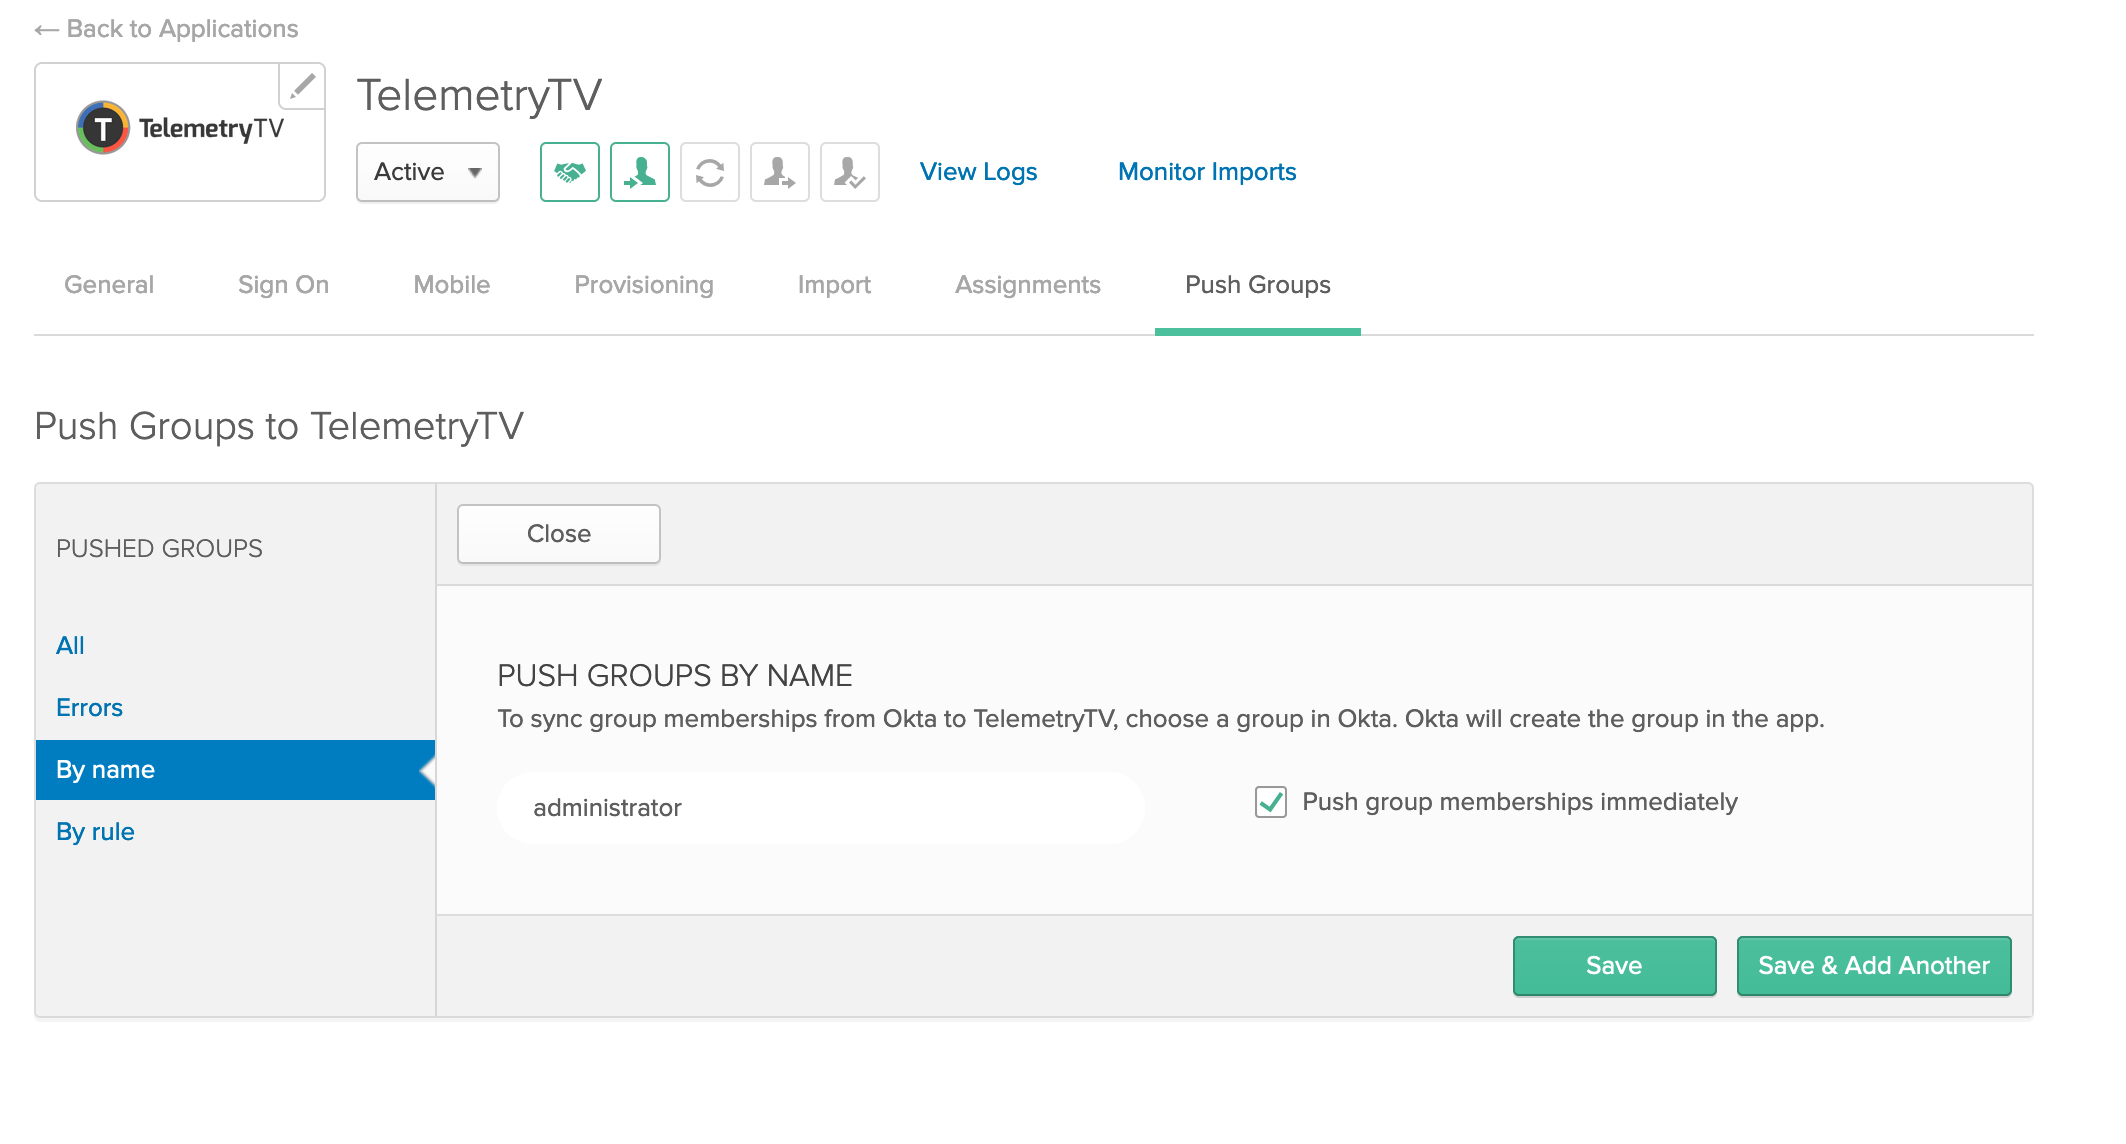
By selecting 'Push Groups memberships immediately', the group will be automatically pushed to your TelemetryTV account. You can use 'Find Groups by Name' to locate your Okta group to be pushed to TelemetryTV. Click 'Save' to push the selected group from your directory.
Note
By selecting 'Push Groups memberships immediately', the group will automatically be pushed to your TelemetryTV account.
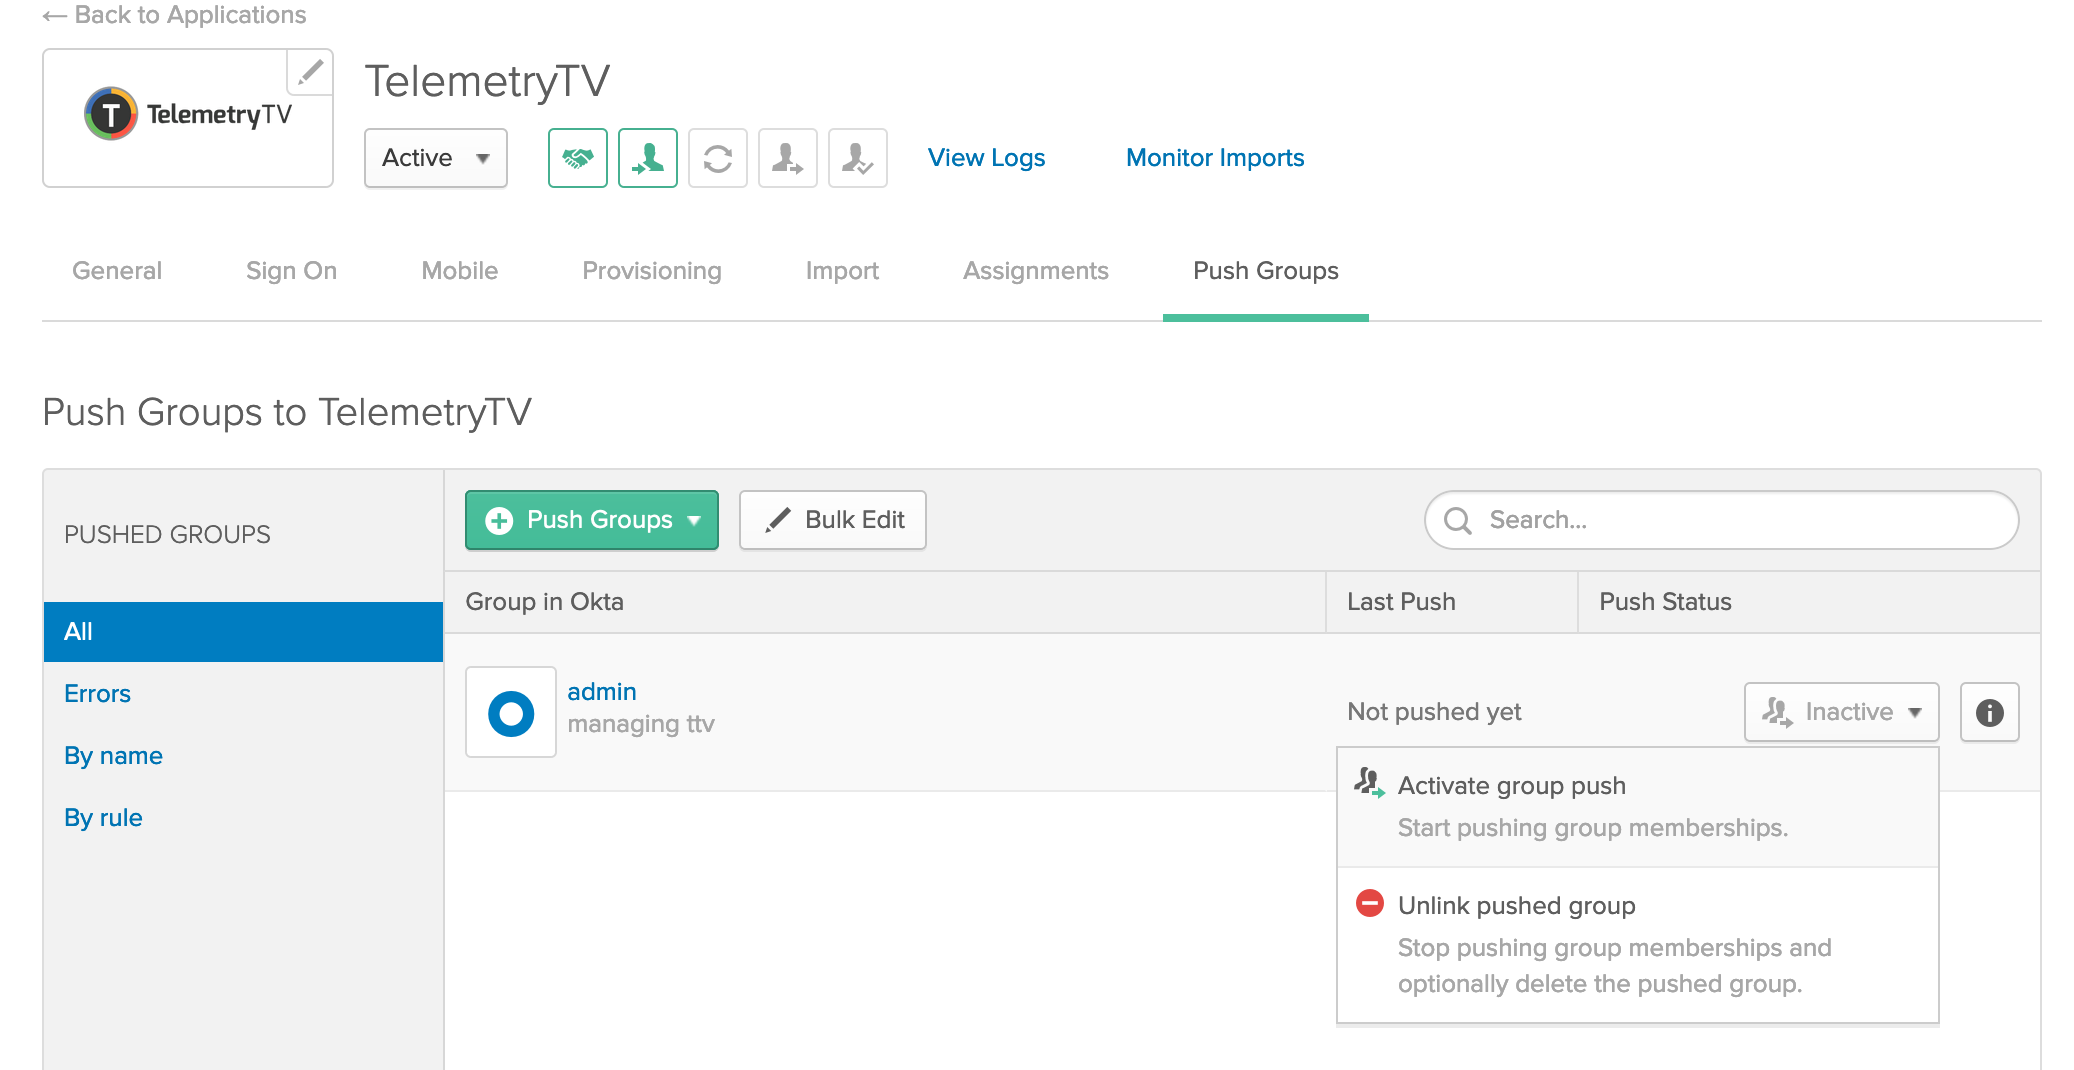
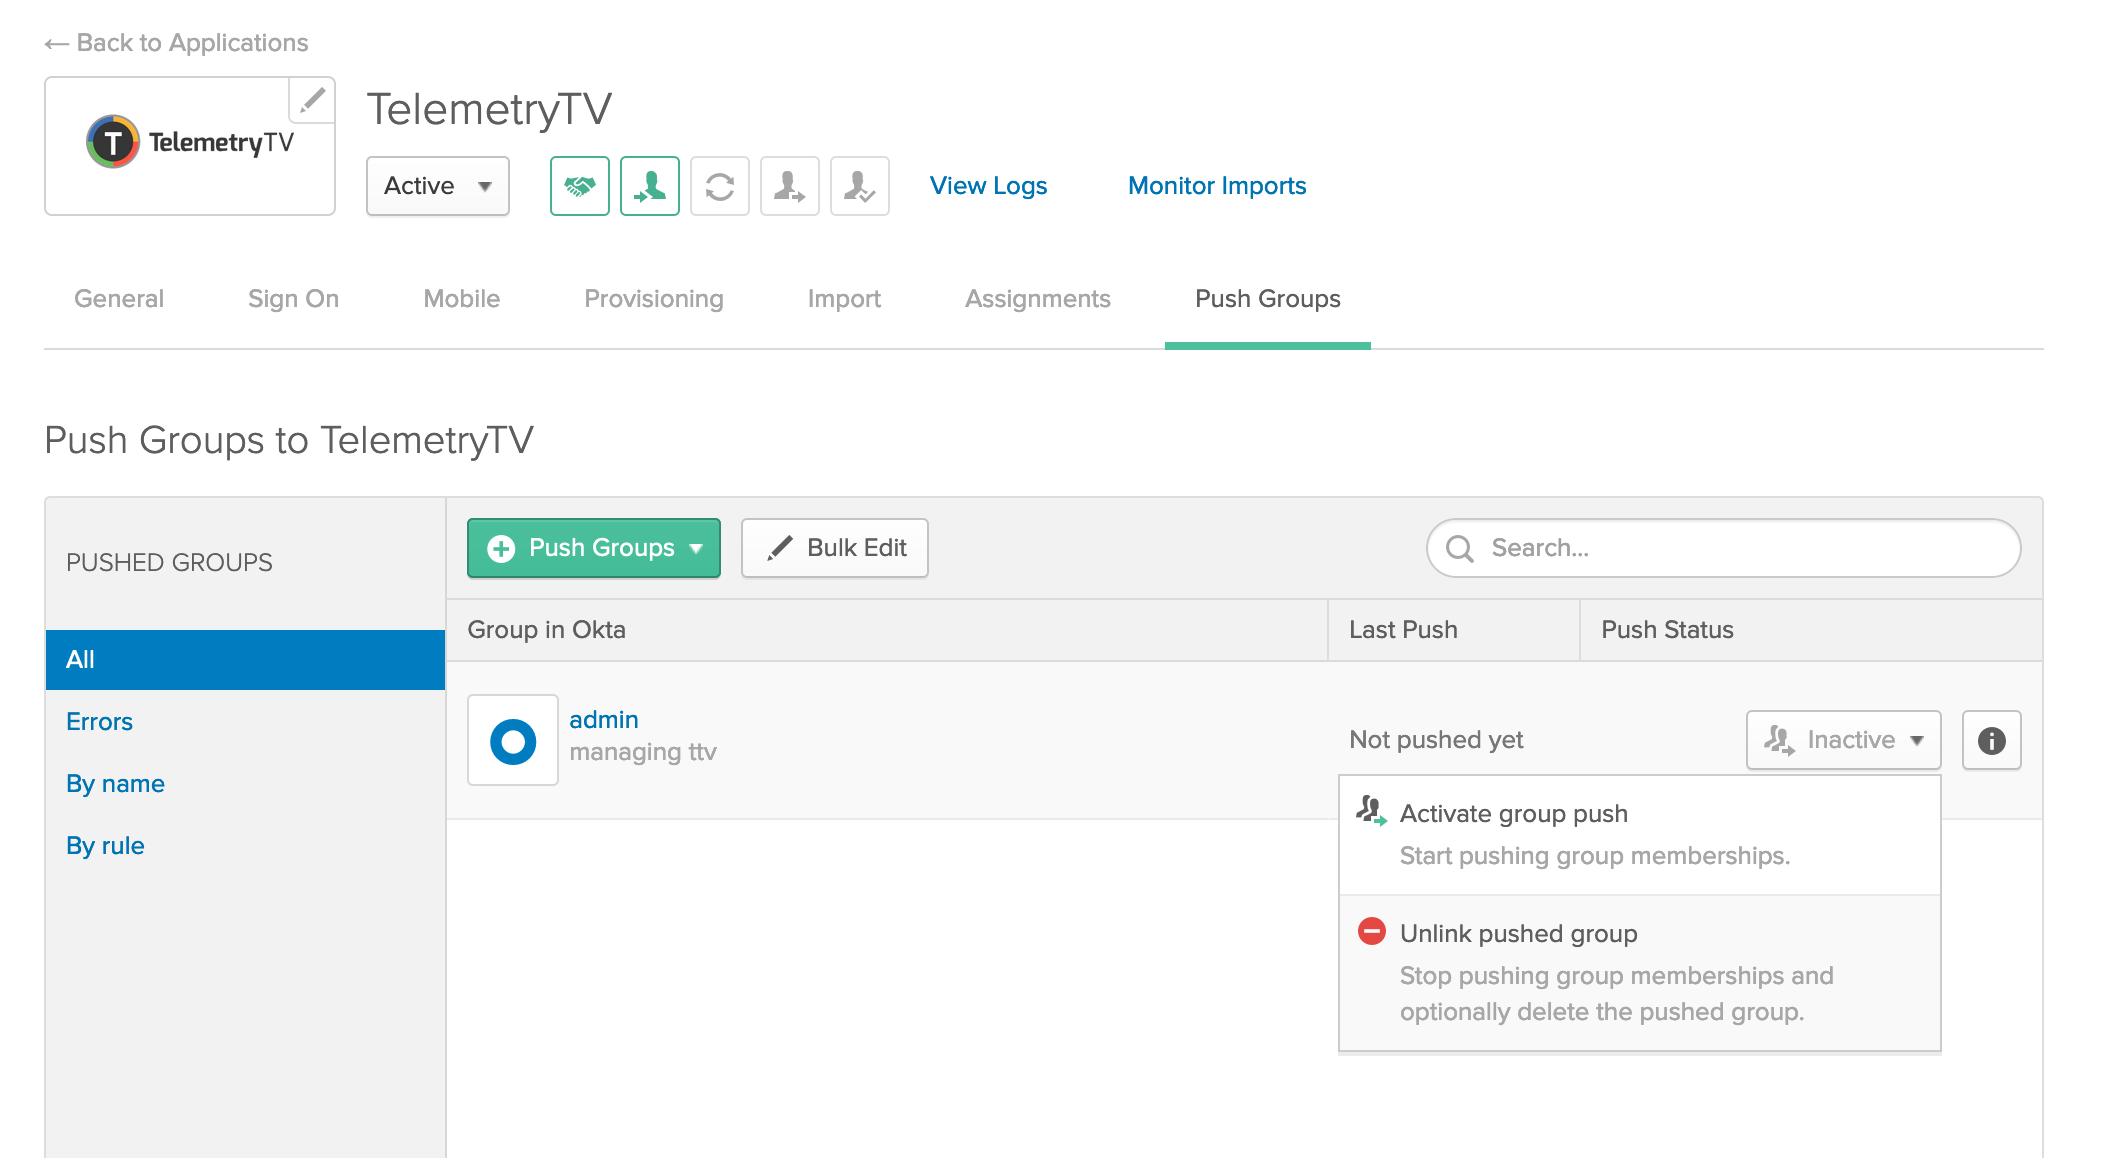
6. Deleting Users, Groups and Unassigning in TelemetryTV
To remove an entire group from TelemetryTV, click on the dropdown menu beside the group and select 'Unlink pushed group'.

In the following modal, select the option to delete the Group within TelemetryTV. This will remove the group in the same setting.
Updated 2 days ago